
Brother FAX-1575mc ч.2 Руководство по эксплуатации онлайн
ON-SCREEN PROGRAMMING
3 - 2
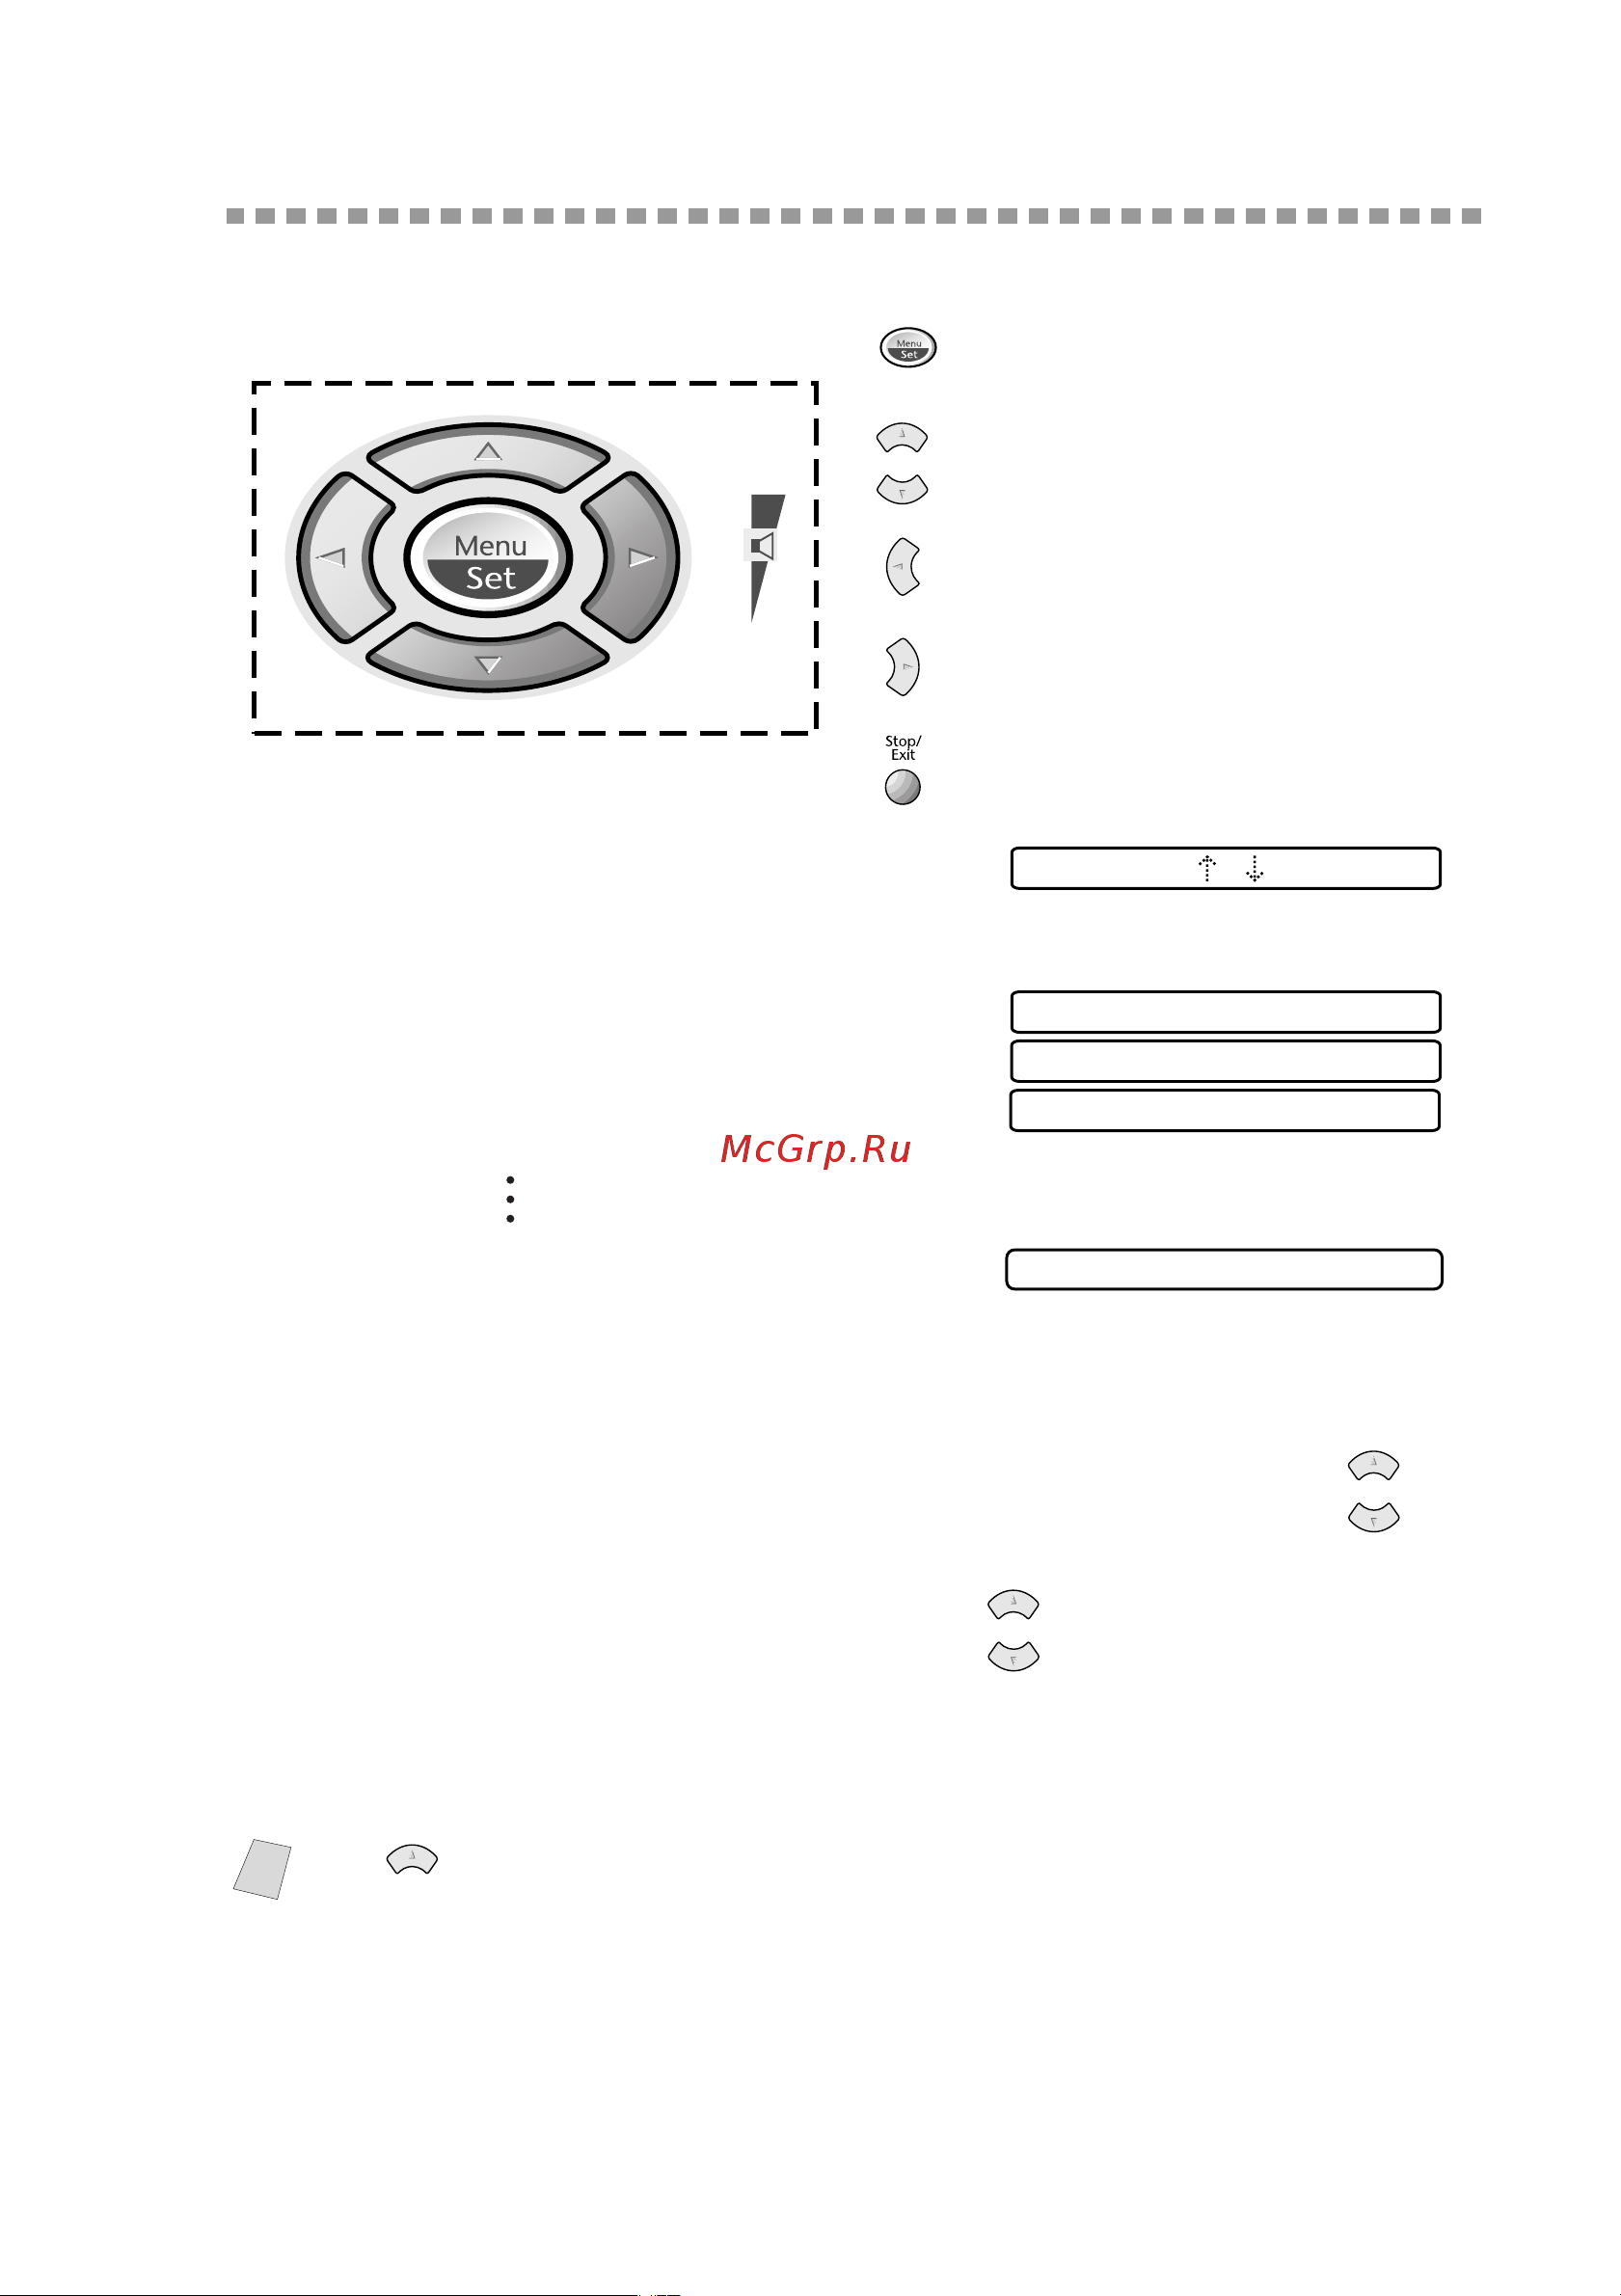
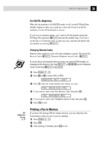
Navigation Keys
You can access the menu mode by pressing
Menu/Set. When you enter the Menu, the
LCD scrolls:
Then press 1 for Initial Setup Menu—OR—
Press 2 for Setup Receive Menu—OR—
Press 3 for Setup Send Menu
Press 0 for
TEL SERVICE
—
OR
—
You can scroll more quickly through the each menu level by pressing , and
then set an option by pressing Menu/Set when that option appears on the LCD.
Then the LCD shows next menu level. Press to scroll to your next menu
selection, and then press Menu/Set.
When you finish setting an option, the LCD shows ACCEPTED.
* Access the Menu
* Go to next menu level
* Accept an option
* Scroll through the
current menu level
* Back to previous menu
level
* Forward to next menu
level
* Exit the Menu
Note
Use to scroll backward if you passed your choices or to save keystrokes.
2.SETUP RECEIVE
3.SETUP SEND
1.INITIAL SETUP
SELECT & SET
0.TEL SERVICE
or
or
Содержание
- Tel service p.1
- Setup receive 3 setup send p.1
- Select set p.1
- Navigation keys p.1
- Initial setup p.1
- Main menu menu selections options descriptions page p.2
- To access the menu press menu set p.2
- The factory setting option is shown in bold p.2
- O n s c r e e n p r o g r a m m i n g p.2
- To access the menu press menu set p.3
- The factory setting option is shown in bold p.3
- O n s c r e e n p r o g r a m m i n g p.3
- Main menu menu selections options descriptions page p.3
- To access the menu press menu set p.4
- The factory setting option is shown in bold p.4
- O n s c r e e n p r o g r a m m i n g p.4
- Main menu menu selections options descriptions page p.4
- To access the menu press menu set p.5
- The factory setting option is shown in bold p.5
- O n s c r e e n p r o g r a m m i n g p.5
- Main menu menu selections options descriptions page p.5
- Main menu menu selections options descriptions page p.6
- To access the menu press menu set p.6
- The factory setting option is shown in bold p.6
- O n s c r e e n p r o g r a m m i n g p.6
- Setting station id p.7
- Setting date and time p.7
- Initial setup p.7
- Getting started p.7
- Notice p.8
- Inserting spaces p.8
- Details for entering text p.8
- Special characters and symbols p.9
- Setting the speaker volume p.9
- Repeating letters p.9
- Making corrections p.9
- Warning p.10
- Choosing the handset volume for volume amplify p.10
- Volume amplify p.11
- Vol amplify off p.11
- Setting volume amplify p.11
- Setting the ring volume p.11
- Setting beeper volume p.11
- Permanent p.11
- Beeper p.11
- Tone pulse p.12
- Setting up your area code usa only p.12
- Setting tone pulse dialing mode p.12
- Memory storage p.12
- Dialing tone p.12
- Dialing pulse p.12
- Caller id p.12
- Area code 908 p.12
- Area code 000 p.12
- Setup receive p.13
- Select receive mode p.13
- Basic receiving operations p.13
- To select or change your receive mode p.14
- Mc msg ctr p.14
- Manual p.14
- Fax tel p.14
- Fax only p.14
- Setting ring delay p.15
- Setting f t ring time p.15
- Ring time 20 sec p.15
- Ring delay p.15
- F t ring time p.15
- Record fax tel outgoing message f t ogm p.16
- Easy receive p.16
- Printing a reduced incoming fax p.17
- Yes 2 no change reduction p.17
- Setting paper size p.17
- Reduction p.17
- Recommended reductions p.17
- Operation from external or extension telephone p.18
- Advanced receiving operations p.18
- Setting up sequential polling receive p.19
- Setting up for polled transmit p.19
- Polling rx on p.19
- Polling rx p.19
- Polling p.19
- Polled tx on p.19
- Polled tx p.19
- Enter fax no p.19
- Dialing p.19
- Accepted p.19
- Setup send p.20
- Before you begin p.20
- Automatic document feeder adf p.20
- Manual transmission p.21
- Manual and automatic fax redial p.21
- Automatic transmission p.21
- Urgent p.22
- Quick scan fax transmission p.22
- Please call p.22
- Confidential p.22
- Composing electronic cover page p.22
- Comment off p.22
- Basic sending operations p.22
- Comment off p.23
- Always send a cover page p.23
- Accepted p.23
- User defined p.23
- Urgent p.23
- Please call p.23
- Other settings p.23
- Coverpage on p.23
- Coverpage off p.23
- Cover page for next fax only p.23
- Confidential p.23
- Urgent p.24
- Please call p.24
- Other settings p.24
- Coverpg setup p.24
- Confidential p.24
- Composing your own comments p.24
- Comment off p.24
- Accepted p.24
- Using a printed cover page p.24
- User defined p.24
- Resolution p.25
- Overseas mode p.25
- Contrast p.25
- Advanced sending operations p.25
- Print sample call back message p.26
- Other settings p.26
- Call reserve on p.26
- Call reserve off p.26
- Call reserve p.26
- Call reservation call back message p.26
- Call back on p.26
- Call back off p.26
- Accepted p.26
- Accepted p.27
- Setting up for polled transmit p.27
- Polled tx on p.27
- Polled tx p.27
- Other settings 1 yes 2 no p.27
- Memory 100 enter fax no p.27
- Delayed fax p.27
- Remove original p.28
- Interrupting delayed fax and polled transmit jobs p.28
- Insert original p.28
- Canceling a scheduled job p.28
- Cancel job p.28
- Storing one touch dial numbers p.29
- Storing numbers for easy dialing p.29
- Auto dial numbers and dialing options p.29
- Storing speed dial numbers p.30
- Speed dial p.30
Похожие устройства
-
 Brother 1350 MРуководство по эксплуатации
 -
 Brother MFX-1200 ч.4Руководство по эксплуатации
 -
 Brother MFX-1200 ч.3Руководство по эксплуатации
 -
 Brother MFX-1200 ч.2Руководство по эксплуатации
 -
 Brother MFX-1200 ч.1Руководство по эксплуатации
 -
 Brother FAX-1575mc ч.4Руководство по эксплуатации
 -
 Brother FAX-1575mc ч.3Руководство по эксплуатации
 -
 Brother FAX-1575mc ч.1Руководство по эксплуатации
 -
 Brother FAX 2750 ч.5Руководство по эксплуатации
 -
 Brother FAX 2750 ч.4Руководство по эксплуатации
 -
 Brother FAX 2750 ч.3Руководство по эксплуатации
 -
 Brother FAX 2750 ч.2Руководство по эксплуатации