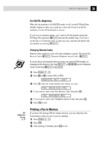
![Brother MFX-1200 ч.2 [6/40] Select document type](/img/pdf.png)
Brother MFX-1200 ч.2 [6/40] Select document type
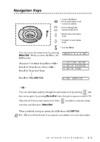
![Brother MFX-1200 ч.2 [6/40] Select document type](/views2/1965670/page6/bg6.png)
2.15
Basic operation
Making copy settings
When the machine is in the Copy mode,the
LCD
shows:
Number of pages
Use the numeric keypad to enter the desired number of copies for the document.
Copy reduction or enlargement rate
Your fax machine can make enlarged and reduced copies. For more information, see
Enlarged or reduced copies, page 2.13.
Document size
To select the document size manually, press
DOCUMENT SIZE
repeatedly until your
desired document size appears.You can choose the Letter, Legal or Half letter:
Note: When the document size is set to Auto (see Setting copy auto, page 4.7)
you may see the
LCD
as below:
[ ] means the machine automatically select the document size.
Note: According to the magnification ratio or recording paper size, the document
size will be not displayed:
Recording paper size
As default, your machine selects the paper source automatically, however if you
wish to select the paper source manually, press
PAPER SIZE
repeatedly until your
desired paper size is displayed.The
LCD
toggles the paper size in the 1st cassette,
2nd cassette (if installed), the bypass tray and Auto select mode.
Note: If the bypass tray has no paper, the
LCD
shows None for the paper size of
the bypass tray.
Note: When you choose the auto paper select mode,the
LCD
shows Auto and the all LED of the paper source will
be lit.
However, if the bypass tray has no paper and the
optional 2nd paper cassette has not been installed,
the machine will show the [(paper size)] instead
of Auto although you select auto paper select mode.
And it lights the LED of the paper source that can be
used only.
Select Document type
PHOTO
Select this mode when copying photographs or
drawings.
PHOTO
/
TEXT
Select this mode when copying documents
containing photographs or drawings with letters.
TEXT
Select this mode when copying letters.
To select the document type, press
DOCUMENT
repeatedly.
A glowing
LED
indicates the machine is using the setting named by that
LED
.
PHOTO
DOCUMENT
PHOTO
/TEXT
TEXT
RESOLUTION
Copy Ready 1
----- Ltr 50%
Copy Ready 1
[ Ltr ] Ltr 100%
Number of copies
Copy reduction or enlargement ratio
Recording paper size
Document size
Содержание
- Tel ready mode p.1
- Reception modes p.1
- Receiving faxes p.1
- Fax tel ready mode p.1
- Fax ready mode p.1
- Answering fax calls using another phone not the fax machine p.1
- Answering calls manually p.1
- St cassette please supply paper p.2
- Out of paper reception p.2
- If the paper runs out while fax reception p.2
- How to select the fax reception mode p.2
- Fax tel ready enter p.2
- Fax ready enter p.2
- Ans fax ready mode p.2
- Tel fax ready mode p.2
- Your machine s copier features p.3
- Single copy p.3
- Making copies p.3
- Basic copy procedure p.3
- Stacking multiple copies p.4
- Sorting multiple copies using adf p.4
- Enlarged or reduced copies p.4
- Using the bypass tray p.5
- St cassette please supply paper p.5
- Memory overflow start or cancel p.5
- Memory overflow message p.5
- If the paper runs out while copying p.5
- Copy reduction or enlargement rate p.6
- Copy ready 1 ltr ltr 100 p.6
- Copy ready 1 ltr 50 p.6
- Select document type p.6
- Recording paper size p.6
- Number of pages p.6
- Making copy settings p.6
- Document size p.6
- Special copy function p.7
- Sort copy setting p.7
- Sort copy on enter p.7
- Sort copy off enter p.7
- Negative positive reversing black and white areas p.7
- Nega posi on enter p.7
- Nega posi off enter p.7
- Ltr ltr 100 p.7
- Adjust image contrast p.7
- Combine off enter p.8
- Combine p.8
- Ultra copy on enter p.8
- Ultra copy off enter p.8
- Ultra copy mode p.8
- Ltr ltr 100 p.8
- Combine on enter p.8
- Fax ready copy off p.9
- Copy protection p.9
- Copy protect on enter p.9
- Copy protect off enter p.9
- Copy protect complete p.9
- Redial p.10
- On hook dialing p.10
- Dialing in the event of a power failure p.10
- Dialing a telephone number p.10
- Changing the dialing type p.10
- Call request p.10
- View redial history 0 1234567890 p.10
- Using your fax machine as a phone p.10
- Tel mode _ p.10
- Attaching an optional handset p.11
- Attaching a second phone p.11
- This chapter describes convenient features of your machine p.13
- Advanced features p.13
- Special dialing characters p.14
- S and the easydial directory p.14
- Location p.14
- How do you autodial p.14
- Autodialer basics p.14
- Autodialer p.14
- Call groups p.15
- Alt no _ p.15
- Alt no 9 1 555 987 6553_ p.15
- Using one touch keys p.15
- Select one touch 02 no number stored p.15
- Select one touch 02 9 1 555 987 6543 p.15
- Select one touch 01 no number stored p.15
- Name upper _ p.15
- Name lower s w region office_ p.15
- Group no _ p.15
- Group no 2 6_ p.15
- Fax number _ p.15
- Fax number 9 1 5559292039_ p.15
- Fax number 9 1 555 987 6543_ p.15
- Entering or changing a one touch number p.15
- Group no 3 16 27_ p.16
- Erasing a one touch number p.16
- Erase one touch complete p.16
- Erase one touch check enter cancel p.16
- Select one touch 02 9 1 555 987 6543 p.16
- Select one touch 01 9 1 555 345 6789 p.16
- Printing a list of one touch numbers p.16
- Group no 3_ p.16
- Tel mode 9 555 2842_ p.17
- Plano office a4 normal p.17
- One touch phone dialing p.17
- One touch fax dialing p.17
- If you specified real time transmission p.17
- If you specified quick memory transmission p.17
- If you specified normal memory transmission p.17
- Enter speed dial no 005 no number stored p.18
- Enter speed dial no 005 9 555 397 0123 p.18
- Enter speed dial no 001 no number stored p.18
- Alt no _ p.18
- Alt no 9 1 555 789 3556_ p.18
- Using speed dial numbers p.18
- Name upper _ p.18
- Name lower w est coast sales_ p.18
- Group no _ p.18
- Group no 1 4 12_ p.18
- Fax number _ p.18
- Fax number 9 555 397 0123_ p.18
- Fax number 9 1 555 567 1234_ p.18
- Entering or changing a speed dial number p.18
- Group no 6_ p.19
- Group no 6 17 30_ p.19
- Erasing a speed dial number p.19
- Erase speed dial complete p.19
- Erase speed dial check enter cancel p.19
- Enter speed dial no 005 9 1 555 987 6543 p.19
- Enter speed dial no 001 9 555 584 6950 p.19
- Printing a list of speed dial numbers p.19
- Tel mode s_ p.20
- Tel mode 9 555 5783_ p.20
- Plano office s018_ p.20
- Plano office a4 normal p.20
- Phoning via speed dial p.20
- If you specified real time transmission p.20
- If you specified quick memory transmission p.20
- If you specified normal memory transmission p.20
- Fax dialing via speed dial p.20
- Enter speed dial no s_ p.20
- Send a fax via call group p.21
- Printing a call group directory p.21
- Enter group no g p.21
- Call group dialing p.21
- Easydial directory dialing p.22
- View redial history 0 1234567890 p.22
- Telephone index a abc company 01 p.22
- If an easydial call fails p.22
- Making changes to broadcasts p.23
- Delayed broadcasting p.23
- Broadcasting p.23
- Setting up a delayed transmission p.24
- Reserved jan 29 2000 17 17 p.24
- Enter fax number _ p.24
- Delayed transmission p.24
- Delayed enter time 11 23 05 p.24
- Delayed enter time 06 17 16 p.24
- Delayed enter p.24
- Fax number 9 1 555 871 9052_ p.25
- Creating or modifying a batch box p.25
- Batch transmission p.25
- Transmit time enter time 30 17 05 p.25
- Transmit time enter time 26 14 00 p.25
- Transmit time enter time 00 17 05 p.25
- Select batch box 3 no number stored p.25
- Select batch box 3 9 555 2110 p.25
- Select batch box 1 no number stored p.25
- Select batch box 1 9 1 555 345 6789 p.25
- Name upper _ p.25
- Name lower bookkeeping_ p.25
- Fax number _ p.25
- Fax number 9 555 2110_ p.25
- Press start box 5 file 1 p.26
- Batch tx enter box no _ p.26
- Batch tx enter box no 5 p.26
- Batch document enter file no _ p.26
- Batch document enter box no _ p.26
- Storing a document for batch transmission p.26
- Printing a list of stored batch documents p.26
- Printing a list of batch boxes p.26
- Printing a document stored in a batch box p.26
- Select batch box document stored p.27
- Select batch box 2 9 1 972 5559900 p.27
- Select batch box 1 no number stored p.27
- Select batch box 1 9 5551023 p.27
- Erasing an empty batch box p.27
- Erasing a document stored in a batch box p.27
- Erase batch box complete p.27
- Erase batch box check enter cancel p.27
- Batch document enter file no _ p.27
- Batch document enter box no _ p.27
- Batch document check enter stop p.27
- Being polled p.28
- Regular polling p.28
- Printing a stored polling document p.28
- Polling p.28
- Limiting polling access to your fax machine p.28
- Erasing a stored polling document p.28
- Enter fax number _ p.28
- Delayed enter time 15 17 05 p.28
- Passcode passcode 5627 p.29
- Passcode passcode 0000 p.29
- Special features p.30
- Soft keys p.30
- Setting the soft key p.30
- Programming the macro key p.31
- Overwrite check enter cancel p.31
- Macro keys p.31
- Fax ready jun 1 2000 13 30 p.31
- Select macro key m2 no number stored p.31
- Select macro key m1 no number stored p.31
- Storing fax documents with the macro key p.32
- Reserved jan 29 2000 17 17 p.32
- Printing lists using the macro key p.32
- M2 name upper delayed_ p.32
- M2 name upper _ p.32
- Include start enter check enter cancel p.32
- Fax dialing with the macro key p.32
- Copying with the macro key p.32
- 1 972 555 4335 a4 normal p.32
- Macro speed norm enter p.33
- Macro speed fast enter p.33
- Erasing a macro key p.33
- Erase macro complete p.33
- Erase macro check enter cancel p.33
- Setting the speed for macros p.33
- Select macro key m2 batch box list p.33
- Select macro key m1 activity journal p.33
- Printing a list of your macro keys p.33
- Macro speed slow enter p.33
- Using the fax copy function p.34
- Setting the fax copy function p.34
- Setting the activity journal p.34
- Journal autoprt off enter p.34
- Fax copy on enter p.34
- Fax copy off enter p.34
- Fax copy 1 ltr ltr 100 p.34
- Fax copy p.34
- Canceled copying start stop p.34
- Setting the printing order of the activity journal p.35
- Printing an activity journal manually p.35
- What the reports tell you p.35
- Setting the reports p.35
- Turning the cover page on p.36
- Fax message from p.36
- Cover page p.36
- Printing the cover page p.37
- Oneline distinctive ring detection p.37
- Entering the cover page message p.37
- Talking first then sending a fax p.38
- Talking first then receiving a fax p.38
- Ring pattern c enter p.38
- Ring pattern a enter p.38
- Faxing receiving first then talking p.38
- Drd on enter p.38
- Drd off enter p.38
- Call request p.38
- The power of quadacces p.39
- Responding to a call request p.39
- Ok will scan soon p.39
- F code boxes p.39
- F code an introduction p.39
- Creating or modifying an f code box p.39
- Sub address no 654321_ p.40
- Sub address no 123456_ p.40
- Set f code box enter i d code p.40
- Select f code box 03 no number stored p.40
- Select f code box 03 muratec america p.40
- Select f code box 01 ny branch office p.40
- Select f code box 01 no number stored p.40
- Elements of an f code box p.40
- Box name upper muratec america_ p.40
- Box name upper _ p.40
- To create or modify an f code box p.40
- Sub address no sub address in use p.40
- Sub address no _ p.40
Похожие устройства
-
 Brother 1350 MРуководство по эксплуатации
 -
 Brother MFX-1200 ч.4Руководство по эксплуатации
 -
 Brother MFX-1200 ч.3Руководство по эксплуатации
 -
 Brother MFX-1200 ч.1Руководство по эксплуатации
 -
 Brother FAX-1575mc ч.4Руководство по эксплуатации
 -
 Brother FAX-1575mc ч.3Руководство по эксплуатации
 -
 Brother FAX-1575mc ч.2Руководство по эксплуатации
 -
 Brother FAX-1575mc ч.1Руководство по эксплуатации
 -
 Brother FAX 2750 ч.5Руководство по эксплуатации
 -
 Brother FAX 2750 ч.4Руководство по эксплуатации
 -
 Brother FAX 2750 ч.3Руководство по эксплуатации
 -
 Brother FAX 2750 ч.2Руководство по эксплуатации