
Noctua NH-U12DX Инструкция по эксплуатации онлайн
Содержание
- Applying thermal paste 1
- Attaching the fan 1
- Attaching the heatsink to the cpu 1
- Caution 1
- If you re replacing a standard intel cooler the cek spring has 1
- If your system doesn t have a cek spring or you didn t get 1
- Improve cooling performance this fan has to be purchased 1
- In order to obtain one 1
- Most likely already been installed 1
- Nh u12dx installation manual 1
- Of the socket when installing the cooler these springs are 1
- One with your mainboard please contact our support team 1
- Please note that a cek spring should be used on the rear side 1
- Please note that a third fan can be installed in order to further 1
- Required mounting parts 1
- Separately though 1
- Usually supplied by the mainboard manufacturer 1
Похожие устройства
- Sony VAIO VGN-AR51SU Инструкция по эксплуатации
- Samsung Galaxy Core 2 DS SM-G355 Black Инструкция по эксплуатации
- Noctua NH-U12DX 1366 Инструкция по эксплуатации
- Sony VAIO VGN-AR51SRU Инструкция по эксплуатации
- Samsung Galaxy Core 2 DS SM-G355 White Инструкция по эксплуатации
- Noctua NH-U12F Инструкция по эксплуатации
- Sony VAIO VGN-AR61E Инструкция по эксплуатации
- Samsung Galaxy S5 mini DS SM-G800 Black Инструкция по эксплуатации
- Noctua NH-U12P Инструкция по эксплуатации
- Sony VAIO VGN-AR61M Инструкция по эксплуатации
- Samsung Galaxy S5 mini DS SM-G800 Blue Инструкция по эксплуатации
- Noctua NH-U12P SE1366 Инструкция по эксплуатации
- Sony VAIO VGN-AR61MR Инструкция по эксплуатации
- Samsung Galaxy S5 mini DS SM-G800 White Инструкция по эксплуатации
- Noctua NH-U12P SE2 Инструкция по эксплуатации
- Sony VAIO VGN-AR61S Инструкция по эксплуатации
- Noctua NH-C12P SE14 Инструкция по эксплуатации
- Samsung Gear2 Neo SM-R381 Black Инструкция по эксплуатации
- Sony VAIO VGN-AR61ZRU Инструкция по эксплуатации
- Sony Smart Watch 2 Fifa SW2 Инструкция по эксплуатации
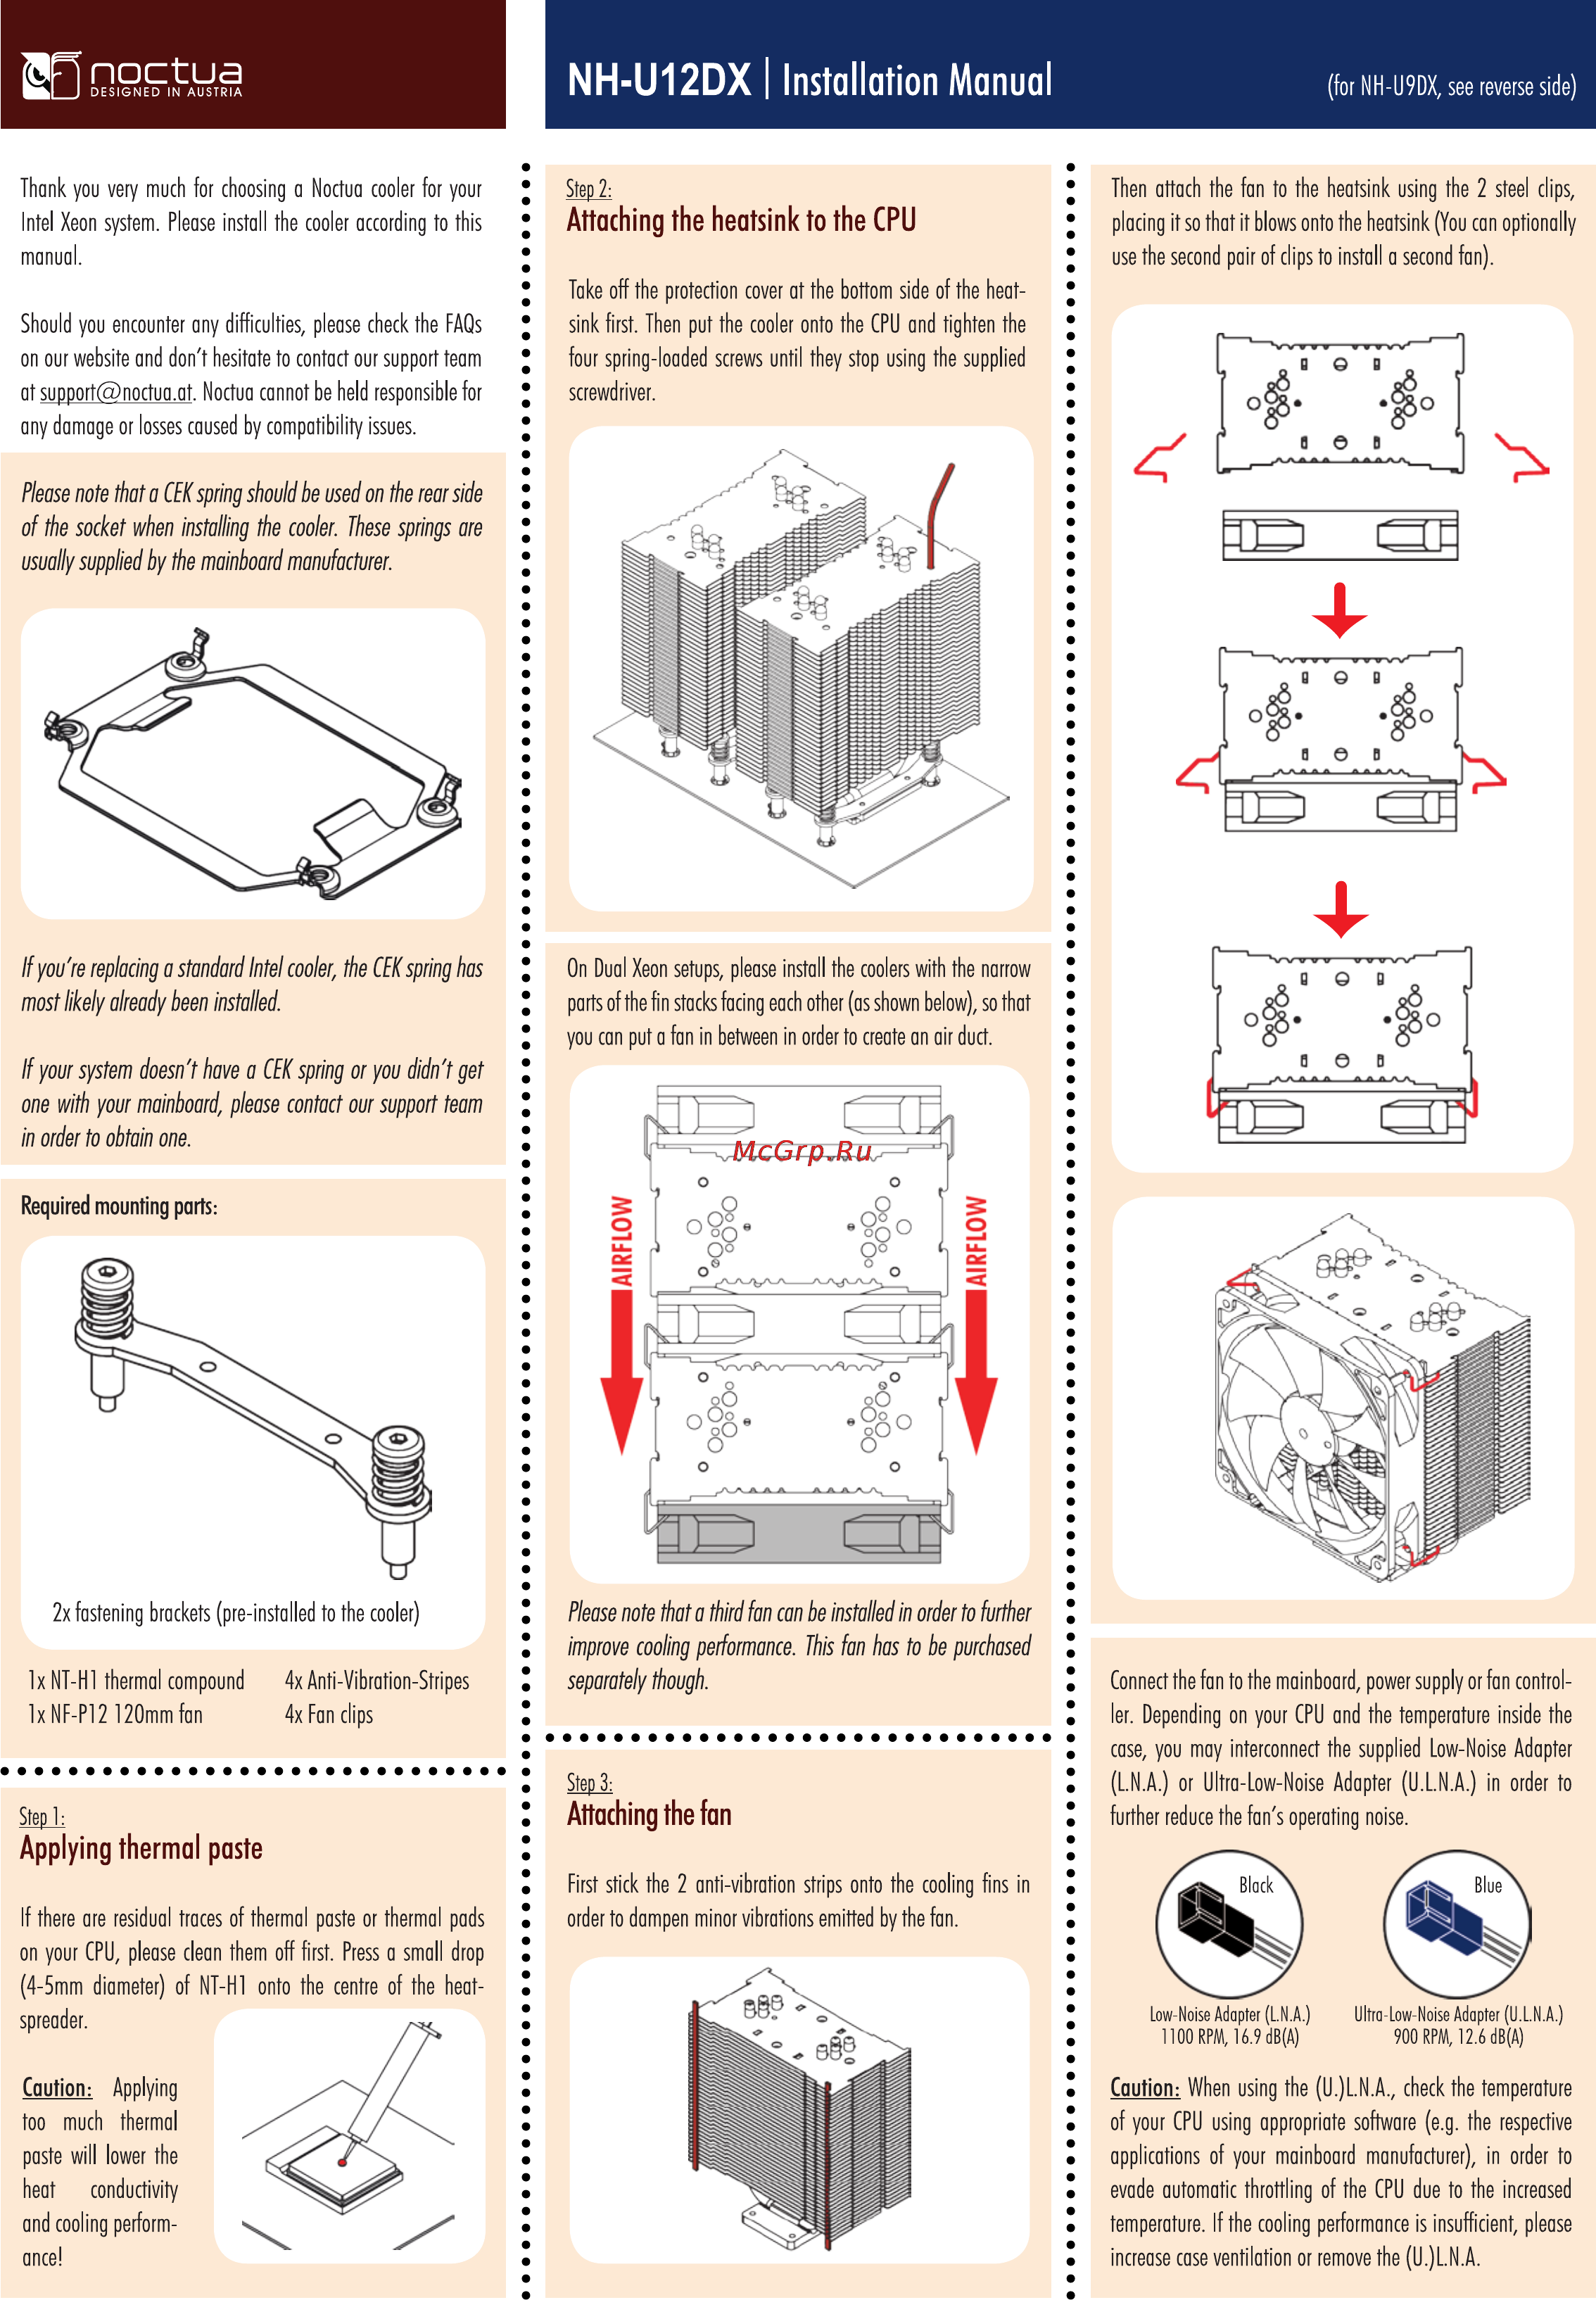
NH U12DX Installation Manual Thank you very much for choosing a Noctua cooler for your Step 2 Intel Xeon system Please install the cooler according to this Attaching the heatsink to the CPU manual for NH U9DX see reverse side Then attach the fan to the heatsink using the 2 steel clips placing it so that it blows onto the heatsink You can optionally use the second pair of clips to install a second fan Take off the protection cover at the bottom side of the heat Should you encounter any difficulties please check the FAQs sink first Then put the cooler onto the CPU and tighten the on our website and don t hesitate to contact our support team four spring loaded screws until they stop using the supplied atsupport noctua at Noctua cannot be held responsible for screwdriver any damage or losses caused by compatibility issues Please note that a CEK spring should be used on the rear side of the socket when installing the cooler these springs are usually supplied by the mainboard manufacturer If you re replacing a standard Intel cooler the CEK spring has most likely already been installed On Dual Xeon setups please install the coolers with the narrow parts of the fin stacks facing each other as shown below so that If your system doesn t have a CEK spring or you didn t get one with your mainboard please contact our support team in order to obtain one Required mounting parts 2x fastening brackets pre installed to the cooler lx NT Hl thermal compound 4x Anti Vibration Stripes Please note that a third fan can be installed in order to further improve cooling performance This fan has to be purchased separately though lx NF P12120mm fan 4x Fan clips Connect the fan to the mainboard power supply or fan control ler Depending on your CPU and the temperature inside the case you may interconnect the supplied Low Noise Adapter Step 1 Step 3 LN A or Ultra Low Noise Adapter U L N A in order to Attaching the fan further reduce the fan s operating noise Applying thermal paste First stick the 2 anti vibration strips onto the cooling fins in If there are residual traces of thermal paste or thermal pads order to dampen minor vibrations emitted by the fan on your CPU please clean them off first Press a small drop 4 5mm diameter of NT Hl onto the centre of the heat spreader Caution too Applying Ultra Low Noise Adopter U L N A 1100 RPM 16 9 dB A 900 RPM 12 6 dB A Caution When using the U L N A check the temperature thermal of your CPU using appropriate software e g the respective paste will lower the applications of your mainboard manufacturer in order to heat much Low Noise Adapter LN A conductivity evade automatic throttling of the CPU due to the increased and cooling perform temperature If the cooling performance is insufficient please ance increase case ventilation or remove the U L N A