
Foxeye gc1 moto cam Инструкция по эксплуатации онлайн
Содержание
Похожие устройства
- Falcon Eye fe, fe-100m Инструкция по эксплуатации
- Falcon Eye fe, fe-200w Инструкция по эксплуатации
- Falcon Eye fe-4hp2 + avp-506 + fe-2369 + ат-12/30 Инструкция по эксплуатации
- Falcon Eye fe-201avr Инструкция по эксплуатации
- Falcon Eye fe-kit квартира Инструкция по эксплуатации
- Protherm FE 120/6 BM Инструкция по эксплуатации
- Protherm FE 150/6 BM Инструкция по эксплуатации
- Protherm FE 200/6 BM Инструкция по эксплуатации
- Protherm WH B60Z Инструкция по эксплуатации
- Protherm FS B 100 MSR Инструкция по эксплуатации
- Protherm Бобер 20 DLO Инструкция по эксплуатации
- Protherm Бобер 20 DLO Технические характеристики
- Protherm Бобер 20 DLO Сертификат
- Protherm Бобер 30 DLO Инструкция по эксплуатации
- Protherm Бобер 30 DLO Технические характеристики
- Protherm Бобер 30 DLO Сертификат
- Protherm Бобер 40 DLO Инструкция по эксплуатации
- Protherm Бобер 40 DLO Технические характеристики
- Protherm Бобер 40 DLO Сертификат
- Protherm Бобер 50 DLO Инструкция по эксплуатации
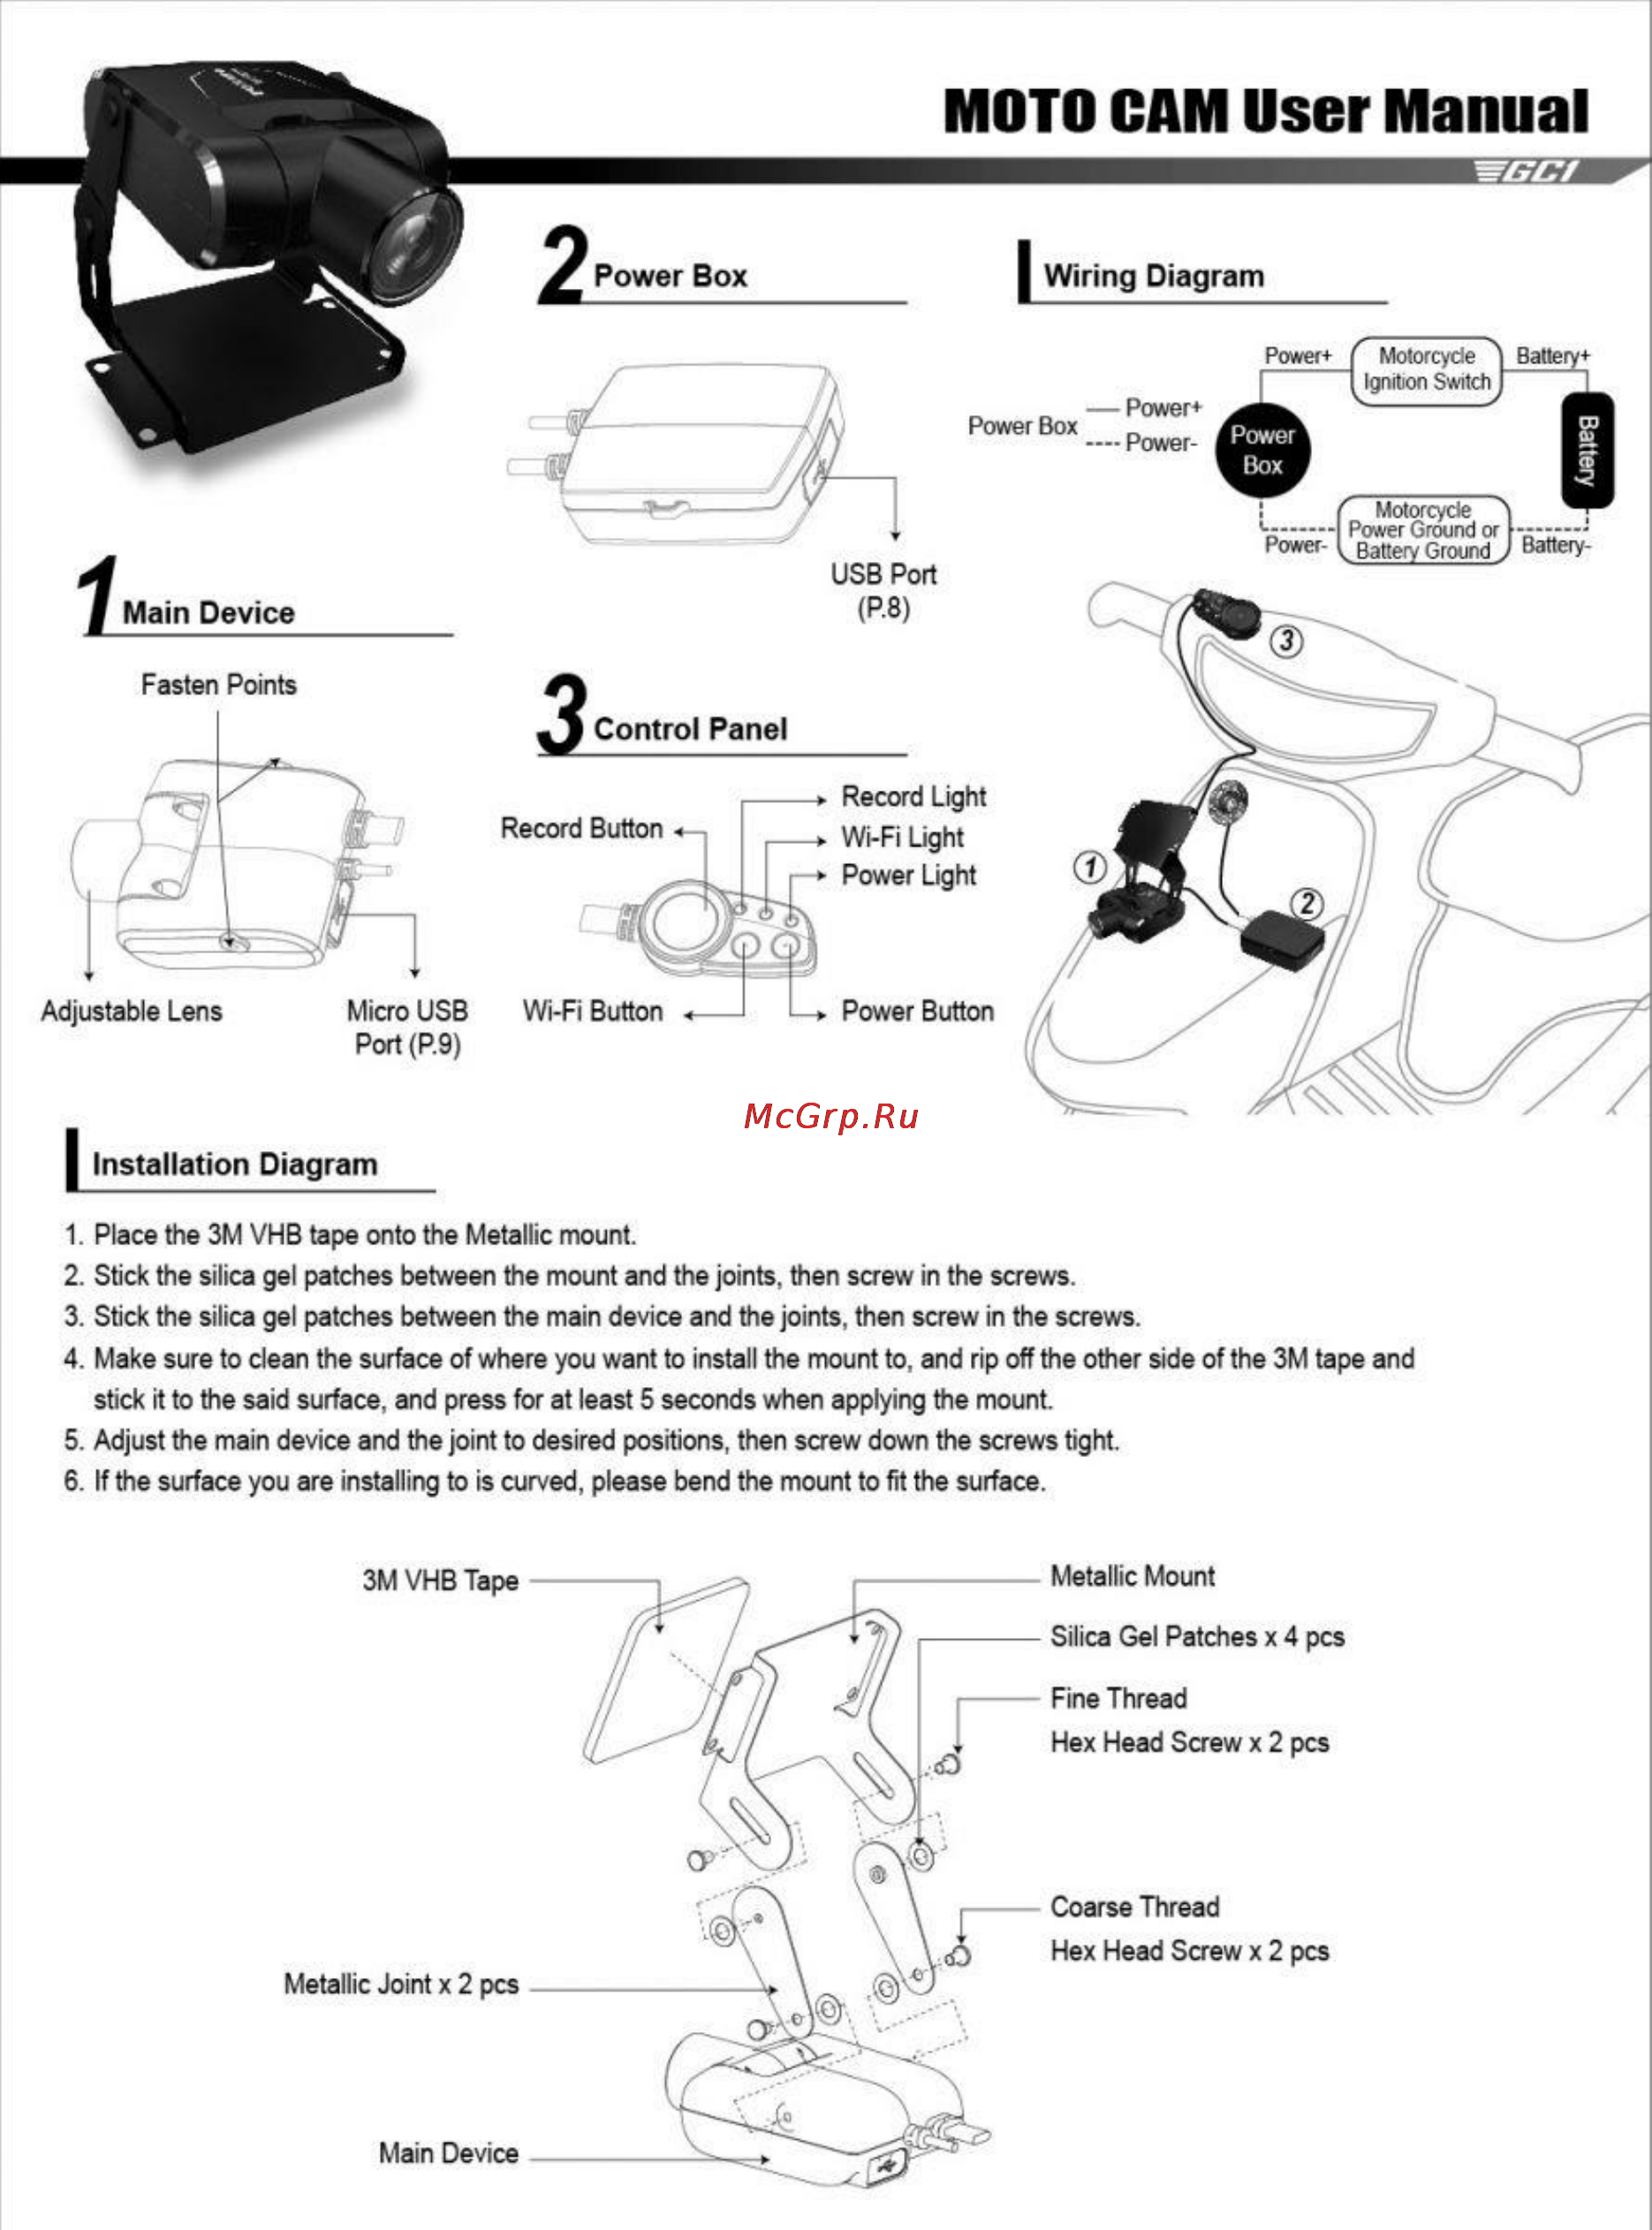
мото САМ Oser Manual Wiring Diagram Port P 9 Installation Diagram 1 Place the 3M VHB tape onto the Metallic mount 2 Stick the silica gel patches between the mount and the joints then screw in the screws 3 Stick the silica gel patches between the main device and the joints then screw in the screws 4 Make sure to clean the surface of where you want to install the mount to and rip off the other side of the 3M tape and stick it to the said surface and press for at least 5 seconds when applying the mount 5 Adjust the main device and the joint to desired positions then screw down the screws tight 6 If the surface you are installing to is curved please bend the mount to fit the surface 3M VHB Tape Metallic Mount Silica Gel Patches x 4 pcs Fine Thread Hex Head Screw x 2 pcs Coarse Thread Hex Head Screw x 2 pcs Metallic Joint x 2 pcs Main Device