
Supermicro SYS-1018GR-T Инструкция по эксплуатации онлайн
Содержание
- Warning handling of lead solder materials used in this product may expose you to lead a chemical known to the state of california to cause birth defects and other reproductive harm 2
- About this manual 3
- Preface 3
- Warnings 3
- Chapter 1 introduction 4
- Chapter 2 installation in a rack 4
- Contents 4
- Chapter 3 system interface 5
- Chapter 4 standardized warning statements for ac systems 5
- Chapter 5 advanced motherboard setup 5
- Chapter 6 advanced chassis setup 6
- Chapter 7 bios 1 6
- Appendix a bios post error codes a 1 7
- Appendix b system specifications b 1 7
- Contacting supermicro 8
- 1 overview 9
- Chapter 1 9
- Introduction 9
- 2 motherboard features 10
- I o ports 10
- Memory 10
- Pci expansion slots 10
- Processors 10
- Serial ata 10
- Ast2400 bmc 11
- Chapter 1 introduction 11
- Figure 1 1 intel c612 express chipset block diagram 11
- I350 lan 11
- Ipmi intelligent platform management interface is a hardware level interface specification that provides remote access monitoring and administration for supermicro server platforms ipmi allows server administrators to view a server s hardware status remotely receive an alarm automatically if a failure occurs and power cycle a system that is non responsive 11
- Note this is a general block diagram please see chapter 5 for details 11
- Skt r3 lga2011 3 11
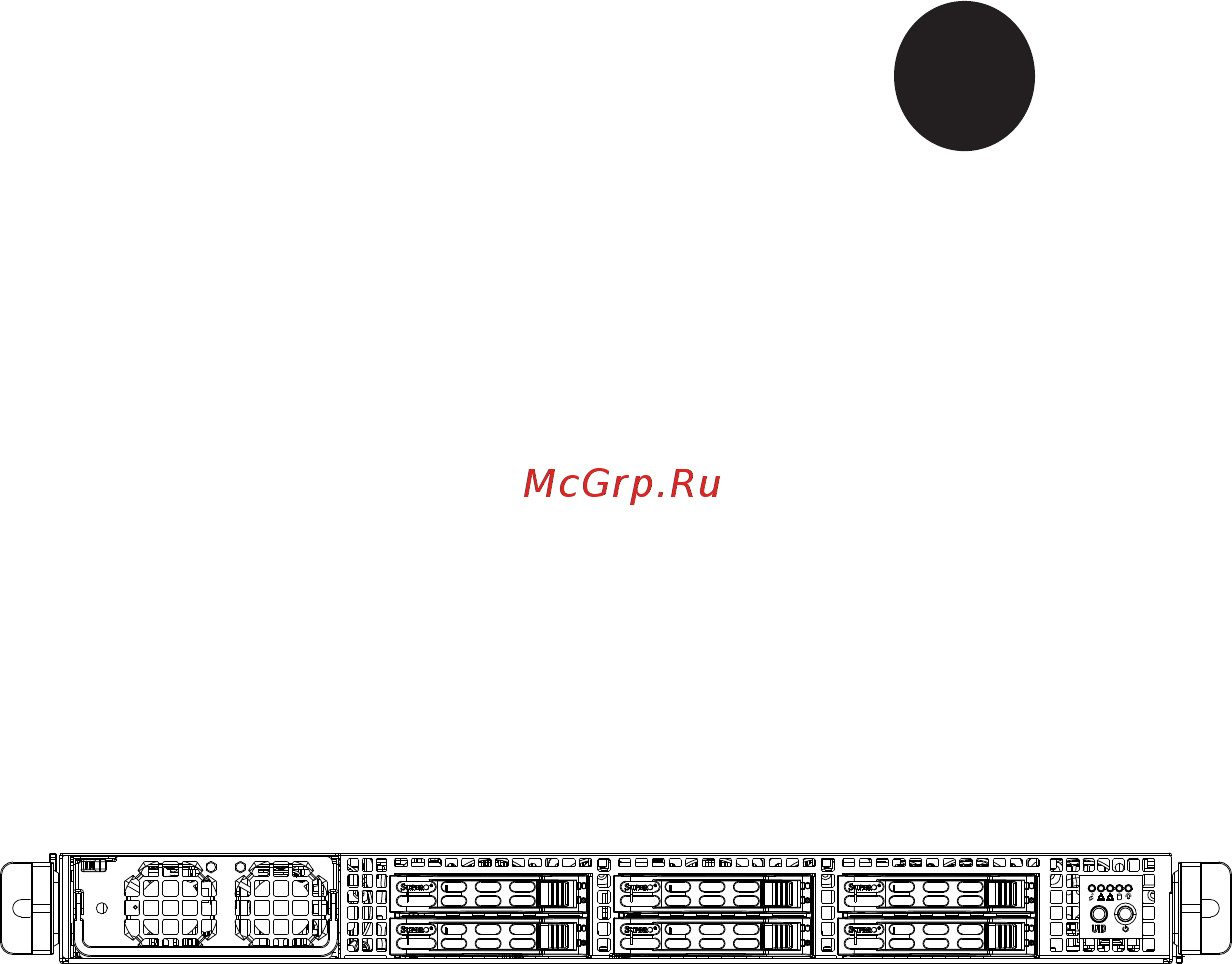
- 3 server chassis features 12
- 4 gpu subsystem 12
- Cooling system 12
- Front control panel 12
- Sata subsystem 12
- System power 12
- 5 contacting supermicro 13
- 1 preparing for setup 15
- Chapter 2 15
- Choosing a setup location 15
- Installation in a rack 15
- 2 warnings and precautions 16
- Rack precautions 16
- Server precautions 16
- Ambient operating temperature 17
- Circuit overloading 17
- Mechanical loading 17
- Rack mounting considerations 17
- Reduced airflow 17
- Reliable ground 17
- 3 installing the system into a rack 18
- Identifying the sections of the rack rails 18
- Chassis front 19
- Installing the optional inner rail extensions 19
- Align the round post in the rear rail b with the round hole at the end of the slot 20
- Assembling the outer rails 20
- Each outer rail comes in two sections that must be assembled before mounting onto the rack 20
- Figure 2 3 assembling the outer rails 20
- Identify the left and right outer rails by examining the ends which bend outward 20
- In the front rail a and slide the front section into the rear section 20
- Match the left front outer rail with the left rear outer rail and the same for the right rails 20
- Superserver 1018gr t user s manual 20
- Installing the outer rails onto the rack 21
- Sliding the chassis onto the rack rails 22
- Installing the server into a two post rack 23
- 1 overview 25
- Chapter 3 25
- System interface 25
- 2 control panel buttons 26
- 3 control panel leds 26
- Overheat temperature setting 27
- Overheating 27
- Responses 27
- 4 drive carrier leds 28
- 5 power supply leds 28
- About standardized warning statements 29
- Chapter 4 29
- Standardized warning statements for ac systems 29
- Warning definition 29
- Superserver 1018gr 30
- ןונקת תורהצהאהרהז ןה תואבה תורהצהא ינפמ שמתשמה תא ריהזהל תנמ לע היישעתה ינקת יפ לע תורהז הלבח ה וא תולאש שיו הדימב תירשפא תיזיפי יהשלכ היעבב תולקתרוציל שי הכימת תקלחמ םע רשק רידגהל וא ןיקתהל םיאשר דבלב םיכמסומ םיאנכט ורקימרפוס לש תינכט תאה םיביכר אורקל שי ורקימרפוס יזראמב םיביכרה תרדגה וא תנקתה ינפל ואולמב חפסנה תא 30
- ف ك ا ىأ يكو ةلاح ف ببستت ةباصا ة ذسج زهزلا اذه ع زطخ ز ذحت ىأ لبق يأ ىلع لوعت تاذعه كنلع ىلع ي يع ةوجا لا زطاخولاب زئاوذلا ة ئابزهكلا كوة ارد ىلع ي راوولابتاس ة ئاقىلا ل ع وعىقو يأثداىح نقر مذختسا ىا بلا صىص ولا ة اه ف ز ذحت لك رىثعلل اهتوجزت 31
- Installation instructions 32
- אורקל שי רוקמל תכרעמה רוביח ינפל הנקתה תוארוה תאחתמ אורקל שי רוקמל תכרעמה רוביח ינפל הנקתה תוארוה תאחתמ 32
- لا تاداشرإ رقابيكرت ليصوت لبق ىلإ ماظنلا ةقاطلل ردصم 32
- Circuit breaker 33
- לע ךמתסמ הז רצומנגהה תעינמל םינבמב תנקתומה יכ אדוול שי ילמשח רצק רצקה ינפמ ןגמה רישכמה ילמשחהמ רתוי אל אוה 33
- جتنملا اذه ىلع دمتعي ثادعم تيامحلا ةريصقلارئاودلا هم اهتيبثت مت يتلا يف ىنبملا 33
- نم دكأت نأ مييقت زاهجلا لايئاقو سيل نم رثكأ 33
- Power disconnection warning 34
- Superserver 1018gr 34
- הרהזא למשחה תורוקמ לכמ תכרעמה תא קתנל שי ריסהל שיו קפסהמ ילמשחה לבכ תא נקתה ךרוצל זראמה לש ימינפה קלחל השיג ינפלת רסה ואת םיביכר 35
- ילמשח קותינ ינפמ הרהזא 35
- مصف بجي واظننا عيمج نمرداصم تقاطنا تنازإو ءابرهكنا كهس نم ةدحو دادما تقاطنا مبق ىنإ لىصىنا تيهخادنا قطانمنا نمكيهه تنازإ وأ جيبثتن ثانىكم زاهجلا 35
- Equipment installation 36
- Superserver 1018gr 36
- הרהזא שר דבלב ךמסומ תווצתא ףילחהל ןיקתהל יא דויצה רובע תוריש תתל וא דויצה 36
- هيبردملاو و بيكزتللادبتسا وأ ةمدخ ساهجلا اذه حمسي نأ بجي طقف هيلهؤملا هيفظىملل 36
- Restricted area 37
- Battery handling 38
- Superserver 1018gr 38
- תלבגומ השיג םע רוזא הרהזא תרזעב תנתינ השיגה השיג תלבגה םהב שיש םירוזאב הדיחיה תא ןיקתהל שי דכו לוענמ חתפמ דבלב החטבא ילכ 38
- صيصخت ةذحىنا هذه ف اهب كرتن قطانم ةروظحم مت صىنا نكم نإ لى تقطنم ةروظحم طقف واذختسا للاخ نم تصاخ ةادأ وأ أ لان يرخأ ته سو املأم حاتفمو مفق 38
- הרהזא תנכס תמייקץוציפ הניקת אל ךרדב הפלחוהו הדימב הללוסה לש ףילחהל שי גוסב הללוסה תא מ םאותה תרבחלמומ ןרציתצ תוללוסה קוליס תושמושמה עצבל שי ןרציה תוארוה יפל 39
- رطخ كانه نم لاذبحسا ةلاح يف راجفنا ةيراطبلا ةحيحص ريغ ةقيرطب ليلعف ةيراطبلا لاذبحسا طقف عىنلا سفنب اهلداعي ام وأ اممثصوأ ةعنصملا ةمرشلا هب تايراطبلا نم صلخج ل اقفو ةلمعحسملاةعناصلا ةمرشلا تاميلعح 39
- Redundant power supplies if applicable to your system 40
- Superserver 1018gr 40
- דחא קפסמ רתוי םייק םא הרהזא קפס לש דחא רוביחמ רתוי שי הדחיל תא ריסהל שי ןקורל תנמ לע םירוביחה לכ 40
- חיה תאי הד 40
- Backplane voltage if applicable to your system 41
- دق اذهل نوكي لازاهج تلااصتا ةدع تادحوب ةقاطلا دادما ةلازإ بجي تلااصتلاا ةفاك لسعل لاةدحو نع ءابرهكلا 41
- Comply with local and national electrical codes 42
- Superserver 1018gr 42
- ירוחאה לנפב חתמ זא הרה ךלהמב רהזיהל שי תכרעמה לועפת ןמזב ירוחאה לנפב חתמ תנכס תמייק הדובעה 42
- كانه زطخ هم يئابزهكلا رايتلا ىلع ةدىجىملا ةقاطلاوأ ةحىللا نىكي امدنعماظنلا لمعي دنع ارذح هك ةمدخ ساهجلا اذه 42
- Product disposal 43
- יצראה למשחה יקוח םואית הרהזא תנקתה םייצראהו םיימוקמה למשחה יקוחל תמאות תויהל תבייח דויצה 43
- تادعملا بيكرت ةيئابرهكلا لل لثتمي نأ بجي هيواىقةيىطىلاو ةيلحملا ةقلعتملا ءابرهكلاب 43
- Hot swap fan warning if applicable to your system 44
- Superserver 1018gr 44
- רצומה קוליס הרהזא ו תויחנהל םאתהב תויהל בייח הז רצומ לש יפוס קוליס הנידמה יקוח 44
- يئاهنلا صلختلا نم جتنملا اذه هعم لماعتلا يغبني ل اقفو عيمجةينطىلا حئاىللاو نيناىقلا دنع 44
- הרהזא יקלח תא םיריסמ רשאכ שי םידבוע ןיידע םיררוואמהו ןכתי זראמהמ ררוואמה קיחרהללררוואמה ךותב םיחתפהמ םינוש הדובע ילכו תועבצאה תא חוטב קחרמ 45
- عباصلأا ويغاربنا تاكفم ءايشلأا هم اهريغو اديعب هع تاحتفنا يف ةهتك ةحورمنا 45
- هكممنا هم حوارمنا نأ لاست لا ةنازإ دنعرودت ةهتك ةحورمنا مكيهنا هم بجي ءاقبإ هكممنا هم حوارمنا نأ لاست لا ةنازإ دنعرودت ةهتك ةحورمنا مكيهنا هم بجي ءاقبإ 45
- Power cable and ac adapter 46
- Superserver 1018gr 46
- 1 handling the motherboard 49
- Advanced motherboard setup 49
- Chapter 5 49
- Unpacking 49
- 2 connecting cables 50
- Connecting data cables 50
- Connecting power cables 50
- Connecting the control panel 50
- 3 i o ports 51
- 4 installing the processor and heatsink 52
- Installing an lga 2011 processor 52
- Installing the cpu heatsink 55
- Removing the heatsink 55
- 5 installing memory 56
- Align the key of the dimm module 56
- Align the notches on both ends of 56
- Caution exercise extreme care when installing or removing dimm modules to prevent damage 56
- Dimm installation 56
- Insert the desired number of dimms 56
- Into the memory slots starting with dimma1 see the next page for the location for best performance please use the memory modules of the same type and speed in the same bank 56
- Note check the supermicro website for recommended memory modules 56
- On both ends of the dimm slot to unlock it 56
- Positions to secure the dimm module into the slot 56
- Press the release tabs to the lock 56
- Push the release tabs outwards 56
- Removing memory modules 56
- Reverse the steps above to remove the dimm modules from the motherboard 56
- Superserver 1018gr t user s manual 56
- The module against the receptive points on the ends of the slot 56
- The notches on both ends of the module straight down into the slot until the module snaps into place 56
- Use two thumbs together to press 56
- With the receptive point on the memory slot 56
- Chapter 5 advanced motherboard setup 57
- Cpu slot3 pci e 3 x8 in x16 57
- Dimma1 57
- Dimma1 blue slot 57
- Dimma2 57
- Dimmb1 blue slot 57
- Dimmb1 dimma2 57
- Dimmb2 57
- Dimmc1 57
- Dimmc1 blue slot 57
- Dimmc2 57
- Dimmd1 blue slot 57
- Dimmd1 dimmc2 57
- Dimmd2 57
- Edge of the motherboard 57
- Fana fanb 57
- Figure 5 3 installing memory 57
- I sata2 i sata1 i sata0 57
- I sata3 57
- I sata4 57
- I sata5 57
- Ipmi_lan 57
- Lan1 lan2 57
- Memory support 57
- S sata2 s sata1 s sata0 57
- S sata3 57
- Size and speed are recommended dimm sizes are 2gb 4gb 8gb 16gb 32gb 64gb refer to the illustration and the table on the following pages 57
- The motherboard has eight dimm slots that can support up to 256 gb rdimm or 512 lrdimm of ddr4 ecc memory at 1333 1600 2133 mhz modules of the same 57
- Usb 0 1 3 57
- Usb 2 3 57
- Usb 4 5 57
- Usb 6 7 57
- Usb 8 9 3 57
- Installed however for best memory performance install dimm modules in pairs to activate memory interleaving 58
- Memory population guidelines 58
- Mixed dimm speeds can be installed however all dimms will run at the speed 58
- Of the slowest dimm 58
- Recommended population balanced 58
- Superserver 1018gr t user s manual 58
- The motherboard will support odd numbered modules 1 3 5 or 7 modules 58
- Use ddr4 dimm modules of the same size type and speed 58
- When installing memory modules the dimm slots should be populated in the following order dimma1 dimmb1 dimmc1 dimmd1 then dimma2 dimmb2 dimmc2 dimmd2 58
- 6 expansion cards 59
- 7 motherboard details 60
- Motherboard quick reference 61
- 8 connector definitions 63
- Chapter 5 advanced motherboard setup 63
- Main pwr jpw1 gpu pwr connectors jpw2 jpw3 63
- Power connectors 63
- The 20 pin proprietary main power connector jpw1 is used to provide power to the motherboard the 8 pin gpu pwr connector jpw2 is also required for the graphics processor jpw3 is used if additional power to the gpu is needed for performance boost these power connectors meet the ssi eps 12v specification see the tables on the right for pin definitions 63
- Control panel connectors 64
- Figure 5 5 control panel header pins 64
- Ground 64
- Hdd led 64
- Nic1 led activity 64
- Nic1 led link 64
- Nic2 led activity 64
- Nic2 led link 64
- Power button 64
- Power fail led 64
- Power on led 64
- Reset button 64
- Superserver 1018gr t user s manual 64
- The power button connection is located on pins1 and 2 of jf1 momentarily contacting both pins will power on off the system this button can also be configured to function as a suspend button with a setting in the bios see chapter 7 to turn off the power in the suspend mode press the button for at least 4 seconds refer to the table on the right for pin definitions 64
- The power fail led connection is located on pins 5 and 6 of jf1 refer to the table on the right for pin definitions 64
- The reset button is located on pins 3 and 4 of jf1 and attaches to the reset switch on the computer chassis see the table on the right for pin definitions 64
- Uid led 64
- Chapter 5 advanced motherboard setup 65
- Connect a cable to the unit id connection on pins 7 and 8 of jf1 to connect to the unit id led on the chassis the unit id led is used together with the unit id uid switch see 2 16 65
- Hdd led 65
- Nic1 nic2 lan1 lan2 65
- Nmi button 65
- Of jf1 refer to the table on the right for pin definitions 65
- Power led 65
- The hdd led connection is located on pins 13 and 14 of jf1 attach a cable here to indicate the status of hdd related activities including ide sata activities see the table on the right for pin definitions 65
- The nic network interface controller led connection for lan ports 1 and 2 are located on pins 11 and 12 and pins 9 and 10 of jf1 respectively attach nic led cables to the nic1 and nic2 led indicators to display network activity refer to the table on the right for pin definitions 65
- The non maskable interrupt button header is located on pins 19 and 20 65
- The power led connection is located on pins 15 and 16 of jf1 refer to the table on the right for pin definitions 65
- Unit id led front panel 65
- Back panel usb 3 usb 0 66
- Back panel usb 3 usb 1 66
- Ethernet ports lan1 lan2 66
- Front panel usb 2 usb 2 3 66
- Front panel usb 2 usb 4 5 66
- Front panel usb 2 usb 6 7 66
- Front panel usb 3 usb 8 9 66
- In addition to the two ethernet ports lan1 lan2 this motherboard also features a dedicated ipmi port this provides remote system management access through a standard ip protocol network 66
- Ipmi port 66
- One com port com1 is provided on the motherboard located on the i o backpanel 66
- Other connectors 66
- Serial ports 66
- Superserver 1018gr t user s manual 66
- The unit id switch is located on the i o backpanel when the unit id switch is turned on both the blue rear unit id led and front panel unit led on jf1 if attached to the front unit id led on the chassis will activate push the unit id switch again to 66
- Two 2 universal serial bus 3 ports are located on the i o back panel there are also four 4 usb 2 ports on two headers on the motherboard that may be used to provide front chassis access using usb cables not included see the tables below for pin definitions 66
- Two ethernet ports lan1 lan2 are located next to the usb ports on the i o backpanel these ports provide networking connectivity with speeds up to 1 gb s 66
- Unit identifier switch uid 66
- Universal serial bus usb 66
- A chassis intrusion header is located at jl1 on the motherboard attach the appropriate cable from the chassis to inform you of a chassis intrusion when the chassis is opened 67
- Chapter 5 advanced motherboard setup 67
- Chassis intrusion 67
- Fan headers 67
- Legacy wake on lan header 67
- The onboard lan ports lan1 and lan2 do not need a wol header to support a wake on lan function the legacy wol header was preserved to provide convenience for some embedded customers who need an internal power source from the board see the table on the right for pin definitions 67
- There are eight fan headers fan 1 fan 4 and fan a fan d these are 4 pin fan headers with pins 1 3 being backward compatible with traditional 3 pin fans it is recommended that 4 pin fans are used to allow the fan speed control setting via ipmi to automatically adjust fan speeds based on the system temperature refer to the table on the right for pin definitions 67
- Turn off both indicators these unit id led indicators provide easy identification of the system unit when installed in a server cabinet for instance 67
- A system management bus header for the ipmi slot is located at jipmb1 connect the appropriate cable here to use the ipmb i2c connection on your system 68
- C connector located at ji2c1 monitors the status of the power supply fan and system temperature see the table on the right for pin definitions 68
- Dom pwr connector 68
- Power supply 68
- Superserver 1018gr t user s manual 68
- System management bus 68
- T sgpio1 4 headers 68
- The disk on module dom power connector located at jsd1 jsd2 provides 5v gen1 gen power to a solid state dom storage device connected to one of the sata ports see the table on the right for pin definitions 68
- The power supply 68
- Three t sgpio serial link general purpose input output headers are located next to the i sata ports on the motherboard these headers are used to communicate with the enclosure management chip in the system see the table on the right for pin definitions 68
- Chapter 5 advanced motherboard setup 69
- Internal buzzer sp1 69
- On the jd1 header pins 4 7 are used for internal speaker close pins 4 7 with a cap to use the speaker see the table on the right for pin definitions 69
- Overheat fan fail led 69
- Speaker jd1 69
- The internal buzzer sp1 can be used to provide audible indications for various beep codes see the table on the right for pin definitions 69
- The joh1 header is used to connect an led to provide warnings of chassis overheat this led will also blink to indicate a fan failure refer to the table on right for pin definitions 69
- This header is used to connect a trusted platform module tpm which is available from a third party vendor a tpm is a security device that supports encryption and authentication in hard drives it enables the motherboard to deny access if the tpm associated with the hard drive is not installed in the system see the table on the right for pin definitions 69
- Tpm header 69
- 9 jumper settings 70
- 10 onboard indicators 72
- 1 5 10 although not between controllers see the pin definitions on the right table 73
- 11 sata ports 73
- A rear uid led indicator le1 is located next to the i o backplane this uid indicator assists in identification of a system it may be triggered by the uid switch or ipmi 73
- Chapter 5 advanced motherboard setup 73
- Sata sas connections 73
- Standby power 73
- Ten sata 3 connectors are located on the board and support data transfer rates of up to 6gb s i sata 0 5 six connectors are supported by the ahci controller and s sata 0 3 four connectors are supported by the ssata controller they support raid 73
- The standby power led is located at led2 on the motherboard when led2 is on it means that the ac power cable is connected and the power supply hard switch is on indicating that power is flowing through the power supply and into the motherboard the system may or may not be running 73
- Uid led status 73
- Unit identification led le1 73
- 12 installing software 74
- Superdocto 75
- 13 serverboard battery 76
- 1 static sensitive devices 77
- Advanced chassis setup 77
- Chapter 6 77
- Precautions 77
- 2 removing power from the system 78
- 3 removing the chassis cover 79
- 4 system cooling 80
- Maintaining system fan trays 81
- System fan failure 81
- Installing the air shroud 83
- 5 installing expansion cards 84
- 6 drive bay installation removal 86
- Hard drive installation 86
- 7 power supply 88
- 1 introduction 89
- Chapter 7 89
- How to change the configuration data 89
- Starting bios setup utility 89
- 2 main setup 90
- How to start the setup utility 90
- 3 advanced setup configurations 92
- Boot feature 92
- Power configuration 93
- Cpu configuration 94
- Advanced power management configuration 97
- Cpu c state control 97
- Cpu p state control 97
- Cpu t state control 98
- Chipset configuration 99
- Iio configuration 99
- Iio1 configuration 99
- North bridge 99
- Intel vt for directed i o vt d 100
- Ioat configuration 100
- Memory configuration 101
- Qpi quick path interconnect configuration 101
- Dimm information 102
- Memory ras reliability_availability_serviceability configuration 102
- South bridge 103
- Sata configuration 105
- Ssata configuration 107
- Pcie pci pnp configuration 109
- Server me management engine configuration 109
- Super io configuration 112
- Com1 console redirection 113
- Serial port console redirection 113
- Sol com2 console redirection settings 115
- Ems console redirection settings 117
- Acpi settings 119
- Intel txt lt sx confirguration 120
- Trusted computing 120
- Iscsi configuration 121
- Intel i350 gigabit network connections 122
- Nic configuration 122
- Intel rste sata controller 123
- 4 event logs 124
- Change smbios event log settings 124
- 5 ipmi 126
- System event log 126
- Bmc network configuration 127
- 6 security settings 129
- 7 boot settings 130
- 8 save exit 133
- Appendix a 135
- Bios post error codes 135
- Appendix b 137
- Chipset 137
- Drive bays 137
- Expansion slots 137
- Gpus graphics processing units 137
- Memory capacity 137
- Processors 137
- Sata controller 137
- System specifications 137
- Chassis 138
- Operating environment 138
- Power supply 138
- Regulatory compliance 138
- Serverboard 138
- System cooling 138
- System input requirements 138
- Appendix b system specifications 139
Похожие устройства
- Supermicro SYS-1028R-WC1R Инструкция по эксплуатации
- Supermicro SYS-1028R-WC1RT Инструкция по эксплуатации
- Supermicro X11SAE-M-O Инструкция по эксплуатации
- Supermicro CSE-732D2-500B Инструкция по эксплуатации
- Supermicro X11SSH-F-B Инструкция по эксплуатации
- Supermicro CSE-815TQ-600CB Инструкция по эксплуатации
- Supermicro SYS-5018R-МR Инструкция по эксплуатации
- Supermicro SYS-7048GR-TR, X10DRG-Q C612 Dual Xeon Socket2011-3 2133/1866/1600MHz, up to 2TB DDR4 ECC Reg, 8xSATA3, 2000W (1+1) Инструкция по эксплуатации
- Supermicro X11SSL-F-O Инструкция по эксплуатации
- Supermicro X10DRD-I-B Инструкция по эксплуатации
- Supermicro X10DRH-I-O Инструкция по эксплуатации
- Supermicro CSE-825TQ-R740LPB Инструкция по эксплуатации
- Supermicro SYS-7047R-TRF, X9DRi-F C602 Dual Xeon Socket2011, 800-1600MHz, up to 512MB DDR3 ECC Reg, 8xSATA3, 920W (1+1) Инструкция по эксплуатации
- Supermicro SYS-7048R-TRT, X10DRi-T C612 Dual Xeon Socket2011-3 2133/1866/1600MHz, up to 1TB DDR4 ECC Reg, 8xSATA3, 920W (1+1) Инструкция по эксплуатации
- Supermicro SYS-7048R-TR, X10DRi C612 Dual Xeon Socket2011-3 2133/1866/1600MHz, up to 1TB DDR4 ECC Reg, 8xSATA3, 920W (1+1) Инструкция по эксплуатации
- Supermicro SYS-7047GR-TRF, X9DRG-QF C602 Dual Xeon Socket2011 1866/1600/1333/1066/800MHz, up to 192GB DDR3 ECC Reg, 10xSATA, 1620W Инструкция по эксплуатации
- Supermicro CSE-M35TQB Инструкция по эксплуатации
- Sven gs-m Инструкция по эксплуатации
- Sven gs-s Инструкция по эксплуатации
- Sven CK Инструкция по эксплуатации