
Zycom Zipster Инструкция по эксплуатации онлайн
Содержание
Похожие устройства
- Zycom Cruz С100 Инструкция по эксплуатации
- iBoto Aqua, влажная убока Инструкция по эксплуатации
- iClebo Omega White YCR-M07-20 Инструкция по эксплуатации
- iClebo YCR-M05-P3 Инструкция по эксплуатации
- iClebo Pop Lemon Инструкция по эксплуатации
- Ion Air Pro 2 Wi-Fi Инструкция по эксплуатации
- Ion Air Pro Wi-Fi Инструкция по эксплуатации
- Ion Air Pro Plus Инструкция по эксплуатации
- iOptron Astroboy 9404 (Orange) Инструкция по эксплуатации
- iOptron Astroboy 9403 (Green) Инструкция по эксплуатации
- iOptron Astroboy 9402 (Blue) Инструкция по эксплуатации
- iOptron Astroboy 9401 (Pink) Инструкция по эксплуатации
- iWown i6HR Инструкция по эксплуатации
- Iconbit mini-pc movie smart tv Инструкция по эксплуатации
- Iconbit nettab mercury q7 white Инструкция по эксплуатации
- Iconbit callisto 300 nt-1503c с красным ремешком Инструкция по эксплуатации
- Lumien eco view lev-100103, 111" (282 см), 1:1, на штативе + настенное крепление Инструкция по эксплуатации
- Lumien eco view lev-100102, 100" (254 см), 1:1, на штативе + настенное крепление Инструкция по эксплуатации
- Lumien eco view lev-100101, 84" (213 см), 1:1, на штативе + настенное крепление Инструкция по эксплуатации
- Lumien master view lmv-100108, 116" (294,5 см), 4:3, на штативе Инструкция по эксплуатации
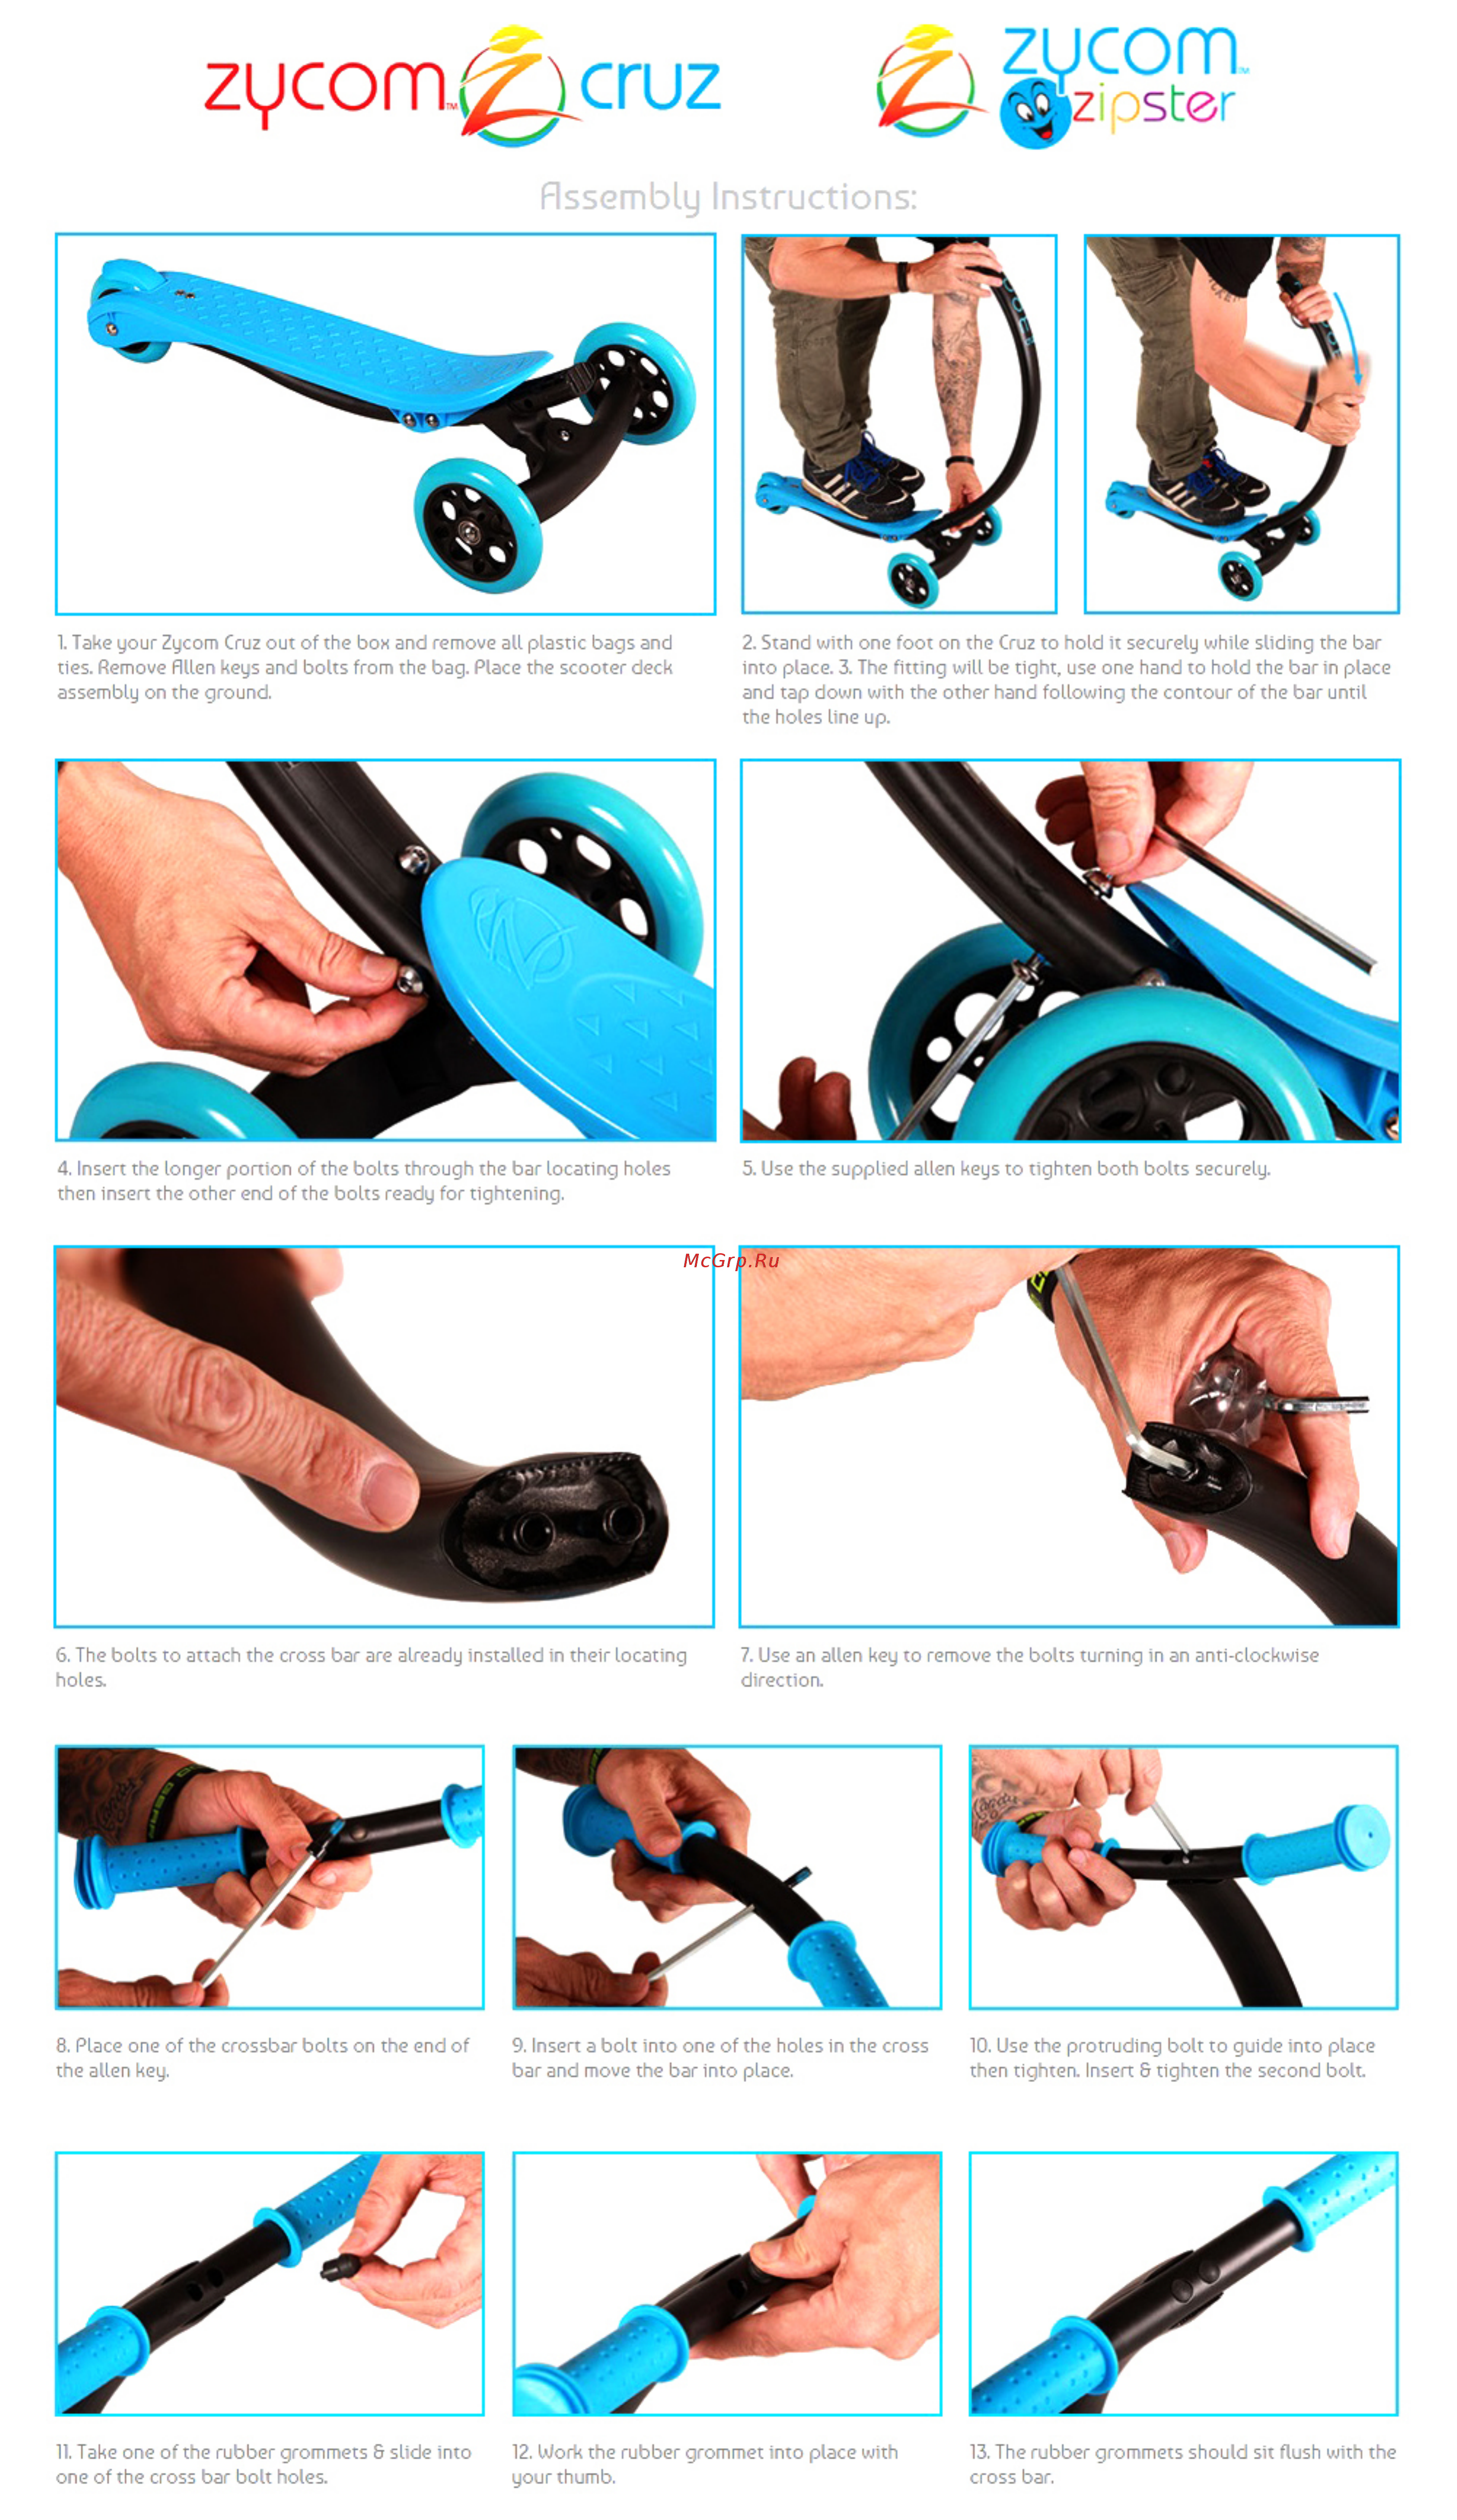
z com _j cruz Assembly Instructions 1 Take your Zycom Cruz out of the box and remove all plastic bags and ties Remove Allen keys and bolts from the bag Place the scooter deck assembly on the ground 2 Stand with one foot on the Cruz to hold it securely while sliding the bar into place 3 The fitting will be tight use one hand to hold the bar in place and tap down with the other hand following the contour of the bar until the holes line up 4 Insert the longer portion of the bolts through the bar locating holes then insert the other end of the bolts ready for tightening 5 Use the supplied alien keys to tighten both bolts securely 6 The bolts to attach the cross bar are already installed in their locating holes 7 Use an alien key to remove the bolts turning in an anti clockwise direction 8 Place one of the crossbar bolts on the end of the alien key 9 Insert a bolt into one of the holes in the cross bar and move the bar into place 10 Use the protruding bolt to guide into place then tighten Insert 8 tighten the second bolt 11 Take one of the rubber grommets 8 slide into one of the cross bar bolt holes 12 Work the rubber grommet into place with your thumb 13 The rubber grommets should sit flush with the cross bar