
Magio MG-589 Инструкция по эксплуатации онлайн
Содержание
Похожие устройства
- Magio MG-592 Инструкция по эксплуатации
- Hilton JM 3801 Инструкция по эксплуатации
- Hilton ICM 3850 Инструкция по эксплуатации
- Magio MG-583 Инструкция по эксплуатации
- Magio MG-587 Инструкция по эксплуатации
- Hilton ICM 3851 Инструкция по эксплуатации
- Magio MG-582 Инструкция по эксплуатации
- Hilton ICM 3852 Инструкция по эксплуатации
- Magio MG-588 Инструкция по эксплуатации
- Magio MG-580 Инструкция по эксплуатации
- Magio MG-581 Инструкция по эксплуатации
- Hilton KS 3219 Инструкция по эксплуатации
- Magio MG-590 Инструкция по эксплуатации
- Hilton KS 3218 Инструкция по эксплуатации
- Magio MG-591 Инструкция по эксплуатации
- Magio MG-187 Инструкция по эксплуатации
- Magio MG-189 Инструкция по эксплуатации
- Magio MG-180N Инструкция по эксплуатации
- Hilton HL 4192 Инструкция по эксплуатации
- Magio MG-182N Инструкция по эксплуатации
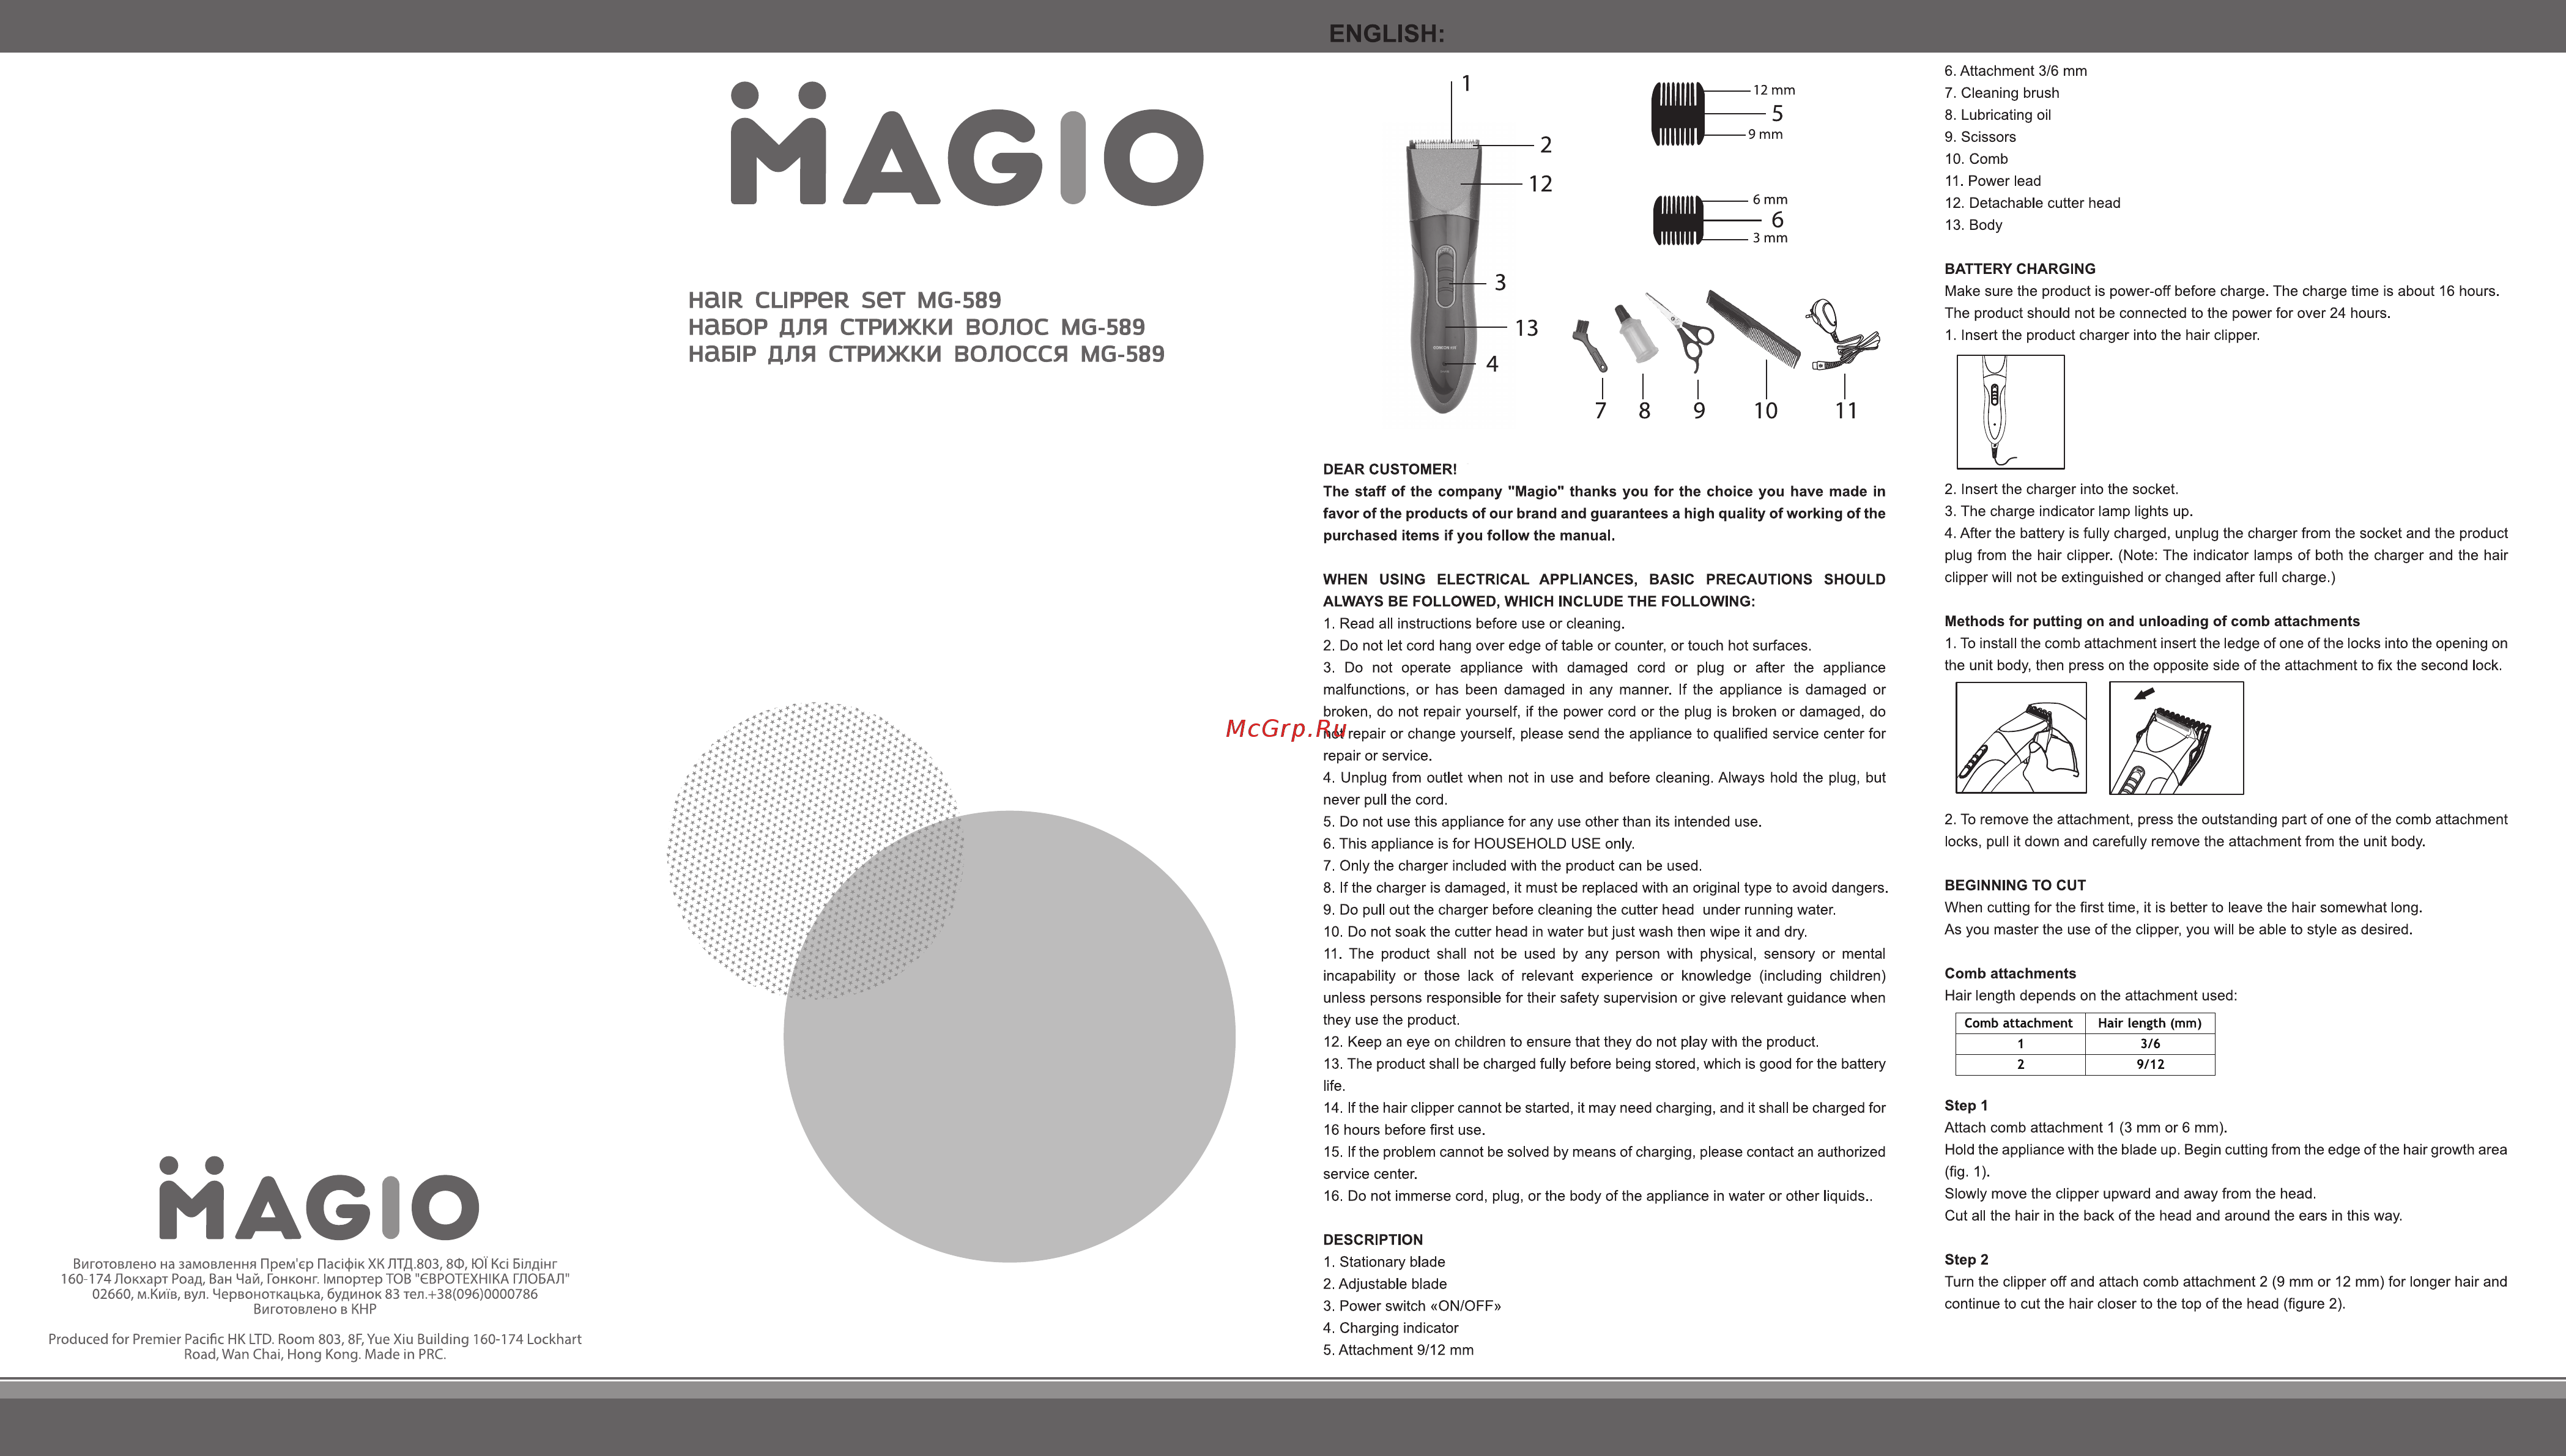
ENGLISH 6 Attachment 3 6 mm 7 Cleaning brush 8 Lubricating oil MAGIO 9 Scissors 10 Comb 11 Power lead 12 Detachable cutter head 13 Body BATTERY CHARGING Make sure the product is power off before charge The charge time is about 16 hours HaiR CLIPPeR SeT MG 589 НЭБОР ДЛЯ СТРИЖКИ ВОЛОС MG 589 HaBIP ДЛЯ СТРИЖКИ ВОЛОССЯ MG 589 The product should not be connected to the power for over 24 hours 1 Insert the product charger into the hair clipper DEAR CUSTOMER The staff of the company Magio thanks you for the choice you have made in 2 Insert the charger into the socket favor of the products of our brand and guarantees a high quality of working of the 3 The charge indicator lamp lights up purchased items if you follow the manual 4 After the battery is fully charged unplug the charger from the socket and the product plug from the hair clipper Note The indicator lamps of both the charger and the hair WHEN USING ELECTRICAL APPLIANCES BASIC PRECAUTIONS SHOULD clipper will not be extinguished or changed after full charge ALWAYS BE FOLLOWED WHICH INCLUDE THE FOLLOWING 1 Read all instructions before use or cleaning Methods for putting on and unloading of comb attachments 2 Do not let cord hang over edge of table or counter or touch hot surfaces 1 To install the comb attachment insert the ledge of one of the locks into the opening on 3 Do not operate appliance with damaged cord or plug or after the appliance the unit body then press on the opposite side of the attachment to fix the second lock malfunctions or has been damaged in any manner If the appliance is damaged or broken do not repair yourself if the power cord or the plug is broken or damaged do not repair or change yourself please send the appliance to qualified service center for repair or service 4 Unplug from outlet when not in use and before cleaning Always hold the plug but never pull the cord 5 Do not use this appliance for any use other than its intended use 2 To remove the attachment press the outstanding part of one of the comb attachment 6 This appliance is for HOUSEHOLD USE only locks pull it down and carefully remove the attachment from the unit body 7 Only the charger included with the product can be used 8 If the charger is damaged it must be replaced with an original type to avoid dangers BEGINNING TO CUT 9 Do pull out the charger before cleaning the cutter head under running water When cutting for the first time it is better to leave the hair somewhat long 10 Do not soak the cutter head in water but just wash then wipe it and dry As you master the use of the clipper you will be able to style as desired 11 The product shall not be used by any person with physical sensory or mental incapability or those lack of relevant experience or knowledge including children Comb attachments unless persons responsible for their safety supervision or give relevant guidance when Hair length depends on the attachment used they use the product Comb attachment Hair length mm 12 Keep an eye on children to ensure that they do not play with the product 1 3 6 13 The product shall be charged fully before being stored which is good for the battery 2 9 12 life МАСЮ Виготовлено на замовлення Прем ер ПаафIк ХК ЛТД 803 8Ф Ю1 Кс1 Б лдIнг 160 174 Локхарт Роад Ван Чай Гонконг 1мпортер ТОВ 0ВРОТЕХН1КА ГЛОБАЛ 02660 м КиТв вул Червоноткацька будинок 83 тел 38 096 000078б Виготовлено в КНР Produced for Premier Pacific HK LTD Room 803 8F Yue Xiu Building 160 174 Lockhart Road Wan Chai Hong Kong Made in PRC 14 If the hair clipper cannot be started it may need charging and it shall be charged for Step 1 16 hours before first use Attach comb attachment 1 3 mm or 6 mm 15 If the problem cannot be solved by means of charging please contact an authorized Hold the appliance with the blade up Begin cutting from the edge of the hair growth area service center fig 1 Slowly move the clipper upward and away from the head 16 Do not immerse cord plug or the body of the appliance in water or other liquids Cut all the hair in the back of the head and around the ears in this way DESCRIPTION 1 Stationary blade Step 2 2 Adjustable blade Turn the clipper off and attach comb attachment 2 9 mm or 12 mm for longer hair and 3 Power switch ON OFF continue to cut the hair closer to the top of the head figure 2 4 Charging indicator 5 Attachment 9 12 mm