
Clarion CC1601A Инструкция по эксплуатации онлайн
Installation/Owner's Manual
CC-1601A
Ultra Wide Angle Compact Color CCD Camera
Thank you very much for your purchase of this Clarion product.
To get the best performance from and to use this device effectively, first read this Installa-
tion/Owner’s Manual thoroughly and then install the device correctly and safely.
Clarion Co., Ltd.
All Rights Reserved. Copyright © 2014 : Clarion Co., Ltd.
SAFETY PRECAUTIONS
Always follow the safety precautions below when installing the device.
WARNING
This device is a rear view camera intended for vehicle installation. Do not use it else-
where except when mounted on a vehicle.
If not, this may result in fuming, fire, electric shock or injury.
Do not attempt to disassemble or modify the unit.
Never disassemble, modify or cut the cable cover to draw power from other devices. Doing so may re-
sult in accident, fire, electric shock or other malfunction.
Do not cut the camera cable
Moisture or water may get inside the camera through the damaged part, resulting in malfunction or fire.
Never use the vehicle's safety-related parts* for mounting or grounding the device.
* Nuts and bolts in the steering system, seat rails, brake system, tanks, etc.
Doing so may result in loss of control, fire or traffic accident.
Never drive while looking at the monitor screen only
The monitor is an auxiliary equipment for checking obstacles and so on but the field of view is limited.
As the actual distance may differ from your perception, make sure you conduct a safety check visu-
ally while driving. Failure to do so may result in a person or object in the camera's blind spot to be hit,
causing a serious accident.
Discontinue use in the event of malfunction or abnormality.
If there is no image, or when there is smoke or strange odors, stop using the camera immediately and
make sure you consult your dealer. Continued use may result in an accident, fire or electric shock.
Do not put water or foreign objects inside the device
In the event water or foreign objects get inside the device, and when there is smoke or strange odors,
stop using the camera immediately and make sure you consult your dealer. Continued use may result
in an accident, fire or electric shock. Make sure you consult your dealer.
Before making connections, disconnect the negative battery terminal.
Failure to do so may result in electric shock or injury due to short-circuit.
Keep the cables away from hot areas
The covering of the cables may melt, causing a short-circuit and resulting in an accident or fire. Pay
particular attention to the wiring inside the engine room.
Engage the services of a professional technician to connect and disconnect.
Failure to do so may result in an accident or fire. Contact the dealer where the device was purchased.
After installation and wiring work, check the operation of the car's electrical compo-
nents
* Brakes, lights, horn, hazard lamps, blinkers, etc.
Malfunctioning equipment may lead to fire, electric shock or traffic accident.
When drilling holes and installing the device on the vehicle side, check the positions of
the pipes, tanks, electrical wiring etc. to make sure there is no interference or contact.
Damage to the pipes etc. may lead to fire or malfunction.
Lay and consolidate the cables so that they do not obstruct the operations
When the cables are wrapped around the steering wheel, shift lever, brake pedal etc., this may result in
accidents.
Reverse the car at a slow speed
The image on the rear monitor uses a wide angle lens. As the actual distance differs from your percep-
tion, reversing at a high speed may risk collision with people and objects, resulting in a serious acci-
dent.
CAUTION
This device is a vehicle-mounted rear view camera. Do not use the device underwater
Doing so may result in smoke, fire, electric shock or injury.
After installation, do not hit or subject this device to strong impacts.
The mounting angle of the camera may change, or the screen may not appear normally. Malfunctions
and damages may also result from the impacts, causing fire and electric shock. Do not subject the
camera to strong impacts as it is a precision machine. Malfunctions and damages may occur, resulting
in fire and electric shock.
Inspect the installation screws occasionally and tighten them if they are loose.
If the screws are loose, the device may become detached and fall off, hitting a passer-by and causing
an accident.
Follow the instructions in the manual when mounting and connecting the device.
Incorrect connection may result in fire or accident.
After mounting the device, check that the monitor image is a mirror image (back mirror).
Incorrect setup may mean that the monitor image is not horizontally flipped, resulting in accident.
The rear view monitor image is inverted on the left and right just like your car's back
mirror.
The viewing angle may differ depending on the vehicle.
Be sure to use the accessories and specified parts.
Using components other than those specified may lead to damage of the parts inside the device or the
inability to secure them firmly, resulting in them becoming detached and leading to an accident or mal-
function.
CAUTION
After wiring the various cords, secure them with clamps and/or insulating tape.
If the cables come into contact with the vehicle side, they will fray and short-circuit, leading to an ac-
cident or fire.
Use protective tubing or insulating grommet when making a hole in the vehicle side to
route the cables.
If the cables come into contact with the openings, they will fray and short-circuit, leading to an accident
or fire.
If a hole is made in the vehicle side to mount the device or route the cables, seal the
gap in the hole and the gap between the hole and the cable with silicon adhesive or
something similar.
If exhaust gas or water gets inside the vehicle through the gap, it may result in an accident.
Route the cables so that they do not get caught in the vehicle side, screws, seat rails or
other moving parts.
Damaged or short-circuited cables may result in an accident, electric shock or fire.
When mounting the camera outside the car, make sure it is mounted within the range
stipulated under the law.
If the screws in the vehicle side are used to mount the device, be sure to tighten them
securely.
Loose screws may result in an accident or malfunction.
PRECAUTION
This equipment has been tested and found to comply with the limits for a Class B digital device,
pursuant to Part 15 of the FCC Rules.
These limits are designed to provide reasonable protection against harmful interference in a resi-
dential installation.
This equipment generates, uses, and can radiate radio frequency energy and, if not installed and
used in accordance with the instructions, may cause harmful interference to radio communica-
tions. However, there is no guarantee that interference will not occur in a particular installation.
If this equipment does cause harmful interference to radio or television reception, which can be
determined by turning the equipment off and on, the user is encouraged to consult the dealer or
an experienced radio/ TV technician for help.
INFORMATION FOR USERS:
CHANGES OR MODIFICATIONS TO THIS PRODUCT NOT APPROVED BY THE MANUFACTUR-
ER WILL VOID THE WARRANTY AND WILL VIOLATE FCC APPROVAL.
PACKAGE CONTENTS
This device consists of the following components.
In the event of any defect, contact the retailer where it was purchased.
1
Main camera unit ................................................................................................................... 1
2
Mounting bracket ................................................................................................................... 1
3
Installation/Owner’s Manual ................................................................................................... 1
4
Grommet ............................................................................................................................... 1
Accessory bag ����������������������������������������������������������������������������������������������������������������������������������1
5
Hexagon head bolts with built-in washer (M4 mm x 10 mm)
(for installing on the main unit) ................................................................................................ 4
6
M4 bush (for installing on the main unit) .................................................................................. 4
7
Hexagon head bolts with built-in washer (M5 mm x 20 mm)
(for installing on the vehicle side) ............................................................................................ 2
8
Flanged nuts (M5 mm) (for installing on the vehicle side) ......................................................... 2
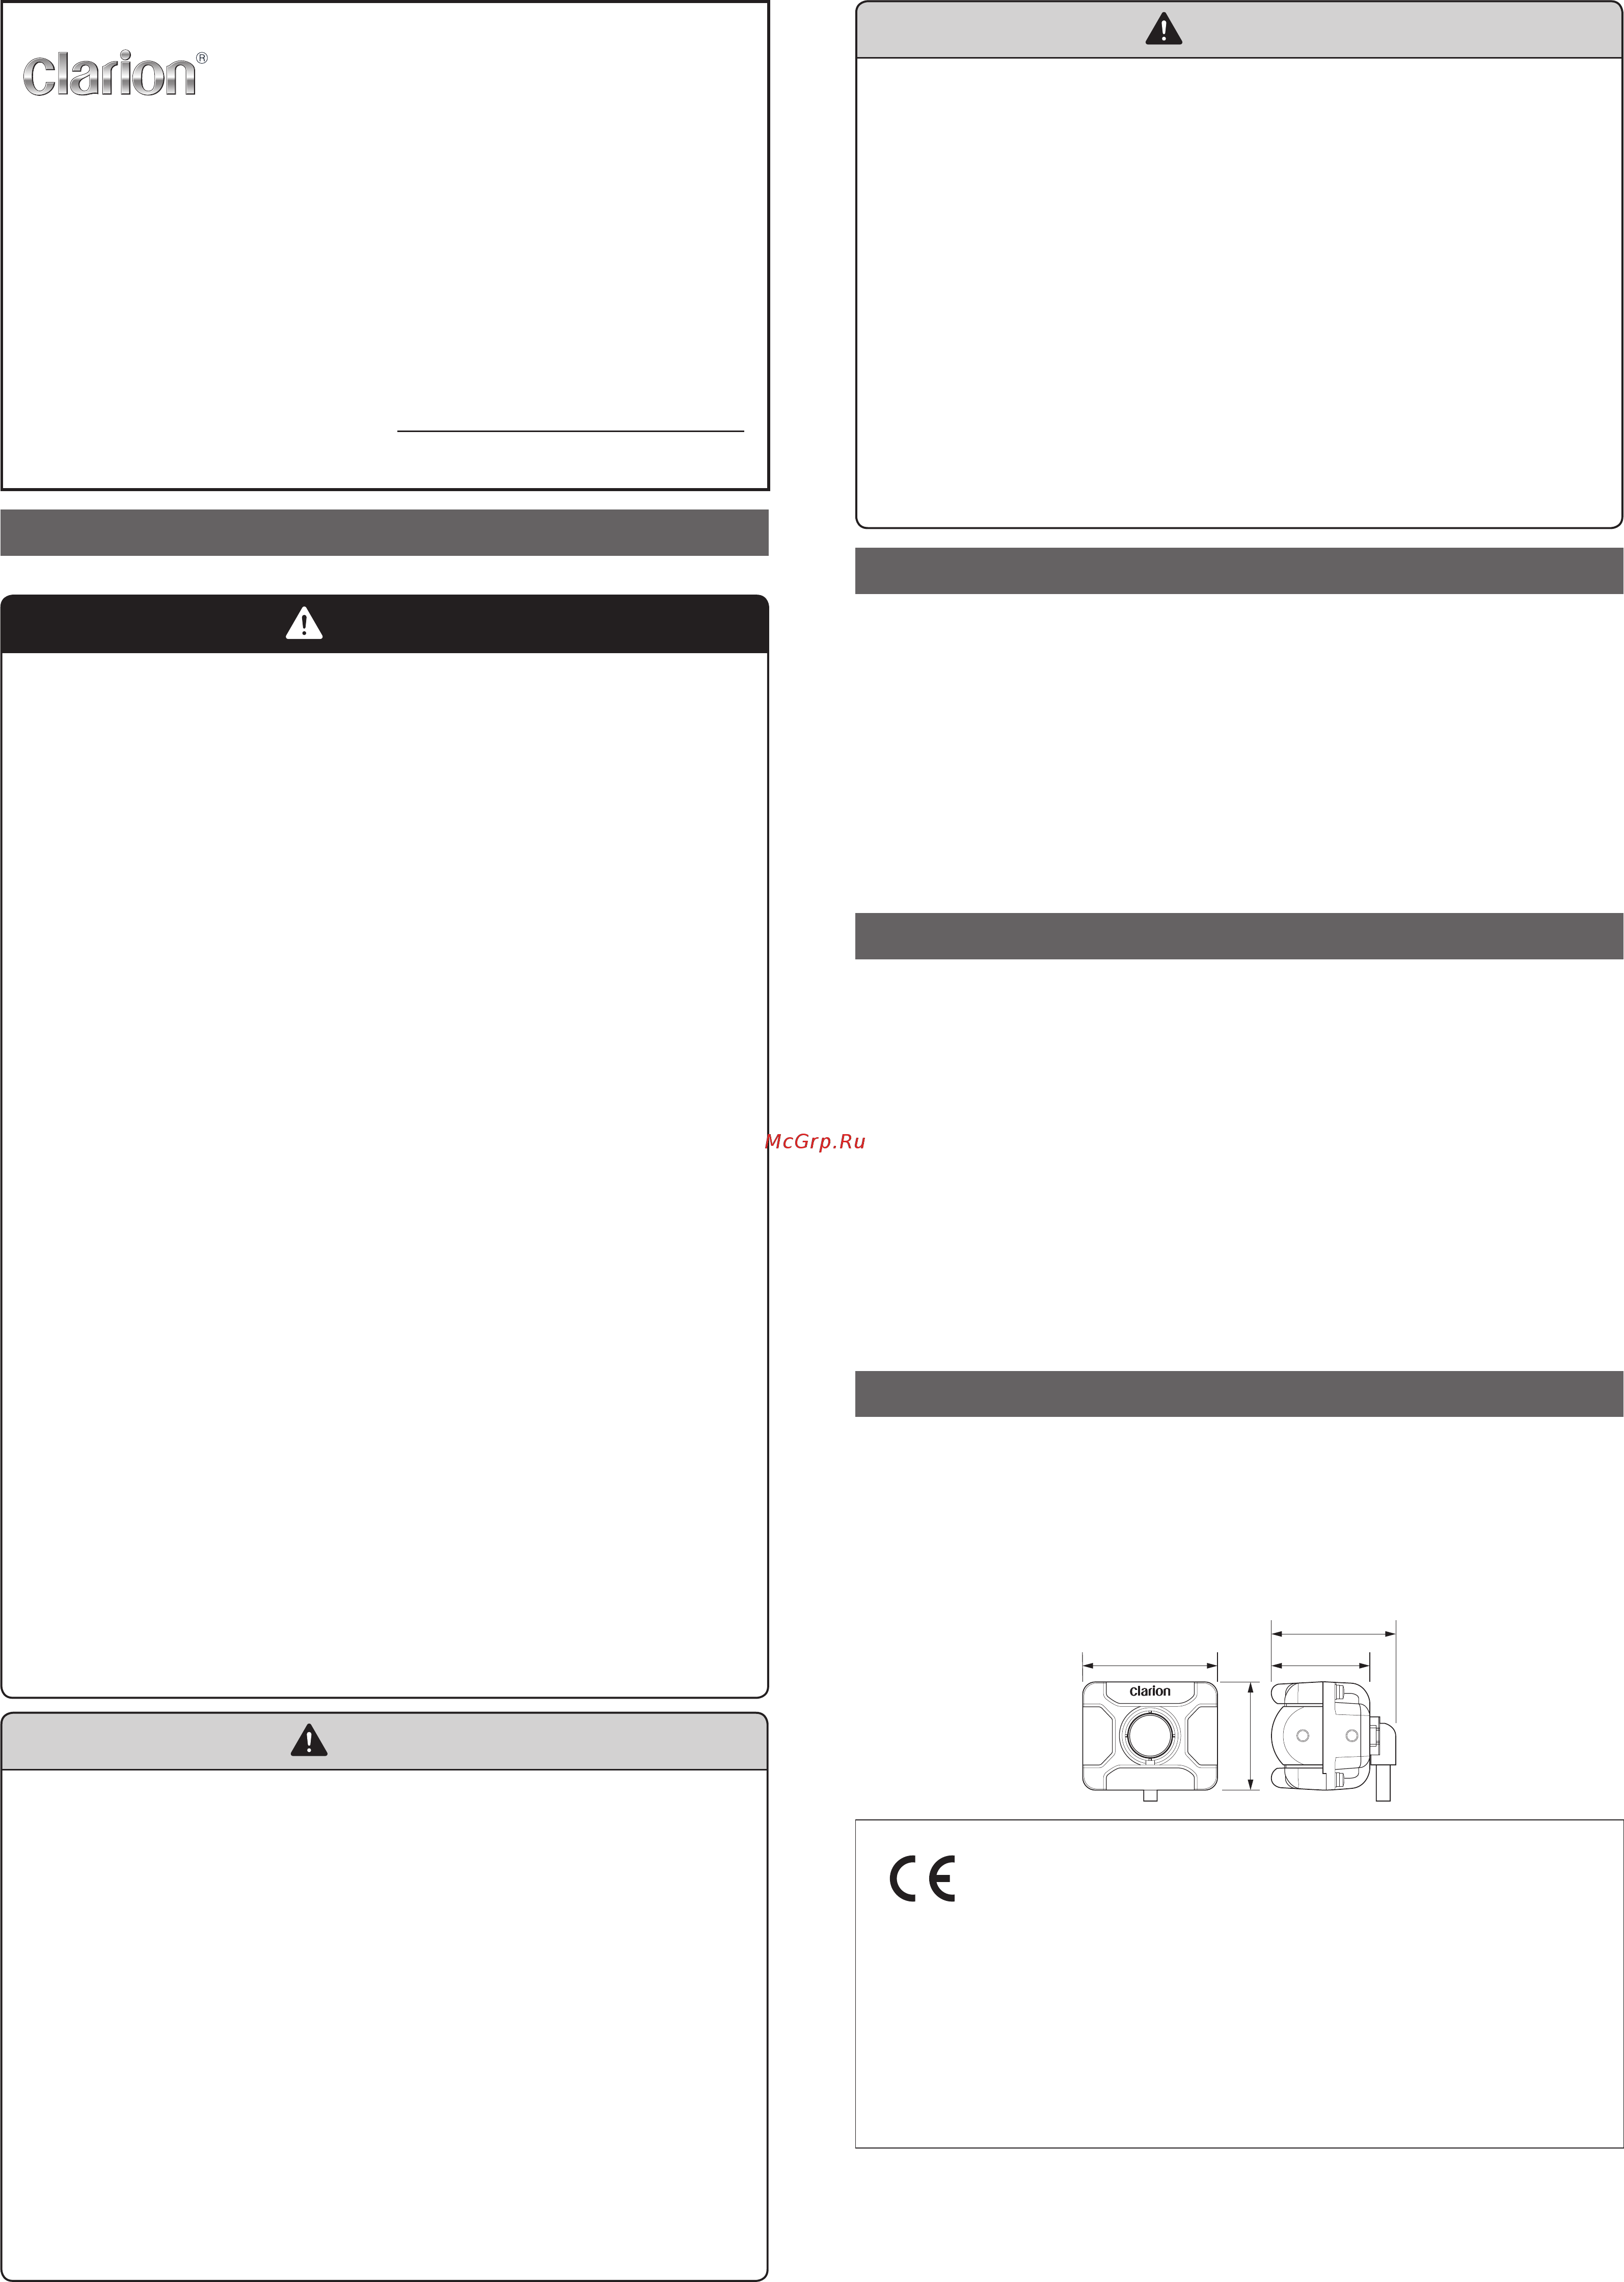
SPECIFICATIONS
Power Supply Voltage : DC9.0V± 0.5V
Current Consumption : 150mA or less
Image Sensor : 1/4 inch 0.25 mega-pixel color CCD
Image Angle : Horizontal 162°/ Vertical 129.8°
S/N Ratio : 36dB & above
Weight : 145g (including the cable)
External Dimensions of Main Unit : 46(W) x 37(H) x 33.8(D) mm
46 mm
37 mm
33.8 mm
42.3 mm
Declaration of conformity
We Clarion declares that the product CC-1601 is following the provision of Directive
2004/108/EC and Directive 2011/65/EU.
Authorized Representative
Clarion Europe S.A.S.
Z.I. du Pré à Varois, Route de Pompey, 54670 Custines, France
Telephone: +33 (0)3 83 49 44 00 Fax: +33 (0)3 83 49 45 99
Printed in Japan 2014/3
CC1601A 274-0616-00
Содержание
- Caution 1
- Cc 1601a 1
- Clarion co ltd 1
- Installation owner s manual 1
- Package contents 1
- Precaution 1
- Safety precautions 1
- Specifications 1
- Ultra wide angle compact color ccd camera 1
- Warning 1
- After adjusting the camera mounting angle fully tighten the screws that have been secured temporarily to secure the main camera unit 2
- After connecting the cables adjust the mounting angle of the camera so that the rear bumper or back end of the vehicle appears in the monitor refer to the figure on the right 2
- Align the marking on each connector and turn the nut with your hand to tighten it until it stops 2
- Cleaning the camera 2
- Drill two installation holes of diameter 5 5 mm in the vehicle side 2
- How to connect the special waterproof relay cable sold separately 2
- How to install 2
- Installation example 2
- Make sure you apply sealing material sealant etc around the installation holes for mounting the mounting bracket to the vehicle side screws and car cable ducts to prevent water ingress and rust 2
- See the wiring instructions on how to lay the cables 2
- Set a spanner for 17 mm nuts to the nut of each cable from the hand tightening position and turn the nut on the camera side about half a turn 180 secure the relay cable side so that it does not rotate when doing so 2
- Troubleshooting 2
- Use the enclosed screws and bush to temporarily secure the main camera unit to the mounting bracket 2 locations on the left and right each 2
- Use the enclosed screws and flange nuts to firmly secure the mounting bracket to the vehicle side 2 locations 2
- Wiring and connections 2
- Wiring example 2
Похожие устройства
- Homa H700B/3,5 DA Инструкция по эксплуатации
- Homa H700B/3,5 DA Технические данные
- Clarion CC2001E Инструкция по эксплуатации
- Clarion CC4001U Инструкция по эксплуатации
- Homa H700B/7,5 D Инструкция по эксплуатации
- Clarion CC6500E Инструкция по эксплуатации
- Polaris PCM 1538E Adore Crema Инструкция по эксплуатации
- Homa H700B/7,5 D Технические данные
- Clarion CC6600E Инструкция по эксплуатации
- Clarion EE2179E Инструкция по эксплуатации
- Homa H700B/7,5 DA Инструкция по эксплуатации
- Homa H700B/7,5 DA Технические данные
- Homa H700B/10 D Инструкция по эксплуатации
- Homa H700B/10 D Технические данные
- Clarion CJ5600E Инструкция по эксплуатации
- Clarion CJ7100E Инструкция по эксплуатации
- Homa H700B/10 DA Инструкция по эксплуатации
- Homa H700B/10 DA Технические данные
- Clarion CJ7300G Инструкция по эксплуатации
- Clarion CJ7500E Инструкция по эксплуатации