
Streacom NC2 Fanless Chassis Инструкция онлайн
NC2 Overview
1...... Top Panel / Heatsink
2...... Integrated Power Button
3...... Back Panel
4...... Acrylic Side Panels (x2)
5...... CPU Mount
6...... Front Panel
7...... Bottom Panel
8...... VESA Mounts (Optional)
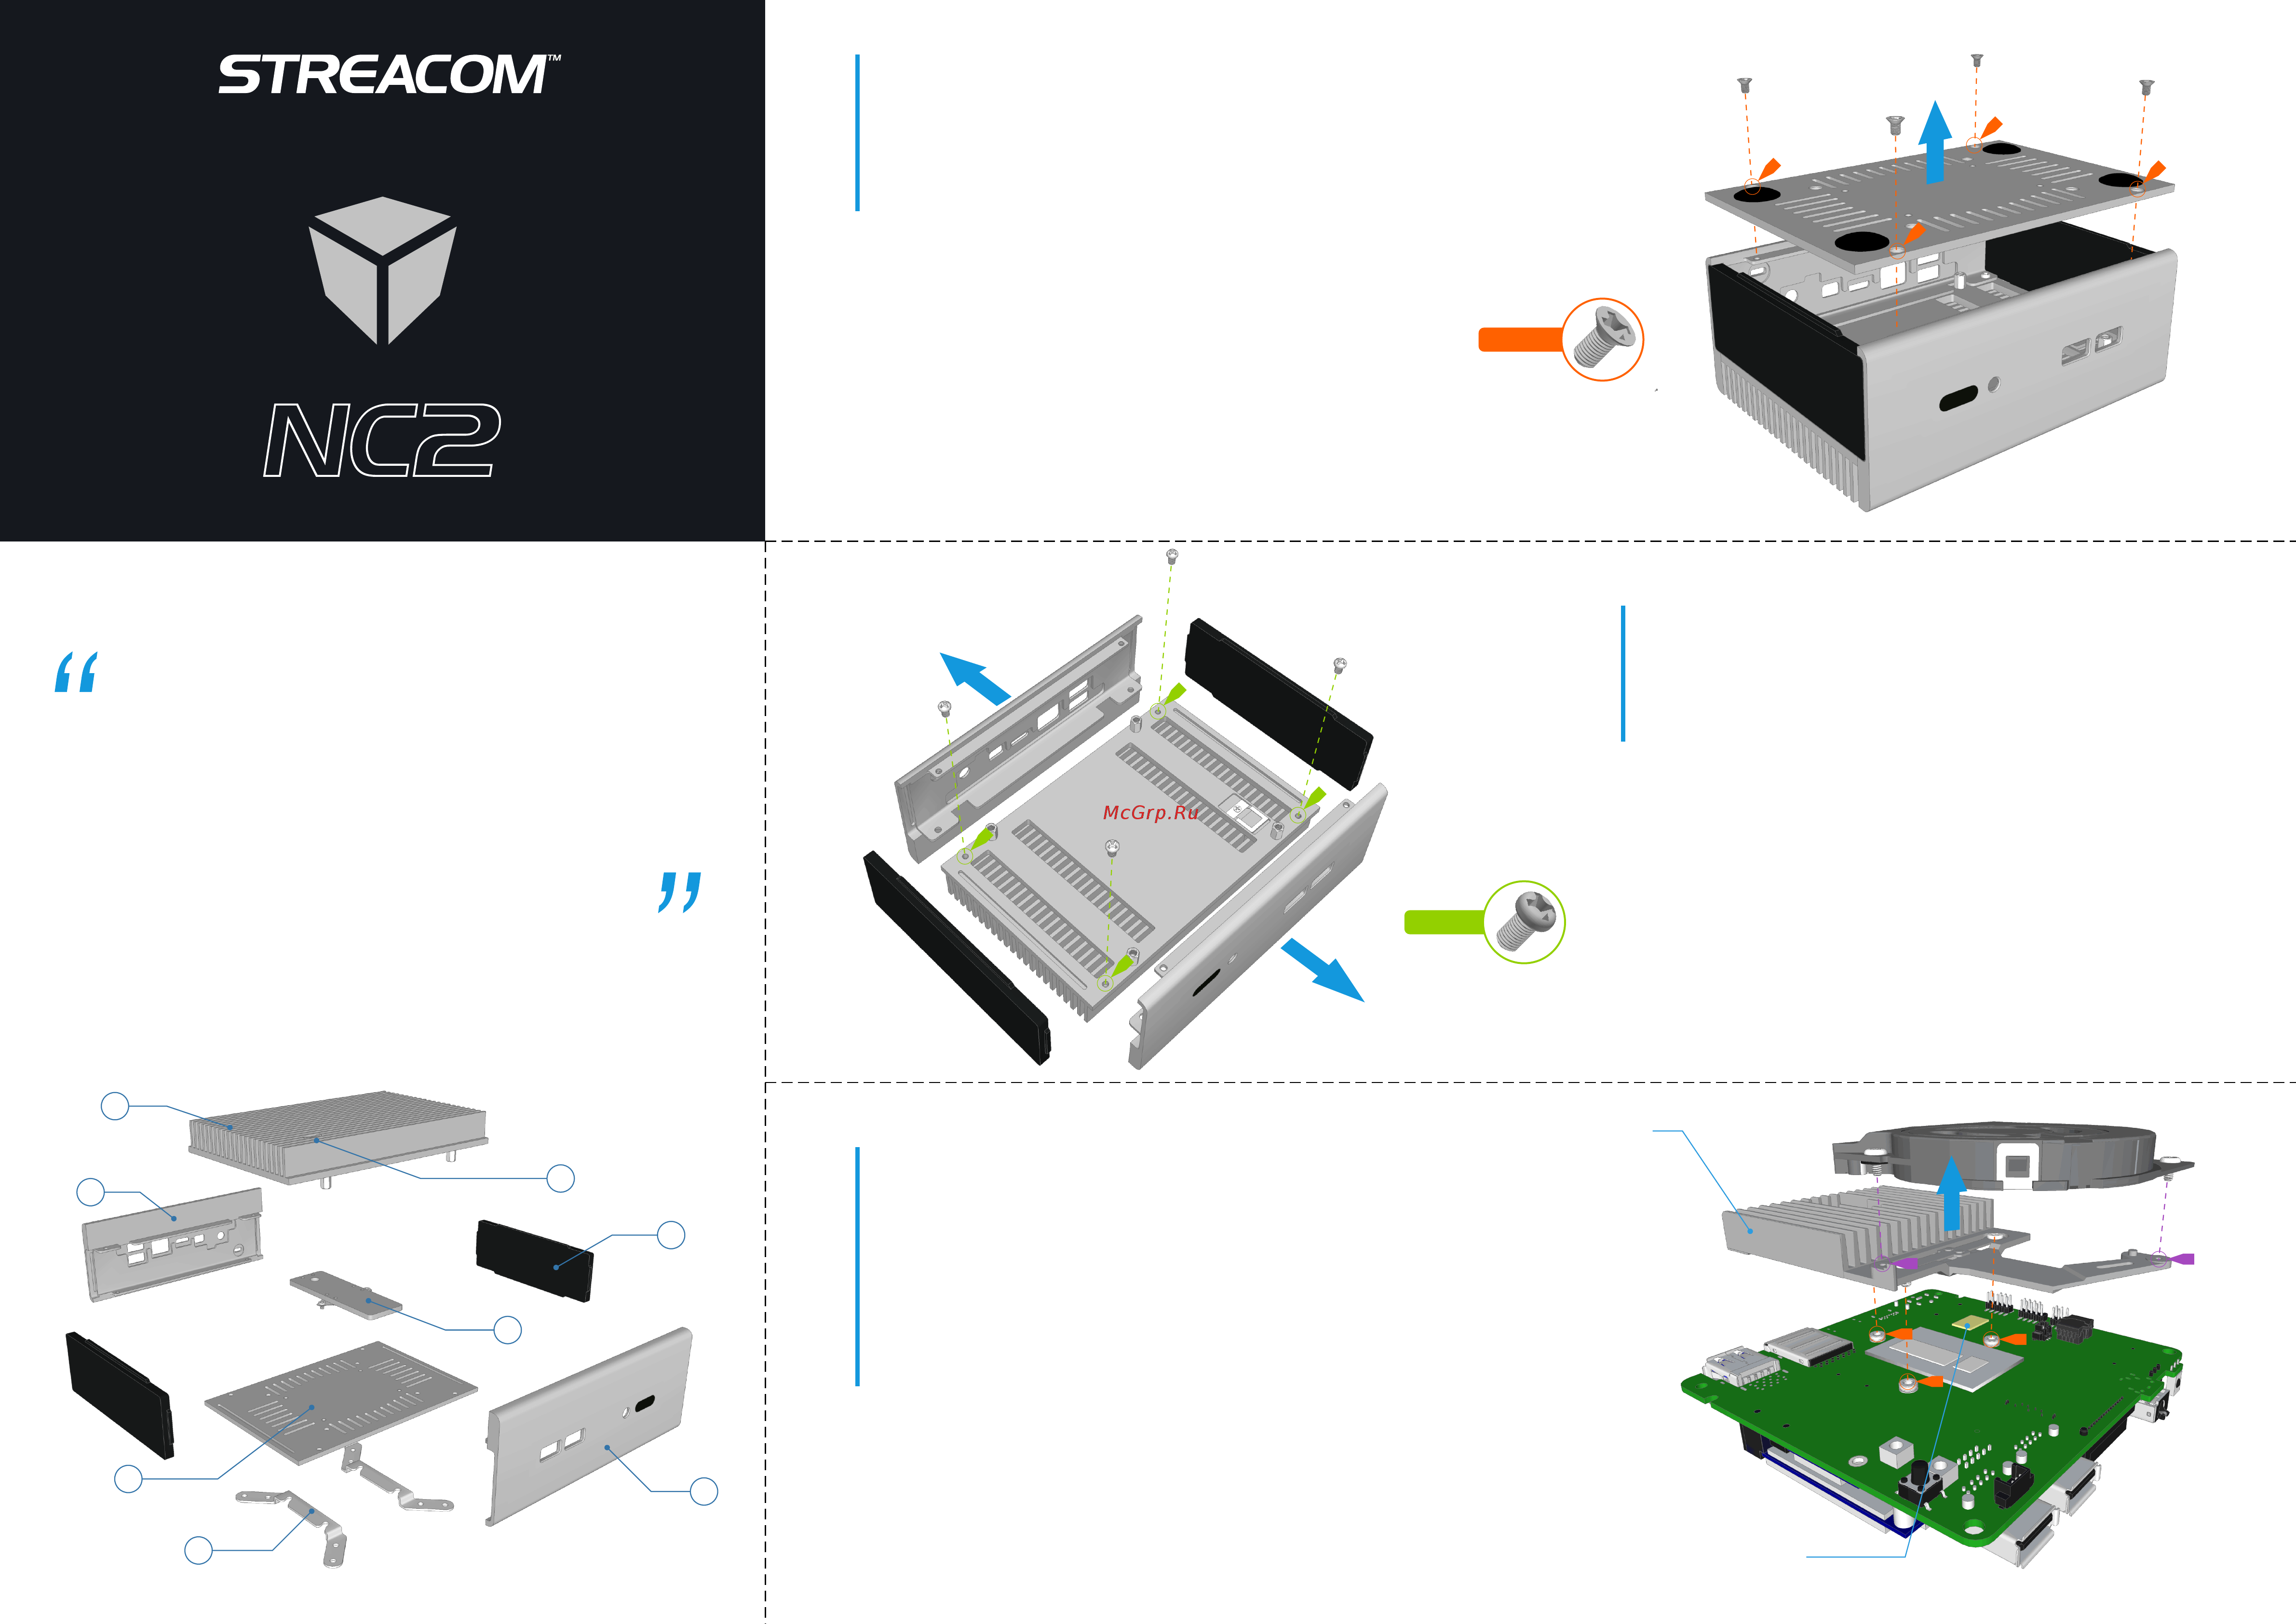
Remove the bottom panel
With the case turned upside down, remove the 4 screws which secure the bottom panel in
place. The bottom panel will lift off. Note that the design is universal, so you don't need to
worry about which direction the front is when replacing it.
As with every step in this guide, please keep the screws safe and be aware of the different type
of screws.
1
Remove the front, back and side panels
Remove the front and back panels which are secured to the top panel by 4 screws (2 each).
With the front and back panels unscrewed from the top panel, the acrylic side panels can be
easily removed. Again, the sides are universal, so you don't need to worry which is left or right,
but do pay attention to the front and back panel. When assembling, the front panel must be
replaced to the side closest to the power button.
2
Prepare the NUC motherboard
Before fitting the motherboard, remove the stock fan and cooler secured in place by 5
screws, 2 for the fan, 3 for the cooler. The cooler might require a little force to remove as
there is thermal paste holding it to the CPU, but be careful not to pry too hard. Clean any
residual thermal paste from the CPU which is left over from the original cooler assembly.
You will also notice two contact areas for cooling, one is the CPU and the other is the chipset.
This might vary for different NUC models and CPU’s, but the basic principle is the same for all
models. Typically the chipset connects to the cooler assembly with a thermal pad. Please
ensure that this pad remains on the chipset as it is ESSENTIAL for ensuring proper contact
and thermal conductivity with the chipset.
3
1
2
3
4
5
6
7
8
Thermal Pad
A Message from the Streacom Team
Thank you for choosing Streacom! In a market dominated by generic and uninspired products, we
are on a mission to break the mold, not only of design, but materials and finish. This is a value that
is not easily conveyed in an industry preoccupied with specs and numbers, so your choice shows an
appreciation and understanding of what makes our products different, and we sincerely thank you
for that.
Every care has been taken to ensure that this product meets the highest quality and standards we
have defined. If anything about this product falls short of your expectations or you have any
questions that are not covered in this user guide, please contact us online at
www.streacom.com/contact. We respond to every question received and your feedback is a
critical part of our ongoing product development and refinement.
From everyone at Streacom, we hope that you enjoy using our product!
CS-M3x5
PH-M3x4
Stock Cooler
Содержание
Похожие устройства
- Streacom F1C Evo Chassis Инструкция
- Streacom FC5 Alpha Fanless Chassis Инструкция
- Streacom F7C Alpha Chassis Инструкция
- Streacom FC8 Alpha Fanless Chassis Инструкция
- Streacom FC9 Alpha Fanless Chassis Инструкция
- Streacom FC10 Alpha Fanless Chassis Инструкция
- Streacom F12C Chassis Инструкция
- Streacom BC1 Mini Open Benchtable Инструкция
- Streacom ZF240 Fanless 240W ZeroFlex PSU Инструкция
- Streacom DA2 Performance Acrylic Panel Kit Инструкция
- Streacom HT4 Thermal Riser Инструкция
- Streacom LH6 CPU Cooling Kit for DB4 Инструкция
- Streacom GPU Cooling Kit for DB4 Инструкция
- Streacom FLIRC-SE – Adaptive IR Receiver Инструкция
- Streacom FC5 WS Fanless Chassis Техническая спецификация
- Streacom FC5 WS Fanless Chassis Инструкция
- Streacom F1C Chassis Техническая спецификация
- Streacom F1C Chassis Инструкция
- Streacom F7C Chassis Инструкция
- Streacom F7C Chassis Техническая спецификация