
Popcorn Hour A-200 Upgrade Kit Hard Disk Installation Guide онлайн
A-210 Upgrade Kit Hard Disk Installation Guide
25.5 cm (H)
38 cm (W)
Steps Installation
Installation Guide for Popcorn Hour A-210 aluminum case
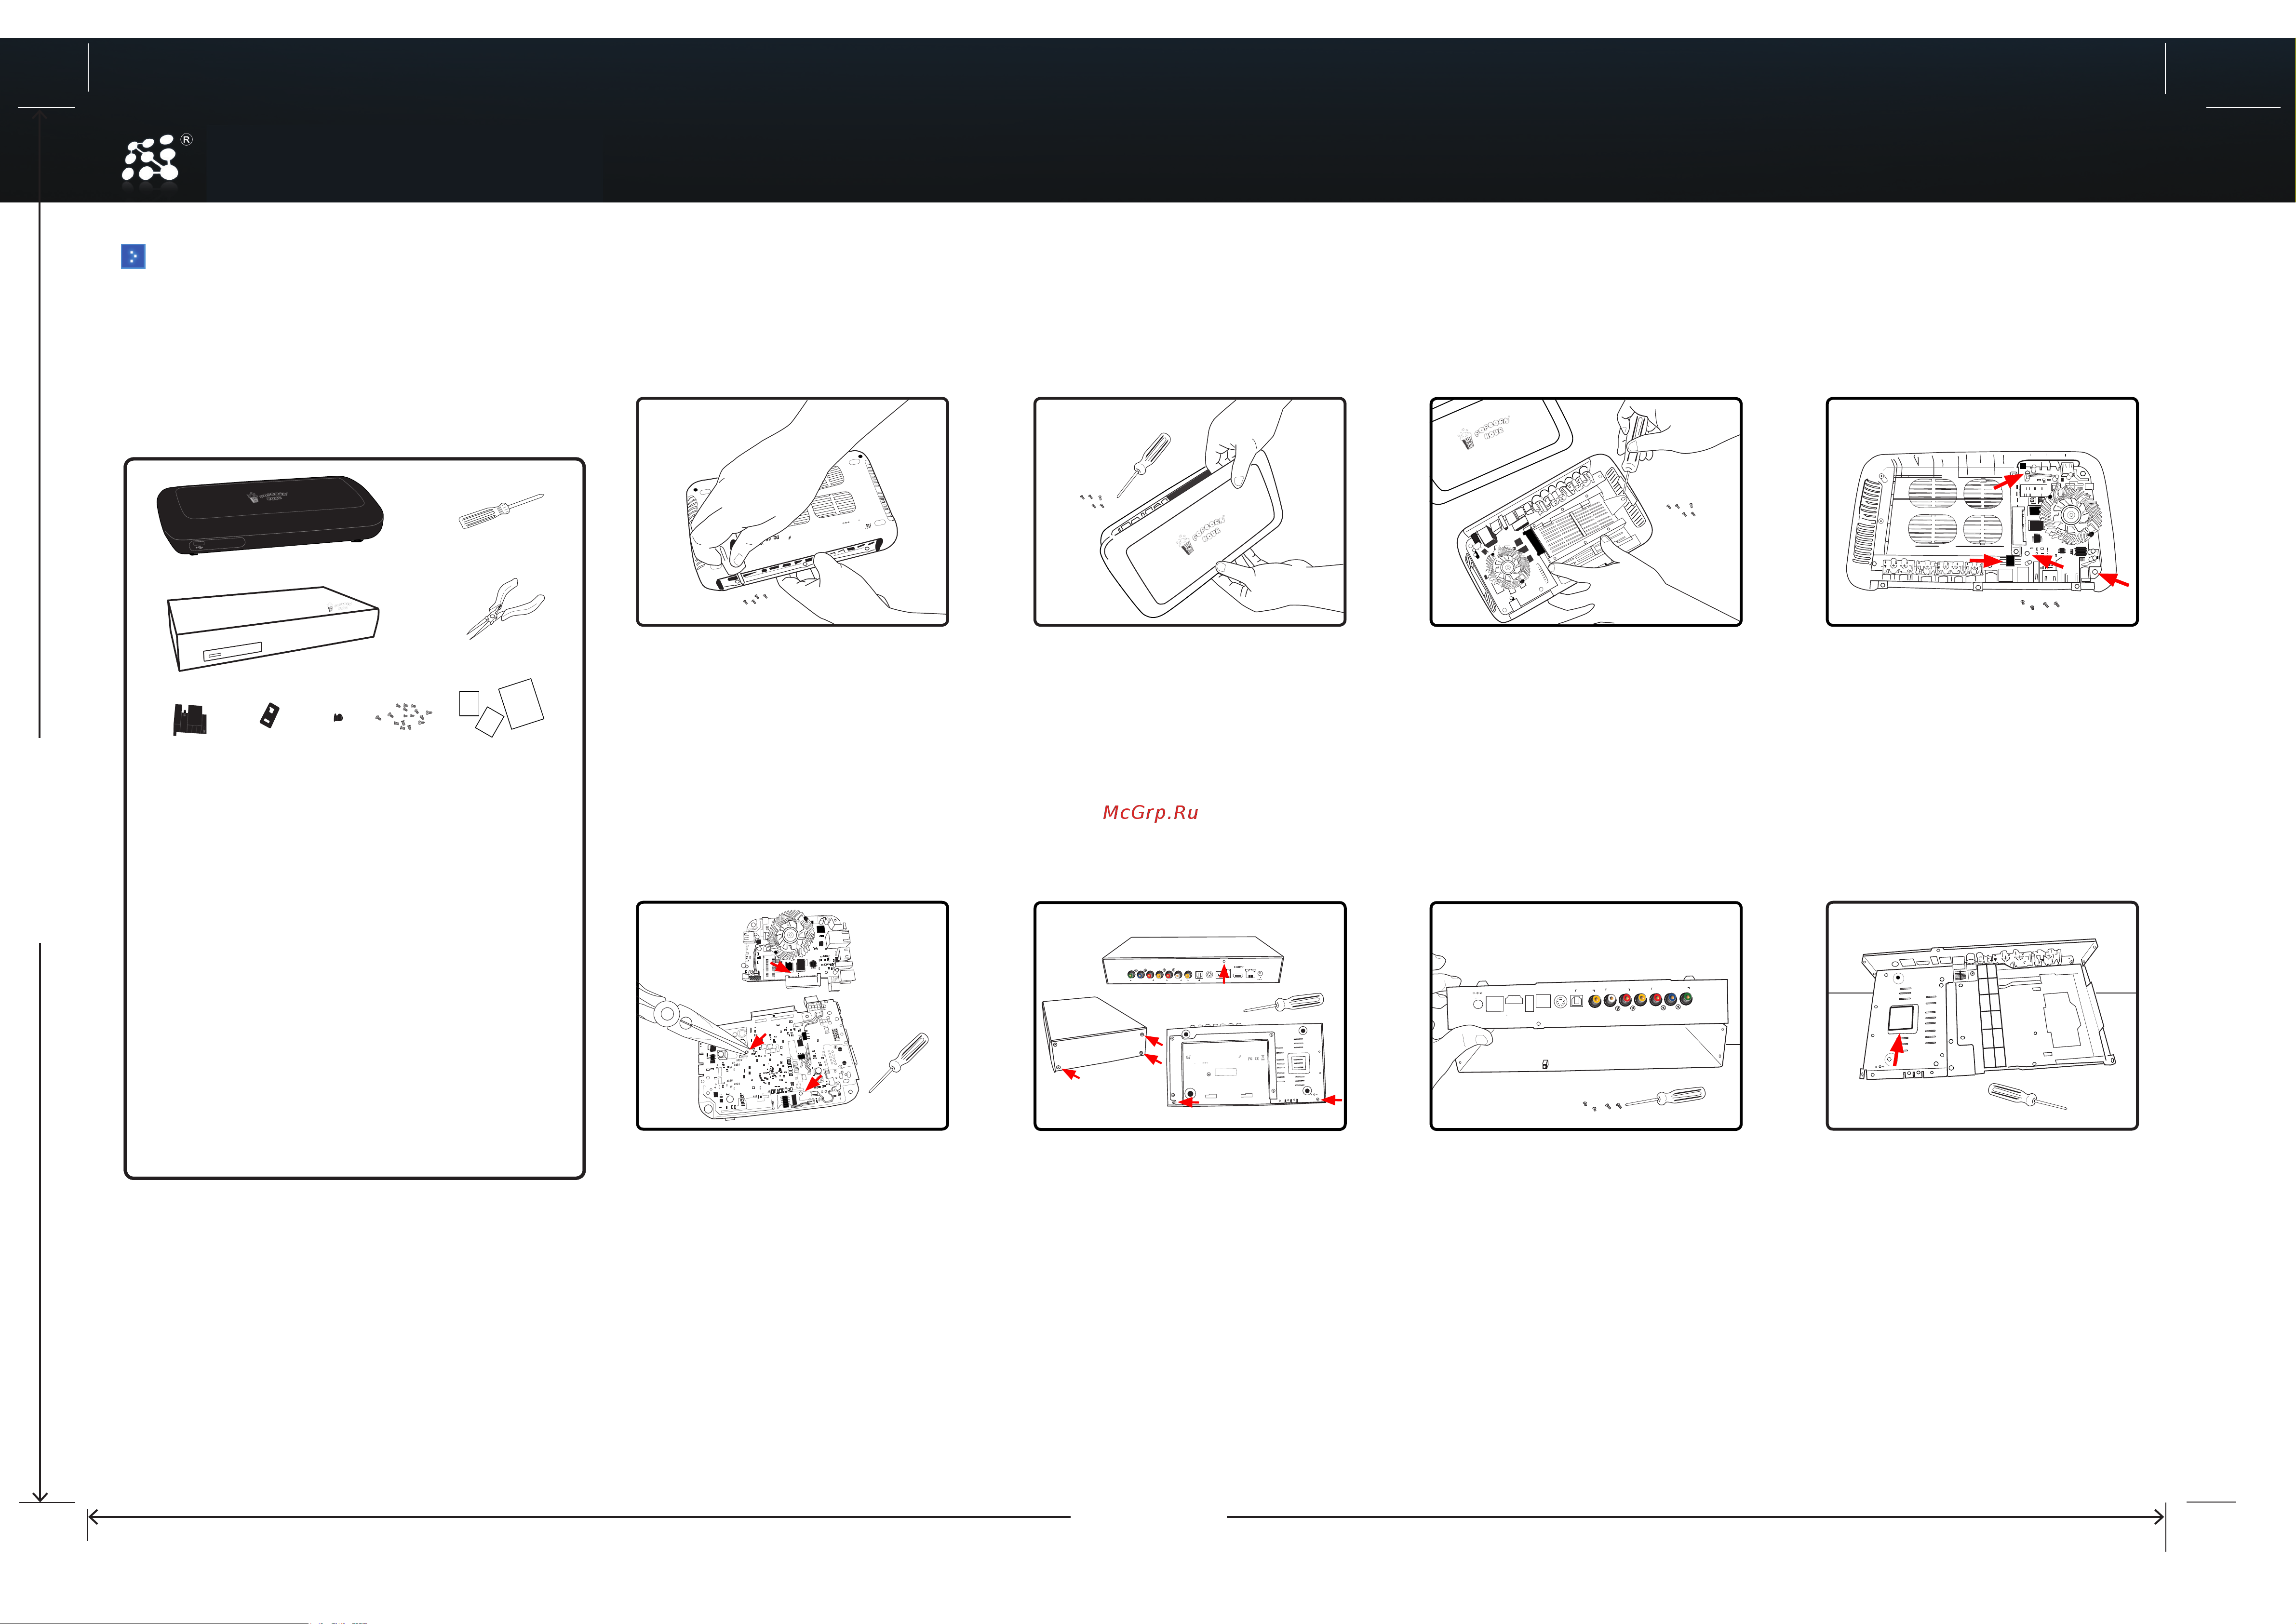
Step 4
Remove the PCB from A-200 case.
1. Unscrew 3 screws holding the PCBA to
the case.
2. Lift up the PCBA but be careful of the
connector connecting the extension board.
Step 1
Flip the A-200 over to show it ’s underside.
Remove the 2 screws located at the front of the
device near the rubber pads, then remove the 3
screws located at the back of the devive at the
protruding ledge.
Step 2
Turn the A-200 so that the top logo is facing you.
Grasp the lid at the back of the device and gently
lif t it towards you. The lid will come free with a
loud click. Set the lid aside.
Step 3
Inside the A-200, remove the screw on the right
of the plastic HDD tray. Gently side the tray to
the right to remove it.
Step 5
Remove fan from PCBA.
1. Disconnect the fan power pin.
2. Flip the PCBA and locate 2 pin as shown, use
a plier to squeeze the pin out carefully.
3. The fan should pop out now, you may place
the fan aside.
Step 6
Preparing the A-210 upgrade kit.
1. Remove 3 screws from both sides of the A-210
case as shown. DO NOT remove the 4th screw,
crossed out in the diagram.
2. Remove 1 screw from the back panel.
3. Flip the case and remove 2 screws from side.
Step 7
Remove the top cover of A-210 case.
1. With all the required screws removed, lift up
the bottom piece carefully.
Networked Media Tank
RoHS
Step 8
Applying thermal rubber to case.
(require Thermal Rubber 27x27x1.6mm packet)
1. Remove thermal rubber from packet, peel of f
protective transparent seal from both side.
2. Apply it to the case as shown above.
0006DC807015
412000800075
QC
Pass
QC
Pass
0006DC807015
412000800075
JAPAN
back
front
6
RoHS
side
rear
Y
Pb
Pr
COMPONENT VIDEO
CVBS
AUDIO OUT
COAX
OPTICAL
R
L
S/PDIF
S-VIDEO
USB-PC
USB
HDMI
ETHERNET
ACT LNK
POWER
What you need:
1. Popcorn Hour A-200
2. Popcorn Hour A-210 case
3. Philips head screw driver
4. Long nose Plier
Found in contents of A-210 case upgrade kit
1. Heat-sink
2. Thermal Rubber 50x50x2.6mm
3. Thermal Rubber 27x27x2.8mm
4. Thermal Rubber 27x27x1.6mm
5. LED Guide
6. PCB Spacer
7. Screws for LED Guide
8. Screws for PCB Spacer
9. Screws for heat-sink
Popcorn Hour A-210 case
Popcorn Hour A-200
Philips head screw driver
Long nose Plier
Thermal Rubber
LED Guide PCB SpacerHeat-sink Screws
Содержание
Похожие устройства
- Popcorn Hour A-200 Инструкция по эксплуатации
- Popcorn Hour A-110 Инструкция по эксплуатации
- Popcorn Hour A-110 Краткое руководство
- Sony NEX-5 Краткое руководство
- Sony NEX-5 Инструкция по эксплуатации
- Epson EB-S6 Сохранение руководства на компьютере
- Epson EB-S6 Инструкция по эксплуатации
- Epson EB-S6 Просмотр руководства
- Epson EB-S6 Краткое руководство
- Epson EB-S6 Руководство пользователя
- Epson EB-S12 Руководство пользователя
- Epson EB-S12 Сохранение руководства на компьютере
- Epson EB-S12 Наклейка С Уведомлением О Защите Паролем
- Epson EB-S12 Open Source Software License
- Epson EB-S12 Краткое руководство
- Epson EB-S12 Инструкция по эксплуатации
- Acer TRAVELMATE B113-E Краткое руководство
- Acer TRAVELMATE B113-E Инструкция по эксплуатации
- Falcon Eye FE-MDV1080/15M Инструкция по эксплуатации
- Falcon Eye FE-IS1080/50M Инструкция по эксплуатации
Скачать
Случайные обсуждения