
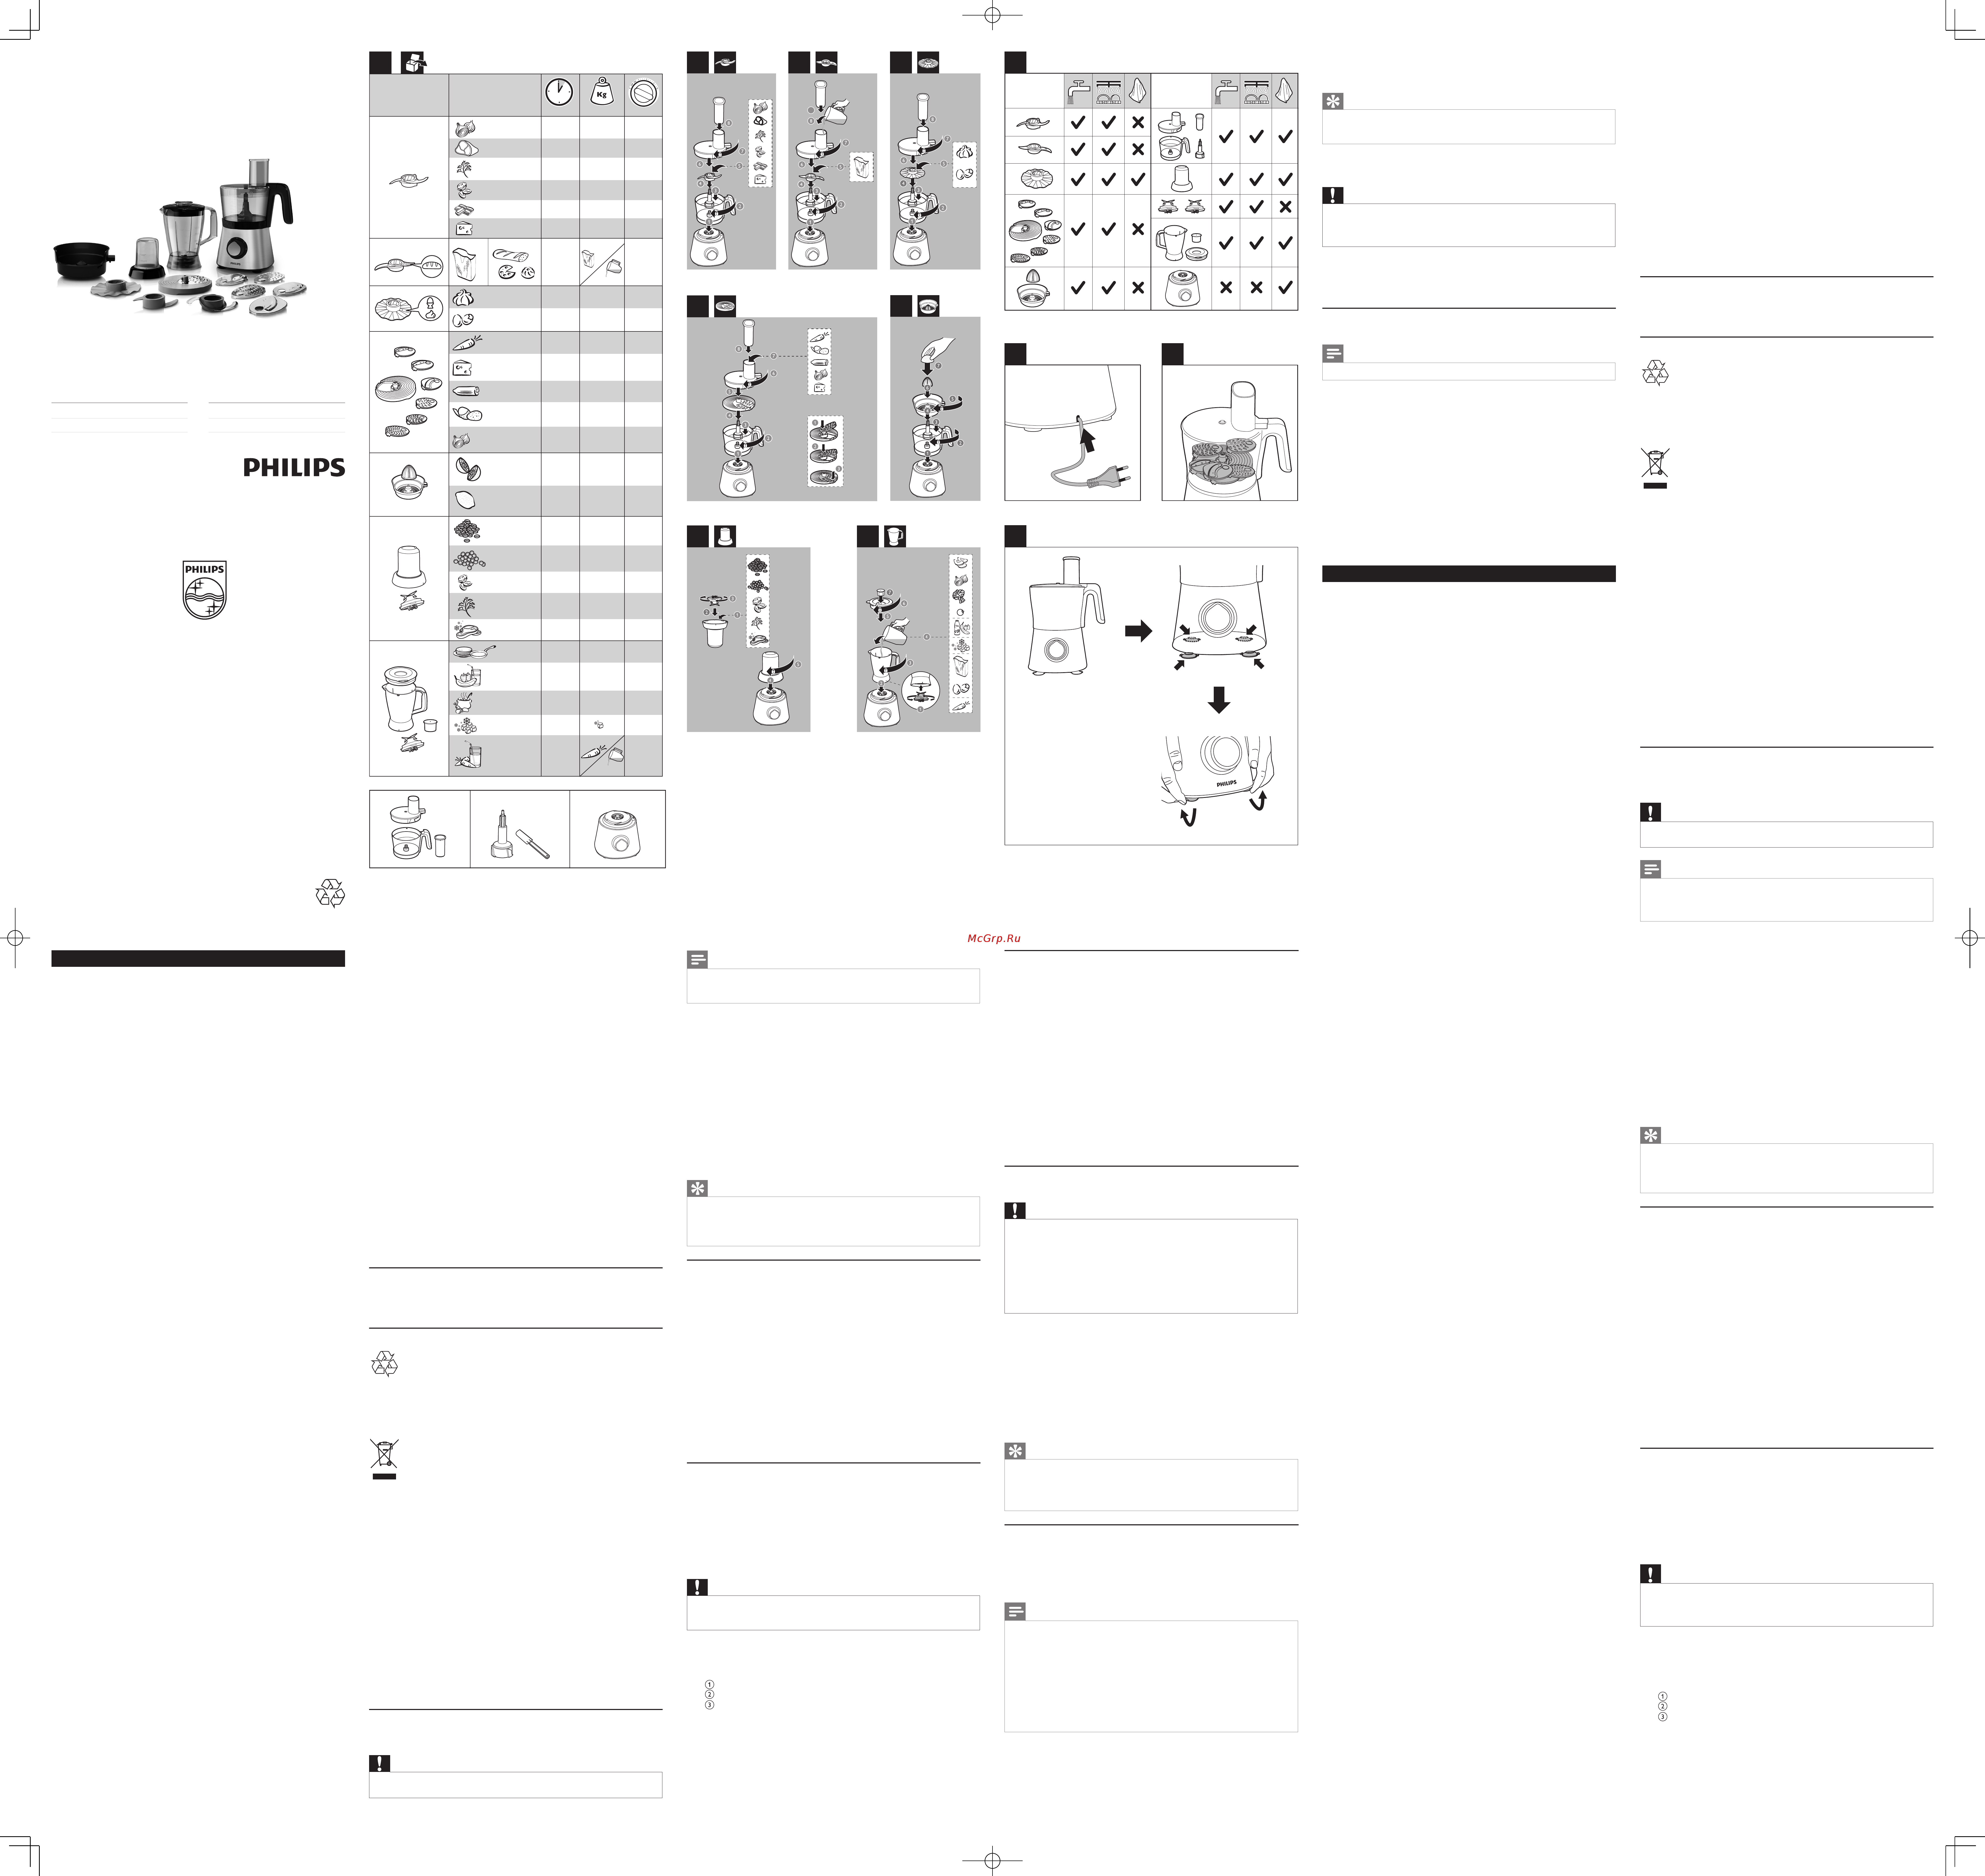
Philips Viva Collection HR7769/00 Инструкция по эксплуатации онлайн
Register your product and get support at
HR7769
www.philips.com/welcome
Specifications are subject to change without notice
© 2013 Koninklijke Philips Electronics N.V.
All rights reserved.
HR7769_RU_UM_V1.0
3140 035 36881
1
(MAX)
5 x 1 sec 500 g
5 x 1 sec 500 g
30 sec 50 g
60 sec 250 g
45 sec 250 g2
30 sec 200 g2
2-3 min
360 ml
350 ml
4 pcs
1
1
1
2
P/2
P
1
30 sec2 pcs1
30 sec 500 g1
30 sec 300 g1
30 sec 200 g1
30 sec 500 g1
60-180 sec
60-180 sec
400 g
1 min1 L
1 min1 L
1 min1 L
3 min
600 ml
P
P x 9
6 x
30 sec 40 g
30 sec 70 g
30 sec 40 g
30 sec 50 g
2
2
2
2
2
2
2
2
5 sec 100 gP
6
4 min 1 kg 1
20 sec 500 g1
2
43
5
87
12
9
500 g
11
10
English
1 Important
Read this user manual carefully before you use the appliance, and save the user manual for
future reference.
Danger
• Do not immerse the motor unit in water nor rinse it
under the tap.
Warning
• Neveruseyourngersoranobjecttopush
ingredientsintothefeedingtubewhiletheappliance
isrunning.Onlyusethepusher.
• Before you connect the appliance to the power, make
surethatthevoltageindicatedonthebottomofthe
appliancecorrespondstothelocalpowervoltage.
• Never connect this appliance to a timer switch, to
avoid a hazardous situation.
• Do not use the appliance if the power cord, the
plug,protectingcover,oranyotherpartsare
damagedorhasvisiblecracks.
• Ifthepowercordisdamaged,youmusthaveit
replaced by Philips, a service center authorized by
Philips,orsimilarlyqualiedpersonstoavoidahazard.
• This appliance shall not be used by children. Keep
the appliance and its cord out of reach of children.
• This appliance can be used by persons with reduced
physical, sensory or mental capabilities or lack of
experienceandknowledgeiftheyhavebeengiven
supervisionorinstructionconcerninguseofthe
appliance in a safe way and if they understand the
hazards involved.
• For their safety, do not allow children to play with
the appliance.
• Never let the appliance run unattended.
• Iffoodstickstothewalloftheblenderjarorbowl,
switchofftheapplianceandunplugit.Thenusea
spatula to remove the food from the wall.
• Be careful when you handle or clean the discs, the
blade unit of the food processor, and the blade unit
oftheblender.Thecuttingedgesareverysharp.
• Do not touch the blades, especially when the
applianceispluggedin.Thebladesareverysharp.
• Ifthebladesgetstuck,unplugtheappliancebefore
youremovetheingredientsthatblocktheblades.
• Be careful if hot liquid is poured into the food
processororblenderasitcanbeejectedoutofthe
applianceduetoasuddensteaming.
• This appliance is intended for household only.
Caution
• Neverswitchofftheappliancebyturningthe
blenderjar,thebowl,ortheirlids.Alwaysswitchoff
theappliancebyturningthespeedselectorto0.
• Unplugtheapplianceimmediatelyafteruse.
• Alwayswaituntilthemovingpartsstoprunning,
thenswitchoffandunplugtheappliancebefore
openingthelidandreachingintoanyoftheparts
that move in use.
• Beforeyouremove,cleanorchangetheaccessories,
switchoffandunplugtheappliance.
• Thoroughlycleanthepartsthatcomeintocontact
withfoodbeforeyouusetheappliancefortherst
time.
• Never use any accessories or parts from other
manufacturersorthatPhilipsdoesnotspecically
recommend. If you use such accessories or parts,
yourguaranteebecomesinvalid.
• Do not exceed the maximum level indication on the
bowlorthejar.Followthequantities,processing
time nd speed as indicated in the user manual.
• Lethotingredientscooldown(<80ºC)before
processingthem.
• Alwayslettheappliancecooldowntoroom
temperature after each batch that you process.
• Certainingredientsmaycausediscolorationsonthe
surfaceoftheparts.Thisdoesnothaveanegative
effect on the parts. The discolorations usually
disappear after some time.
• Noiselevel=83dB(A)
Electromagnetic elds (EMF)
ThisPhilipsappliancecomplieswithallapplicablestandardsandregulationsregarding
exposuretoelectromagneticelds(EMF).Ifhandledproperlyandaccordingtothe
instructionsinthisusermanual,theapplianceissafetousebasedonscienticevidence
available today.
Recycling
Yourproductisdesignedandmanufacturedwithhighqualitymaterialsandcomponents,
which can be recycled and reused.
When you see the crossed-out wheel bin symbol attached to a product, it means the
productiscoveredbytheEuropeanDirective2002/96/EC:
Never dispose of your product with other household waste. Please inform yourself about
the local rules on the separate collection of electrical and electronic products. The correct
disposalofyouroldproducthelpspreventpotentiallynegativeconsequencesonthe
environment and human health.
2 Introduction
CongratulationsonyourpurchaseandwelcometoPhilips!Tofullybenetfromthesupport
thatPhilipsoffers,registeryourproductatwww.philips.com/welcome.
This appliance is equipped with a built-in safety lock. You can only switch on the appliance
afteryoucorrectlyassemblethefollowingpartsonthemotorunit:
• the food processor bowl and its lid, or
• theblenderjaranditslid,or
• the mini chopper.
If these parts are assembled correctly, the built-in safety lock is unlocked.
Forrecipes,gotowww.philips.com/kitchen
3 Food processor
Blade unit
Beforeyoustart,makesurethatyouassembleaccordingtoFig.2.
Youcanusethebladeunittochop,mix,blend,orpureeingredients.
Caution
• Donotusethebladeunittochophardingredients,likecoffeebeans,turmeric,nutmeg,andice
cubes,asthismaycausethebladetogetblunt.
Note
• Donotlettheapplianceruntoolongwhenyouchop(hard)cheeseorchocolate.Otherwisethese
ingredientsbecometoohot,starttomelt,andturnlumpy.
• Precutlargepiecesoffoodintopiecesofapprox.3x3x3cm.
1 Turnthebowlclockwisetoxitonthemotorunit,andthenputtheshaftinthebowl.
» Whenthebowlisxedcorrectly,youhearaclick.
2 Take the blade unit out of the protective cover.
3 Put the blade unit on the shaft.
4 Puttheingredientsinthebowl.
5 Putthelidonthebowl,andthenturnthelidclockwisetoxit.
» Whenthelidisassembledcorrectly,youhearaclickandthelidisxedtothe
bowl handle.
6 Putthepusherintothefeedingtube.
7 Connectthepowerplugtothepowersupply.
8 Followtheprocessingspeedanddonotexceedtheprocessingtimeandmaximum
amountfortheingredientsasindicatedinTable1.
9 Afteruse,turnthespeedselectorto0,andthenunplugtheappliance.
Tip
• When you chop onions, turn the speed selector to P a few times to prevent the onions from
becomingtoonelychopped.
• How to remove food that sticks to the blade or to the inside of the bowl? 1. Switch off the appliance,
andthenunplugit.2.Removethelidfromthebowl.3.Removetheingredientsfromthebladeor
from the side of the bowl with a spatula.
Kneading accessory
Beforeyoustart,makesurethatyouassembleaccordingtoFig.3.
Youcanusethekneadingaccessorytokneadyeastdoughforbreadandpizzas.Youneedtoadjust
theamountofliquidtoformthedoughaccordingtothehumidityandtemperaturecondition.
1 Turnthebowlclockwisetoxitonthemotorunit,andthenputtheshaftinthebowl.
» Whenthebowlisxedcorrectly,youhearaclick.
2 Putthekneadingaccessoryontheshaft.
3 Puttheingredientsinthebowl.
4 Putthelidonthebowl,andthenturnthelidclockwisetoxit.
» Whenthelidisassembledcorrectly,youhearaclickandthelidisxedtothe
bowl handle.
5 Connectthepowerplugtothepowersupply.
6 Followtheprocessingspeedanddonotexceedtheprocessingtimeandmaximum
amountfortheingredientsasindicatedinTable1.
• Dependingontherecipe,pourliquidingredientintothefeedingtubewhilethe
device is turned on.
7 Afteruse,turnthespeedselectorto0,andthenunplugtheappliance.
Discs and Inserts
Beforeyoustart,makesurethatyoupickyourdesireddiscfromfollowingandassemble
accordingtoFig.4andFig.5:
• Emulsifyingdisc
• Insertforneslicing
• Insertforcoarseslicing
• Insertforneshredding
• Insertforcoarseshredding
• Insertforgranulating
• Insertfornejulienne
Caution
• Becarefulwhenyouhandletheslicingbladeofdisc.Ithasaverysharpcuttingedge.
• Neverusethedisctoprocesshardingredients,likeicecubes.
• Donotexerttoomuchpressureonthepusherwhenyoupressingredientsintothefeedtube.
1 Turnthebowlclockwisetoxitonthemotorunit,andthenputtheshaftinthebowl.
» Whenthebowlisxedcorrectly,youhearaclick.
2 Put the disc on the shaft. For inserts, place an insert in the insert holder as indicated
below, then place the insert holder with insert on the shaft.
Placetheopeningoftheinsertovertheshaftoftheinsertholder.
Pushtheopeningoftheinsertovertheprojectionontheshaft.
Press the insert onto the insert holder until it locks in position with a click.
3 Putthelidonthebowl,andthenturnthelidclockwisetoxit.
» Whenthelidisassembledcorrectly,youhearaclickandthelidisxedtothe
bowl handle.
4 Puttheingredientsintothefeedingtubewiththepusher.Fillthefeedingtubeevenly
forthebestresults.Whenyouhavetoprocessalargeamountofingredients,process
small batches and empty the bowl between batches.
5 Connectthepowerplugtothepowersupply.
6 Followtheprocessingspeedanddonotexceedtheprocessingtimeandmaximum
amountfortheingredientsasindicatedinTable1.
7 Afteruse,turnthespeedselectorto0,andthenunplugtheappliance.
Citrus press
Beforeyoustart,makesureyouassembleaccordingtoFig.6.
You can use the citrus press to squeeze citrus fruits.
1 Turnthethebowlclockwisetoxitonthemotorunit,andthenputthetoolholder
in the bowl.
» Whenthebowlisxedcorrectly,youcanhearaclick.
2 Put the sieve for citrus press on the tool holder in the bowl. Make sure that the
projectiononthesieveislockedintheslotofthebowlhandle.
» Whenthesieveisxedcorrectly,youcanhearaclick.
3 Put the cone on the sieve.
4 Connectthepowerplugtothepowersupply.
5 CheckthemaximumamountrequiredfortheingredientsinTable1.Turntheknobto
speed 1.
» Theconestartsrotating.
6 Press the citrus fruit onto the cone.
7 Stoppressingfromtimetotimetoremovethepulpfromthesieve.Whenyounish
pressingorwhenyouwanttoremovethepulp,turntheknobto0 and remove the
bowl from the appliance with the sieve and cone on it.
Mini chopper
Beforeyoustart,makesureyouassembleaccordingtoFig.7.
Caution
• Donotusetheminichoppertochophardingredients,likenutmeg,Chineserocksugar,oricecubes.
• Never use the mini chopper for more than 30 seconds without interruption.
• Assemblethesealingringontothebladeunitbeforeyouattachthebladeunittotheminichopper,
toavoidleakage.
• Alwaysprocesscloves,staranise,andaniseedtogether.Ifprocessedseparately,theseingredientsmay
attack the plastic materials of the appliance.
• Theminichopperbeakermaybecomediscoloredwhenyouusethemilltoprocessingredients,like
cloves, anise, and cinnamon.
• Donotusetheminichoppertoprocessliquidslikefruitjuice.
• Lethotingredientscooldown(<80ºC)beforeprocessingthem.
1 Puttheingredientsintheminichopperbeakerwithinthemaximumindication.
2 Turnthebladeunitanticlockwiseontheminichopperbeakeruntilitisxedproperly.
3 Turn the mini chopper clockwise onto the motor unit until you hear a click.
4 Connectthepowerplugtothepowersupply.
5 Followtheprocessingspeedanddonotexceedtheprocessingtimeandmaximum
amountfortheingredientsasindicatedinTable1.
6 Afteruse,turnthespeedselectorto0,andthenunplugtheappliance.
7 Turn the mini chopper anticlockwise to take it off from the motor unit.
8 Turn the blade unit clockwise to take it off from the mini chopper beaker.
Tip
• Forbestresultswhenprocessingbeef,pleaseuserefrigeratedbeefcubes.Usemaxof100gbeef
cubes at speed P for 5 sec.
• Howtoremovetheingredientsthatsticktothesideoftheminichopper?1.Switchofftheappliance,
andthenunplugit.2.Removethebeakerfromthebladeunit.3.Removetheingredientsfromthe
blade or from the side of the beaker with a spoon.
Blender
Beforeyoustart,makesureyouassembleaccordingtoFig.8.
Theblenderisintendedfor:
• Blendinguids,likedairyproducts,sauces,fruitjuices,soups,mixeddrinks,andshakes,
• Mixingsoftingredients,likepancakebatter,
• Pureeingcookedingredients,likebabyfood.
Note
• Donotexerttoomuchpressureonthehandleoftheblenderjar.
• Neveropenthelidtoputyourhandoranyobjectinthejarwhiletheblenderisrunning.
• Alwaysassemblethesealingringontothebladeunitbeforeyouattachthebladeunittotheblenderjar.
• Toaddliquidingredientsduringprocessing,pourthemintotheblenderjarthroughthefeedinghole.
• Precutsolidingredientsintosmallpiecesbeforeyouprocessthem.
• Ifyouwanttopreparealargequantity,processsmallbatchesofingredientsinsteadofalarge
quantity at once.
• Usecookedingredientswhenyoublendasoup.
• Toavoidspillage:Whenyouprocessaliquidthatishotortendstofoam(forexample,milk),donot
putmorethan1literofliquidintheblenderjar.
• Ifyouarenotsatisedwiththeresult,switchofftheapplianceandstirtheingredientswithaspatula.
Remove some of the contents to process a smaller quantity or add some liquid.
1 Turnthebladeunitontheblenderjar.
2 Placetheblenderjaronthemotorunitandturnitclockwisetoxit.
» Whenthejarisxedcorrectly,youhearaclick.
3 Puttheingredientsintheblenderjarwithinthemaximumlevelindication.
4 Placethelidontheblenderjar,andthenturnitclockwisetoxit.
5 Connectthepowerplugtothepowersupply.
6 Followtheprocessingspeedanddonotexceedtheprocessingtimeandmaximum
amountfortheingredientsasindicatedinTable1.
7 Afteruse,turnthespeedselectorto0,andunplugtheappliance.
Tip
• Howtoremovetheingredientsthatsticktothesideoftheblenderjar?1.Switchofftheappliance,
andthenunplugit.2.Openthelid,andthenuseaspatulatoremovetheingredientsfromthesideof
thejar.3.Keepthespatulaatleast2cmfromtheblade.
4 Cleaning and storage
Caution
• Beforeyoucleantheappliance,unplugit.
• Makesurethatthecuttingedgesoftheblades,discs,andtheinsertsdonotcomeintocontactwith
hardobjects.Thismaycausethebladetogetblunt.
• Thecuttingedgesaresharp.Becarefulwhenyouclean.
1 Cleanthemotorunitwithamoistcloth.
2 Cleantheotherpartsinhotwater(<60ºC)withsomewashing-upliquidorina
dishwasher.
3 Store the product in a dry place.
Quick cleaning
Youcanfollowthefollowingstepstocleanthefoodprocessorbowlandblenderjareasier.
Note
• Make sure that the blade is assembled in the bowl if you clean the food processor bowl.
1 Pourlukewarmwater(notmorethan0.5liters)andsomewashing-upliquidintothe
foodprocessorbowlorblenderjar.
2 Placethelidonthefoodprocessorbowlorblenderjar,andthenturnitclockwiseto
xit.
3 Turn the speed selector to Puntilthebowlorjarisclean.
4 Let the appliance run for 30 seconds or until the food processor bowl or blender
jarisclean.
5 Detachtheblenderjarorfoodprocessorbowlandrinseitwithcleanwater.
5 Guarantee and service
If you have a problem, need service, or need information, see www.philips.com/support or
contactthePhilipsConsumerCareCenterinyourcountry.Thephonenumberisinthe
worldwideguaranteeleaet.IfthereisnoConsumerCareCenterinyourcountry,goto
your local Philips dealer.
Русский
1 Внимание
Передэксплуатациейприборавнимательноознакомьтесьснастоящимруководствоми
сохранитеегодлядальнейшегоиспользованиявкачествесправочногоматериала.
Опасно!
• Запрещаетсяпогружатьблокэлектродвигателяв
водуипромыватьегоподструейводы.
Предупреждение
• Вовремяработыприборазапрещается
проталкиватьпродуктывкамеруподачи
пальцамииликакими-либопредметами.
Пользуйтесьтолькотолкателем.
• Передподключениемприборакисточнику
питанияубедитесь,чтонапряжение,указанное
нанижнейпанелиприбора,соответствует
напряжениюместнойэлектросети.
• Длябезопаснойэксплуатацииприбора
запрещаетсяподключатьегоктаймеру
отключения.
• Непользуйтесьприбором,еслисетевойшнур,
сетеваявилка,защитнаякрышкаилидругие
деталиповреждены.
• Вслучаеповреждениясетевогошнураего
необходимозаменить.Чтобыобеспечить
безопаснуюэксплуатациюприбора,заменяйте
шнуртольковавторизованномсервисном
центреPhilipsиливсервисномцентрес
персоналоманалогичнойквалификации.
• Неразрешайтедетямпользоватьсяприбором.
Хранитеприборишнурвнедоступномдля
детейместе.
• Лицасограниченнымифизическимиили
интеллектуальнымивозможностями,атакже
лицаснедостаточнымопытомизнаниями
могутпользоватьсяэтимприборомтолькопод
присмотромилипослеполученияинструкций
побезопасномуиспользованиюприбораипри
условиипониманияпотенциальныхопасностей.
• Длябезопасностидетейнепозволяйтеим
игратьсприбором.
• Запрещаетсяоставлятьвключенныйприборбез
присмотра.
• Еслипродуктыналиплинастенкикувшина
блендераиличаши,выключитеприбори
отключитеегоотэлектросети.Затемснимите
продуктысостеноклопаточкой.
• Будьтеосторожнывовремяэксплуатациии
очисткидисков,ножевогоблокакухонного
комбайнаиножевогоблокаблендера.Режущие
краяоченьострые.
• Неприкасайтеськножам,еслиприбор
подключенкэлектросети.Лезвияоченьострые!
• Вслучаезаеданияножевогоблокаотключите
приборотсети,преждечемизвлечьпродукты,
препятствующиедвижениюлезвий.
• Воизбежаниеожогагорячимпаромсоблюдайте
особуюосторожность,наливаягорячую
жидкостьвкухонныйкомбайнилиблендер.
• Приборпредназначентолькодлядомашнего
использования.
Внимание!
• Непытайтесьвыключитьприбор,поворачивая
кувшинблендера,чашуилиихкрышки.
Выключайтеприбор,установивпереключатель
скоростивположение0.
• Послезавершенияработыотключайтеприбор
отрозеткиэлектросети.
• Передтемкакоткрытькрышкуивыполнятькакие-
либооперациисдвижущимисячастямиприбора,
дождитесьихполнойостановки,затемвыключите
прибориотключитеегоотэлектросети.
• Передизвлечением,очисткойизаменой
аксессуароввыключитеприбориотключитеего
отрозеткиэлектросети.
• Передпервымприменениемприбора
тщательнопромойтевседетали,которыебудут
соприкасатьсяспищевымипродуктами.
• Запрещаетсяпользоватьсякакими-
либоаксессуарамиилидеталямидругих
производителей,неимеющихспециальной
рекомендацииPhilips.Прииспользовании
такихаксессуаровидеталейгарантийные
обязательстватеряютсилу.
• Незаполняйтечашуиликувшинвышеотметки
максимальногоуровня.Количествопродуктов
ивремяихобработкинедолжныпревышать
значения,указанныевруководствепо
эксплуатации.
• Передизмельчениемдайтегорячим
ингредиентамостыть(<80°C).
• Всегдадавайтеприборуостытьдокомнатной
температурыпередобработкойследующей
порциипродуктов.
• Некоторыеингредиентымогутвызвать
изменениецветаповерхностидеталей.Этоне
оказываетнадеталиотрицательногоэффекта.
Обычносовременемцветвосстанавливается.
• Уровеньшума=83дБ(A)
Электромагнитные поля (ЭМП)
ЭтотприборPhilipsсоответствуетвсемприменимымстандартаминормампо
воздействиюэлектромагнитныхполей(ЭМП).Приправильнойэксплуатациив
соответствиисинструкциямивданномруководствеприборабсолютнобезопасенв
использовании,чтоподтверждаетсяимеющимисянасегоднянаучнымиданными.
Утилизация
Данноеизделиеизготовленоизвысококачественныхматериаловикомпонентов,
которыеподлежатповторнойпереработкеивторичномуиспользованию.
Еслиизделиемаркированозначкомсизображениемперечеркнутогомусорногобака,
этоозначает,чтоизделиеподпадаетподдействиеДирективыЕС2002/96/EC:
Никогданевыбрасывайтеотслужившиеизделиявместесбытовыммусором.Для
утилизацииэлектрическихиэлектронныхизделийнеобходимысведенияоместной
системеотдельнойутилизацииотходов.Правильнаяутилизацияотработавшего
изделияпоможетпредотвратитьвозможныенегативныепоследствиядляокружающей
средыиздоровьячеловека.
2 Введение
ПоздравляемспокупкойиприветствуемвклубеPhilips!Чтобывоспользоватьсявсеми
преимуществамиподдержкиPhilips,зарегистрируйтеприобретенноеустройствона
сайтеwww.philips.com/welcome.
Данныйприбороснащенвстроеннойсистемойзащиты.Включениеприборавозможно
толькопослеправильнойустановкинаблокеэлектродвигателяследующихдеталей:
• чашикухонногокомбайнаиеекрышки;
• чашикувшинаблендераиеекрышки;
• мини-измельчителя.
Еслиперечисленныедеталиустановленыдолжнымобразом,встроеннаясистема
защитыбудетразблокирована.
Рецептысм.навеб-сайтеwww.philips.com/kitchen
3 Кухонный комбайн
Ножевой блок
Передвключениемубедитесь,чтосборкапроизведенасогласнорис.2.
Ножевойблокиспользуетсядляизмельчения,смешиванияиприготовления
однородныхмасс.
Внимание!
• Непользуйтесьножевымблокомдляизмельчениятвердыхингредиентов,такихкаккофейные
зерна,куркума,мускатныйорехикубикильда.Ножможетзатупиться.
Примечание
• Приизмельчениитвердогосыраилишоколаданевключайтеприборнапродолжительное
время.Впротивномслучаеингредиентымогутслишкомсильнонагреться,расплавитьсяи
сбитьсякомками.
• Нарежьтекрупныепродуктынакусочкиразмеромприблизительно3x3x3см.
1 Повернитечашупочасовойстрелке,чтобызакрепитьеенаблоке
электродвигателя,затемустановитевчашувал.
» Приправильнойустановкечашипрозвучитщелчок.
2 Извлекитеножевойблокиззащитногофутляра.
3 Установитеножевойблокнавал.
4 Поместитеингредиентывчашу.
5 Накройтечашукрышкой,затемповернитекрышкупочасовойстрелкедля
фиксации.
» Есликрышкасобранаверно,прозвучитщелчок,икрышкабудетнадежно
прикрепленакручкечаши.
6 Установитетолкательвкамеруподачи.
7 Подключитесетевуювилкукисточникупитания.
8 Непревышайтемаксимальноеколичествоингредиентов,атакжескоростьи
времяобработки,указанныевтаблице1.
9 Послеиспользованияустановитепереключательскоростивположение0,затем
отключитеприборотэлектросети.
Совет
• ВовремяизмельчениялуканесколькоразповернитепереключательскоростивположениеP,
чтобыпредотвратитьслишкомсильноеизмельчение.
• Какудалитьпродукты,налипшиенаножиливнутреннююповерхностьчаши?1.Выключите
прибориотключитеегоотэлектросети.2.Снимитесчашикрышку.3.Спомощьюлопатки
очиститеприлипшиепродуктыслезвияножаилисостенокчаши.
Насадка для теста
Передвключениемубедитесь,чтосборкапроизведенасогласнорис.3.
Насадкадлятестаиспользуетсядлязамешиваниядрожжевоготестадляхлебаи
пиццы.Объемжидкостидлятестаследуетподбиратьвсоответствиисуровнем
влажностиитемпературой.
1 Повернитечашупочасовойстрелке,чтобызакрепитьеенаблоке
электродвигателя,затемустановитевчашувал.
» Приправильнойустановкечашипрозвучитщелчок.
2 Установитенасадкудлятестанавал.
3 Поместитеингредиентывчашу.
4 Накройтечашукрышкой,затемповернитекрышкупочасовойстрелкедля
фиксации.
» Есликрышкасобранаверно,прозвучитщелчок,икрышкабудетнадежно
прикрепленакручкечаши.
5 Подключитесетевуювилкукисточникупитания.
6 Непревышайтемаксимальноеколичествоингредиентов,атакжескоростьи
времяобработки,указанныевтаблице1.
• Взависимостиотрецептаналейтежидкийингредиентвкамеруподачи,
когдаприборвключен.
7 Послеиспользованияустановитепереключательскоростивположение0,затем
отключитеприборотэлектросети.
Диски и вставки
Преждечемприступить,выберитеподходящийдиск(перечисленыдалее)ивыполните
сборкусогласнорис.4ирис.5:
• Дискдляприготовленияэмульсий
• Насадкадлянарезкитонкимиломтиками
• Насадкадлянарезкитолстымиломтиками
• Насадкадлямелкойшинковки
• Насадкадлякрупнойшинковки
• Насадкадляизмельчения
• Насадкадлянарезкимелкойсоломкой
Внимание!
• Будьтеосторожныприобращениислезвиемдлянарезкинадиске.Режущийкрайлезвия
оченьострый.
• Неиспользуйтедискидляобработкитвердыхингредиентов,такихкаккубикильда.
• Припроталкиванииингредиентоввкамеруподачиненажимайтенатолкательслишкомсильно.
1 Повернитечашупочасовойстрелке,чтобызакрепитьеенаблоке
электродвигателя,затемустановитевчашувал.
» Приправильнойустановкечашипрозвучитщелчок.
2 Установитедискнавал.Насадки:установитенасадкувдержательнасадок,как
показанониже,азатемустановитедержательснасадкойнавал.
Расположитеотверстиевнасадкенадваломдержателянасадок.
Протолкнитенасадку,чтобывыступвалавошелвотверстие.
Нажмитенаустановленнуювдержательнасадкудощелчка.
3 Накройтечашукрышкой,затемповернитекрышкупочасовойстрелкедля
фиксации.
» Есликрышкасобранаверно,прозвучитщелчок,икрышкабудетнадежно
прикрепленакручкечаши.
4 Опуститеингредиентывкамеруподачиспомощьютолкателя.Дляполучения
наилучшихрезультатовзаполняйтекамеруподачиравномерно.Есливам
необходимообработатьбольшоеколичествопродуктов,разделитеихна
небольшиепорциииосвобождайтечашупослеобработкикаждойпорции.
5 Подключитесетевуювилкукисточникупитания.
EN User manual
RU Руководство пользователя
KK Қолданушының нұсқасы
UK Посібник користувача
Содержание
- 035 36881 1
- Blade unit 1
- Blender 1
- Citrus press 1
- Discs and inserts 1
- Electromagnetic fields emf 1
- En user manual 1
- Hr7769 1
- Kk қолданушының нұсқасы 1
- Kneading accessory 1
- Mini chopper 1
- Quick cleaning 1
- Recycling 1
- Ru руководство пользователя 1
- Uk посібник користувача 1
- Диски и вставки 1
- Насадка для теста 1
- Ножевой блок 1
- Утилизация 1
- Электромагнитные поля эмп 1
- Ізпослабленимифізичнимивідчуттямиабо розумовимиздібностями чибезналежногодосвіду тазнань заумови щокористуваннявідбувається піднаглядом їмбулопроведеноінструктажщодо безпечногокористуванняпристроємтаїхбуло повідомленопроможливіризики 2
- Інемийтейогопідкраном 2
- Їмохолонути дотемпературинижче80 c 2
- Ажыратыңыз 2
- Алыңыз 80 c 2
- Ас комбайны 2
- Аскомбайнынанемесеблендергеыстық 2
- Астындакөрсетілгенкернеудіңжергілікті розетканыңкернеуінесәйкескелетінінтексеріңіз 2
- Астындашайюғаболмайды 2
- Ауыстыруалдындақұрылғыныөшіріп розеткадан ажыратыңыз 2
- Бавитисяпристроєм 2
- Басқаөндірушілершығарғаннемесеphilips 2
- Беріліп басқабіреуқадағалағанжәнеқұралды пайдалануғақатыстықауіп қатерлертүсіндірілген жағдайда осықұралдыфизикалық сезунемесе ойлауқабілетішектеулі біліміментәжірибесіаз адамдарпайдаланаалады 2
- Блендер 2
- Блендердіңпышақбөлігінұстағанданемесе тазалағандаабайболыңыз жүздеріөтеөткір 2
- Будь якоїчастини якарухаєтьсяпідчас використання завждидочекайтесяповної зупинкирухомихчастин післячоговимкніть пристрійтавід єднайтейоговідмережі 2
- Будьтеобережні колиналиваєтегарячурідину 2
- Будьтеобережніпідчасвикористанняабо 2
- Быстрая очистка 2
- Бұлқұралтекүйдеқолдануғажасалған абайлаңыз құралдыблендерқұмырасын тостағандынемесе 2
- Бұлқұрылғыныбалаларғапайдалануғаболмайды 2
- Важливо 2
- Вимкнітьпристрійівід єднайтейоговідрозетки потімлопаткоювидалітьпродуктизістінок 2
- Виробників завиняткомтих якірекомендує компаніяphilips використаннятакогоприладдя чидеталейпризведедовтратигарантії 2
- Вкухоннийкомбайнабоблендер оскільки внаслідокраптовоговипаровуваннявонаможе виходитизпристрою 2
- Вступ 2
- Гарантия и обслуживание 2
- Гарантія та обслуговування 2
- Давайтепристроюохолонутидокімнатної 2
- Деякіпродуктиможутьспричинятизнебарвлення 2
- Диски та насадки 2
- Дискілер және қосымшалар 2
- Дискілерді аскомбайныныңпышақбөлігінжәне 2
- Дляуникненнянебезпекиніколинепід єднуйте 2
- Егерқуатсымы штепсельдікұшы қорғайтын 2
- Електромагнітні поля емп 2
- Ескерту құралжұмысістептұрғанда тамақ 2
- Еңжоғарғыдеңгейкөрсеткішіненарттырмаңыз пайдаланушынұсқаулығындакөрсетілген мөлшерін дайындаууақытынжәнежылдамдығын қадағалаңыз 2
- Живлення штекер захиснукришкуабобудь яку іншучастинупошкодженоабонанійз явилися тріщини 2
- Жылдам тазалау 2
- Жылжымалыбөлшектерітоқтағаншакүтіңіз одан 2
- Зміркуваньбезпекинедозволяйтедітям 2
- Илеу құралы 2
- Кейбірингредиенттертүрлерібөлшекбеттерінің 2
- Кейінқақпағынашып пайдаланылғанжылжымалы бөлшектеріналмасбұрынқұралдысөндіріп токтансуырыңыз 2
- Кепілдік және қызмет көрсету 2
- Компаниясынақтыұсынбағанқосалқықұралдар менбөлшектердіпайдаланушыболмаңыз ондайқосалқықұралдарменбөлшектерді пайдалансаңыз құралдыңкепілдігіөзкүшін жояды 2
- Кухонний комбайн 2
- Кіріспе 2
- Маленький измельчитель 2
- Маңызды ақпарат 2
- Міні подрібнювач 2
- Нагляду 2
- Насадка для замішування тіста 2
- Небезпекийогонеобхіднозамінити звернувшись досервісногоцентру уповноваженогоphilips або фахівцівізналежноюкваліфікацією 2
- Небезпечно нівякомуразінезанурюйтеблокдвигунауводу 2
- Невикористовуйтеприладдячидеталіінших 2
- Невикористовуйтепристрій якщокабель 2
- Ненаповнюйтечашучиглеквищемаксимальної 2
- Неторкайтесяножів особливоколипристрій 2
- Ніколинезалишайтепристрійпрацюватибез 2
- Одразужпіслявикористаннявід єднайте 2
- Ойнауынажолбермеңіз 2
- Олардыңқақпақтарынбұрапөшірмеңіз құралды жылдамдықтаңдағышын 0 күйінеқоюарқылы ғанаөшіріңіз 2
- Орыналмауыүшін онытекphilipsкомпаниясында philipsмақұлдағанқызметорталығынданемесе біліктімамандарауыстыруыкерек 2
- Очистка и хранение 2
- Перевірте чинапруга вказананадніпристрою збігаєтьсяізнапругоюумережі 2
- Передпершимвикористаннямретельно 2
- Передтимяквиймати чиститиабозаміняти 2
- Передтимяквідкритикришкутаторкнутися 2
- Передтимякоброблятигарячіпродукти дайте 2
- Передтимякпід єднуватипристрійдомережі 2
- Побутовоговикористання 2
- Повертаючиглекблендера чашучиїхнікришки завждивимикайтепристрійповертанням селекторашвидкостівположення 0 2
- Поверхоньдеталей ценеєшкідливим знебарвленнязникаєчерездеякийчас 2
- Позначки дотримуйтесякількостіпродуктів часуобробкиташвидкості щовказанів посібникукористувача 2
- Почистітьчастини якіконтактуватимутьізїжею 2
- Прес для цитрусових 2
- Приладдя вимкнітьпристрійтавід єднайтейого відмережі 2
- Пристрійвідмережі 2
- Продуктивотвірдляподачіпальцямичиза допомогоюпредметів колипристрійпрацює використовуйтедляцьоголишештовхач 2
- Пышақтар 2
- Пышақтардыңжүзінұстамаңыз әсіресеқұрал 2
- Пышақтоқтапқалғанжағдайда пышаққатұрып 2
- Під єднанодомережі вонидужегострі 2
- Рівеньшуму 83дб a 2
- Ріжучий блок 2
- Салатынтүтіккеингредиенттердісалуүшін саусақтарыңыздынемесебасқазаттыешқашан пайдаланбаңыз текитергіштіпайдаланыңыз 2
- Сұйықтыққұйылса абайболыңыз себебібу құрылғыдансыртқашығуымүмкін 2
- Тазалау және сақтау 2
- Таймерарқылыістетпеңіз 2
- Тамақпенбайланысқатүсетінбөлшектерін жақсылаптазалаңыз тазалау тармаған қараңыз 2
- Температурипісляобробкикожноїпорції 2
- Тостағандағынемесеқұмырадағыкөрсетілген 2
- Тримайтепристрійішнурподалівіддітей 2
- Түрдебөлметемпературасынадейінсуытып алыңыз 2
- Түстерінөзгертуімүмкін бұлбөлшектергекері әсеретпейді бөлшектүсіәдеттебелгілібір уақыттанкейінқалпынакеледі 2
- Увага увага ужодномуразіневимикайтепристрій 2
- Увага увага ужодномуразінепроштовхуйте 2
- Українська 2
- Утилізація 2
- Цейпристрійдотаймера 2
- Цейпристрійпризначенийвиключнодля 2
- Цимпристроємможутькористуватисяособи 2
- Цимпристроємнеможнакористуватисядітям 2
- Цитрус пресс 2
- Цитрус сыққыш 2
- Чищення та зберігання 2
- Чищеннядисківіріжучихблоківкухонного комбайнатаблендера лезадужегострі 2
- Шағын турағыш 2
- Швидке чищення 2
- Шудеңгейі 83дбa 2
- Ыстықингредиенттердіөңдемесбұрынсуытып 2
- Электромагниттік өрістер эмө 2
- Якчиститиножі витягнітьштекерізрозетки 2
- Якщодоножівприлипаютьпродукти передтим 2
- Якщошнурживленняпошкоджено дляуникнення 2
- Якщоїжаприлипаєдоглекаблендераабочаші 2
- Қабырғаларынаазықжабысыпқалса құралды өшіріп розеткаданажыратыңыз жабысыпқалған азықтыкүрекшеменалыптастаңыз 2
- Қазақша 2
- Қайта өңдеу 2
- Қалғанингредиенттердіалмасбұрын аспапты жүйеденажыратыңыз 2
- Қауіпсіздікмақсатындабалалардыңқұралмен 2
- Қауіпті моторбөлігінсуғасалуғанемесеоныағынсу 2
- Қауіптіжағдайорыналмауыүшін бұлқұралды 2
- Қақпағынемесеөзгебөлшектерізақымданған болса құралдыпайдаланбаңыз 2
- Қолданыпболғансоңқұралдыдереурозеткадан 2
- Қосалқықұралдардышығару тазалаунемесе 2
- Қуаткөзінеқосулытұрғанкезде пышақтарөте өткір 2
- Қуатсымызақымданғанболса қауіптіжағдай 2
- Құралдыалғашқыретқолданаралдында 2
- Құралдыжәнеоныңсымынбалалардыңқолдары жетпейтінжердесақтаңыз 2
- Құралдырозеткағажалғамасбұрын құралдың 2
- Құралдықадағалаусызқосыпқоюғаболмайды блендерқұмырасыныңнемесетостағанының 2
- Құралдықауіпсізпайдаланужөніндегінұсқаулар 2
- Әрпартияныөңдегенненкейінқұралдыміндетті 2
Похожие устройства
- Philips 19PFL3403D Инструкция по эксплуатации
- Зубр ЗНАС-1200 Инструкция по эксплуатации
- Supra TPS-3225 Инструкция по эксплуатации
- Philips 32PFL3512D Инструкция по эксплуатации
- Зубр ЗНАС-1200-Ч Инструкция по эксплуатации
- Philips Viva Collection HR2729/00 Инструкция по эксплуатации
- Philips 26PF3302 Инструкция по эксплуатации
- Зубр ЗНАС-1200-С Инструкция по эксплуатации
- Electrolux PAE1P Инструкция по эксплуатации
- Philips 32PFL3321S Инструкция по эксплуатации
- Зубр ЗНАС-1200-50 Инструкция по эксплуатации
- Krups CitiZ&Milk XN730T10 Инструкция по эксплуатации
- Philips 26PFL3321S Инструкция по эксплуатации
- Зубр ЗНПЧ-250 Инструкция по эксплуатации
- Krups CITIZ&MILK XN730510 Инструкция по эксплуатации
- Philips 32PF3302 Инструкция по эксплуатации
- Зубр ЗНПЧ-400 Инструкция по эксплуатации
- Philips 42PF3331 Инструкция по эксплуатации
- Krups Dolche Gusto KP120110 Инструкция по эксплуатации
- Зубр ЗНПЧ-550 Инструкция по эксплуатации
Скачать
Случайные обсуждения