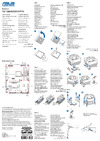
![Asus P8Z77-V LX — настройка программного обеспечения для технологии быстрого запуска [119/142]](/img/pdf.png)
Asus P8Z77-V LX — настройка программного обеспечения для технологии быстрого запуска [119/142]
![Asus P8Z77-V LX [119/142] Rapid start technology under the os](/views2/1163306/page119/bg77.png)
4-20
Chapter 4: Software support
Chapter 4
12. Type set id=84 override, press Enter, and wait for the “shrinking process” until
the Disk Management utility identies a new partition called Hibernation Partition.
13. Reboot the system after creating the partition.
The partition for Intel
®
Rapid Start Technology is incomplete if the computer is not rebooted,
and this results to function failure of Intel
®
Rapid Start Technology.
Enabling and disabling the Intel
®
Rapid Start Technology under the
OS
Install the Intel
®
Rapid Start Technology rst from your support DVD in order to launch the
Intel
®
Rapid Start Manager.
After creating the partition, launch the Intel
®
Rapid Start
Manager to enable or disable the Intel
®
Rapid Start
Technology.
1. Click the
Show hidden icons arrow from the right
side of the task bar, and click Intel
®
Rapid Start
Technology Manager icon.
The Hibernation Partition does not appear when you choose “GPT (GUID Partition Table
store type”. Ensure the “Unallocated” disappears from the volume, and a new partition is
identied.
Содержание
- Additional tools and components to build a pc system p.1
- Advanced menu p.1
- Advanced mode p.1
- Ai tweaker menu p.1
- Dimm installation p.1
- Bios setup program p.1
- Asus crashfree bios 3 utility p.1
- Atx power connection p.1
- Cpu configuration p.1
- Ai suite ii p.1
- Jumper p.1
- Chapter 3 bios setup p.1
- Chapter 2 hardware information p.1
- Boot menu p.1
- Internal connectors p.1
- Onboard switches p.1
- Asus update utility p.1
- Sata configuration p.1
- Asus ez flash 2 utility p.1
- Motherboard installation p.1
- Expansion slots p.1
- Building your computer system p.1
- Audio i o connections p.1
- Audio configurations p.1
- Ati crossfirex technology p.1
- Installing serial ata hard disks p.1
- Hardware installation p.1
- Chapter 5 multiple gpu technology support p.1
- Asus unique features p.1
- Motherboard overview p.1
- Sata device connection p.1
- Motherboard layout p.1
- Asus bios updater p.1
- Central processing unit cpu p.1
- Enabling the ati crossfirex technology p.1
- Updating bios p.1
- Raid configurations p.1
- Before you proceed p.1
- System memory p.1
- Before you begin p.1
- Creating a raid driver disk in windows p.1
- Special features p.1
- Onboard leds p.1
- Software information p.1
- Onboard devices configuration p.1
- Cpu heatsink and fan assembly installation p.1
- Obtaining the software manuals p.1
- Installing an operating system p.1
- Software configuration p.1
- Network stack p.1
- Setting the raid item in bios p.1
- Fan xpert p.1
- Chapter 4 software support p.1
- Asus innovative design p.1
- Ez mode p.1
- Welcome p.1
- Running the support dvd p.1
- Expansion card installation p.1
- Using a usb floppy disk drive p.1
- Chapter 1 product introduction p.1
- Requirements p.1
- Monitor menu p.1
- Exit menu p.1
- Usb configuration p.1
- Rear panel connection p.1
- Main menu p.1
- Usb 3 boost p.1
- Raid definitions p.1
- Lucidlogix virtu solution p.1
- Dual intelligent processors 2 with digi vrm p.1
- Knowing bios p.1
- Turbov evo p.1
- Product highlights p.1
- Tools menu p.1
- Probe ii p.1
- Digi power control p.1
- Pch configuration p.1
- Intel rapid storage technology option rom utility p.1
- Creating a raid driver disk without entering the os p.1
- System agent configuration p.1
- Package contents p.1
- Installing two crossfirex graphics cards p.1
- Support dvd information p.1
- Installing the raid driver during windows os installation p.1
- Creating a raid driver disk p.1
- Installing the device drivers p.1
- Cpu installation p.1
- First edition v1 february 2012 p.2
- Chapter 2 hardware information p.3
- Contents p.3
- Chapter 1 product introduction p.3
- Chapter 3 bios setup p.4
- Contents p.4
- Chapter 4 software support p.4
- Contents p.5
- Chapter 5 multiple gpu technology support p.5
- Safety information p.6
- Operation safety p.6
- Electrical safety p.6
- Where to find more information p.7
- How this guide is organized p.7
- About this guide p.7
- Typography p.8
- Conventions used in this guide p.8
- P8z77 v lx specifications summary p.9
- P8z77 v lx specifications summary p.10
- P8z77 v lx specifications summary p.11
- P8z77 v lx specifications summary p.12
- Welcome p.13
- The motherboard delivers a host of new features and latest technologies making it another standout in the long line of asus quality motherboards p.13
- Thank you for buying an asu p.13
- Package contents p.13
- P8z77 v lx motherboard p.13
- Check your motherboard package for the following items p.13
- Chapter 1 p.13
- Before you start installing the motherboard and hardware devices on it check the items in your package with the list below p.13
- Dual channel ddr3 2400 o c 2200 o c 2133 o c 1866 o c 1600 1333 1066 support p.14
- Smart response technology p.14
- Quad gpu crossfirex support p.14
- Product highlights p.14
- Lga1155 socket for inte p.14
- Generation core i7 core i5 core i3 processors p.14
- Complete usb 3 integration p.14
- Chapter 1 p.14
- Z77 express chipset p.14
- Special features p.14
- Smart connect technology p.15
- S pdif out connector at the back i o p.15
- Rapid start technology p.15
- Pcie 3 ready p.15
- Gigabit lan solution p.15
- Erp ready p.15
- Chapter 1 p.15
- Channel high definition audio p.15
- All high quality conductive polymer capacitors p.15
- Digital power control digital power design for the cpu and igpu p.16
- Chapter 1 p.16
- Asus exclusive features p.16
- Asus epu p.16
- Asus digi vrm digital power design p.16
- Usb 3 boost p.16
- Network icontrol p.16
- Precision tweaker 2 p.17
- Gpu boost p.17
- Fan xpert p.17
- Chapter 1 p.17
- C p r cpu parameter recall p.17
- Asus turbov p.17
- Asus quiet thermal solutions p.17
- Asus mylogo2 p.17
- Ai suite ii p.17
- Fanless design stylish heatsink solution p.18
- Chapter 1 p.18
- Asus uefi bios ez mode p.18
- Asus ez flash 2 p.18
- Asus ez diy p.18
- Other special features p.18
- Lucidlogix virtu mvp p.18
- Hdmi 1 a support p.19
- Erp ready p.19
- Chapter 1 p.19
- Take note of the following precautions before you install motherboard components or change any motherboard settings p.20
- Chapter 2 p.20
- Before you proceed p.20
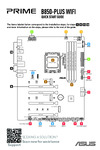
- P8z77 v lx p.21
- Motherboard overview p.21
- Motherboard layout p.21
- Chapter 2 p.21
- Layout contents p.22
- Chapter 2 p.22
- Chapter 2 p.23
- Central processing unit cpu p.23
- The motherboard comes with a surface mount lga1155 socket designed for the inte p.23
- P8z77 v lx cpu socket lga1155 p.23
- Generation core i7 i5 i3 processors p.23
- System memory p.24
- Recommended memory configurations p.24
- P8z77 v lx 240 pin ddr3 dimm sockets p.24
- Chapter 2 p.24
- You may install 1gb 2gb 4gb and 8gb unbuffered non ecc ddr3 dimms into the dimm sockets p.25
- Memory configurations p.25
- Chapter 2 p.25
- Chapter 2 p.26
- P8z77 v lx motherboard qualified vendors lists qvl ddr3 2400mhz capability p.26
- P8z77 v lx motherboard qualified vendors lists qvl ddr3 2200mhz capability p.26
- P8z77 v lx motherboard qualified vendors lists qvl ddr3 2133mhz capability p.26
- P8z77 v lx motherboard qualified vendors lists qvl ddr3 2000mhz capability p.26
- Asus p8z77 v lx 2 7 p.26
- P8z77 v lx motherboard qualified vendors lists qvl ddr3 1866mhz capability p.27
- P8z77 v lx motherboard qualified vendors lists qvl ddr3 1600mhz capability p.27
- Chapter 2 p.27
- 8 chapter 2 hardware information p.27
- P8z77 v lx motherboard qualified vendors lists qvl ddr3 1333mhz capability p.28
- Chapter 2 p.28
- Asus p8z77 v lx 2 9 p.28
- Chapter 2 p.29
- 10 chapter 2 hardware information p.29
- Chapter 2 p.30
- Asus p8z77 v lx 2 11 p.30
- Chapter 2 p.31
- Asus exclusively provides hyper dimm support function p.31
- As one pair of dual channel memory configuration we suggest that you install the modules into slots a2 and b2 for better compatibility 4 dimms supports four 4 modules inserted into both the blue and black slots as two p.31
- 12 chapter 2 hardware information p.31
- 1 dimm supports one 1 module inserted into any slot as single channel memory p.31
- Visit the asus website for the latest qvl p.31
- Side s ss single sided ds double sided dimm support p.31
- Pairs of dual channel memory configuration p.31
- P8z77 v le motherboard qualified vendors lists qvl ddr3 1066mhz capability p.31
- Hyper dimm support is subject to the physical characteristics of individual cpus load the x m p or d o c p settings in the bios for the hyper dimm support p.31
- Configuration we suggest that you install the module into a2 slot 2 dimms supports two 2 modules inserted into either the blue slots or the black slots p.31
- Expansion slots p.32
- Chapter 2 p.32
- Irq assignments for this motherboard p.33
- Chapter 2 p.33
- P8z77 v lx clear rtc ram p.34
- Jumper p.34
- Chapter 2 p.34
- Memok switch p.35
- Installing dimms that are incompatible with the motherboard may cause system boot failure and the dram_led near the memok switch lights continuously press and hold the memok switch until the dram_led starts blinking to begin automatic memory compatibility tuning for successful boot p.35
- Chapter 2 p.35
- P8z77 v lx memok switch p.35
- Onboard switches allow you to fine tune performance when working on a bare or open case system this is ideal for overclockers and gamers who continually change settings to enhance system performance p.35
- Onboard switches p.35
- Turning this switch to enable will automatically optimize the system for fast yet stable clock speeds p.36
- P8z77 v lx gpu boost switch p.36
- Gpu boost switch p.36
- Gpu boost p.36
- Chapter 2 p.36
- P8z77 v lx onboard led p.37
- P8z77 v lx dram led p.37
- Onboard leds p.37
- Chapter 2 p.37
- P8z77 v lx serial port com1 connector p.38
- Internal connectors p.38
- If you installed serial ata hard disk drives you can create a raid 0 1 5 and 10 configuration with the inte p.38
- Chapter 2 p.38
- Z77 serial ata 6 gb s connectors 7 pin sata6g_1 2 gray p.38
- Z77 chipset p.38
- This connector is for a serial com port connect the serial port module cable to this connector then install the module to a slot opening at the back of the system chassis p.38
- These connectors connect to serial ata 6 gb s hard disk drives via serial ata 6 gb s signal cables p.38
- Serial port connector 10 1 pin com1 p.38
- Rapid storage technology through the onboard inte p.38
- Usb 2 connectors 10 1 pin usb 3 10 p.39
- This connector is for a chassis mounted front panel audio i o module that supports either hd audio or legacy ac 97 audio standard connect one end of the front panel audio i o module cable to this connector p.39
- These connectors are for usb 2 ports connect the usb module cable to any of these connectors then install the module to a slot opening at the back of the system chassis these usb connectors comply with usb 2 specification that supports up to 480 mbps connection speed p.39
- P8z77 v lx usb2 connectors p.39
- P8z77 v lx front panel audio connector p.39
- Front panel audio connector 10 1 pin aafp p.39
- Chapter 2 p.39
- Asus p8z77 v lx 2 21 p.40
- The s pdif module is purchased separately p.40
- Connect the fan cables to the fan connectors on the motherboard ensuring that the black wire of each cable matches the ground pin of the connector p.40
- Chapter 2 p.40
- This connector is for an additional sony philips digital interface s pdif port connect the s pdif out module cable to this connector then install the module to a slot opening at the back of the system chassis p.40
- The cpu_fan connector supports the cpu fan of maximum 1a 12 w fan power p.40
- P8z77 v lx fan connectors p.40
- P8z77 v lx digital audio connector p.40
- Do not forget to connect the fan cables to the fan connectors insufficient air flow inside the system may damage the motherboard components these are not jumpers do not place jumper caps on the fan connectors p.40
- Digital audio connector 4 1 pin spdif_out p.40
- Cpu chassis and power fan connectors 4 pin cpu_fan 4 pin cha_fan1 2 3 pin pwr_fan p.40
- Usb 3 connector 20 1 pin usb3_56 p.41
- These connectors connect to serial ata 3 gb s hard disk drives and optical disc drives via serial ata 3 gb s signal cables p.41
- These connectors are for the additional usb 3 ports and complies with the usb 3 specificaton that supports up to 480 mbps connection speed if the usb 3 front panel cable is available from your system chassis with this usb 3 connector you can have a front panel usb 3 solution p.41
- Rapid storage technology through the onboard inte p.41
- P8z77 v lx usb3 front panel connector p.41
- P8z77 v lx sata 3 gb s connectors p.41
- If you installed serial ata hard disk drives you can create a raid 0 1 5 and 10 configuration with the inte p.41
- Chapter 2 p.41
- Z77 serial ata 3 gb s connectors 7 pin sata3g_1 4 blue p.41
- Z77 chipset p.41
- Usb3_34 p.41
- P8z77 v lx atx power connectors p.42
- These connectors are for atx power supply plugs the power supply plugs are designed to fit these connectors in only one orientation find the proper orientation and push down firmly until the connectors completely fit p.42
- Eatxpwr p.42
- Eatx12v p.42
- Chapter 2 p.42
- Atx power connectors 24 pin eatxpwr 8 pin eatx12v p.42
- P8z77 v lx system panel connector p.43
- Chapter 2 p.43
- The tools and components in the table above are not included in the motherboard package p.44
- Chapter 2 p.44
- Building your computer system p.44
- Asus p8z77 v lx 2 25 p.44
- Additional tools and components to build a pc system p.44
- Cpu installation p.45
- Chapter 2 p.45
- To install the cpu heatsink and fan assembly p.47
- Cpu heatsink and fan assembly installation p.47
- Chapter 2 p.47
- To uninstall the cpu heatsink and fan assembly p.48
- Chapter 2 p.48
- Asus p8z77 v lx 2 29 p.48
- Motherboard installation p.50
- Chapter 2 p.50
- Chapter 2 p.51
- To install usb 2 connector to install front panel audio connector p.54
- To install usb 3 connector p.54
- Front i o connector p.54
- Chapter 2 p.54
- Asus p8z77 v lx 2 35 p.54
- Expansion card installation p.55
- Chapter 2 p.55
- Rear panel connection p.56
- Chapter 2 p.56
- Status description status description p.57
- Orange linked orange 100 mbps connection p.57
- Off no link off 10 mbps connection p.57
- Lan port led indications p.57
- Chapter 2 p.57
- Blinking data activity green 1 gbps connection p.57
- Audio 2 4 6 or 8 channel configuration p.57
- Activity link led speed led p.57
- 38 chapter 2 hardware information p.57
- Chapter 2 p.58
- Audio i o connections p.58
- Chapter 2 p.59
- Turning off the computer p.60
- Starting up for the first time p.60
- Chapter 2 p.60
- Chapter 2 p.61
- Knowing bios p.62
- Chapter 3 p.62
- Bios setup program p.62
- The default screen for entering the bios setup program can be changed refer to the setup mode item in section 3 boot memu for details p.63
- The boot menu f8 button is available only when the boot device is installed to the system p.63
- The boot device options vary depending on the devices you installed to the system p.63
- Ez mode p.63
- Chapter 3 bios setup p.63
- Chapter 3 p.63
- By default the ez mode screen appears when you enter the bios setup program the ez mode provides you an overview of the basic system information and allows you to select the display language system performance mode and boot device priority to access the advanced mode click exit advanced mode then select advanced mode p.63
- Advanced mode p.64
- Advanced for changing the advanced system settings p.64
- Tool for configuring options for special functions p.64
- The menu bar on top of the screen has the following main items p.64
- The advanced mode provides advanced options for experienced end users to configure the bios settings the figure below shows an example of the advanced mode refer to the following sections for the detailed configurations p.64
- Monitor for displaying the system temperature power status and changing the fan settings p.64
- Menu bar p.64
- Main for changing the basic system configuration p.64
- Exit for selecting the exit options and loading default settings p.64
- Chapter 3 p.64
- Boot for changing the system boot configuration p.64
- Asus p8z77 v lx p.64
- Ai tweaker for changing the overclocking settings p.64
- Menu items p.65
- General help p.65
- Configuration fields p.65
- Chapter 3 p.65
- Back button p.65
- Submenu items p.65
- Scroll bar p.65
- Pop up window p.65
- Navigation keys p.65
- The security menu items allow you to change the system security settings p.66
- The main menu screen appears when you enter the advanced mode of the bios setup program the main menu provides you an overview of the basic system information and allows you to set the system date time language and security settings p.66
- The administrator or user password items on top of the screen show the default not installed after you set a password these items show installed p.66
- Security p.66
- Main menu p.66
- If you have forgotten your bios password erase the cmos real time clock rtc ram to clear the bios password see section 2 jumper for information on how to erase the rtc ram p.66
- Chapter 3 p.66
- Asus p8z77 v lx p.66
- User password p.67
- Chapter 3 p.67
- Administrator password p.67
- Ai tweaker menu p.68
- The configuration options for this section vary depending on the cpu and dimm model you installed on the motherboard p.68
- The ai tweaker menu items allow you to configure overclocking related items p.68
- Scroll down to display the following items p.68
- Efi bios utility advanced mode p.68
- Chapter 3 p.68
- Be cautious when changing the settings of the ai tweaker menu items incorrect field values can cause the system to malfunction p.68
- Asus p8z77 v lx p.68
- Memory frequency auto p.69
- Internal pll overvoltage auto p.69
- Igpu max frequency xxx p.69
- Freqref auto p.69
- Core ratio limit auto p.69
- Chapter 3 p.69
- Bclk peg frequency xxx p.69
- Ai overclock tuner auto p.69
- 3 4 core ratio limit auto p.69
- Turbo ratio auto p.69
- Ratio mode by per core p.69
- Oc tuner p.70
- Long duration power limit auto p.70
- Epu setting auto p.70
- Epu power saving mode disabled p.70
- Enhanced intel speedstep technology enabled p.70
- Dram timing control p.70
- Cpu ratio auto p.70
- Cpu power management p.70
- Chapter 3 p.70
- Cpu power phase control standard p.71
- Cpu power duty control t probe p.71
- Cpu load line calibration auto p.71
- Cpu fixed frequency xxx p.71
- Chapter 3 p.71
- Short duration power limit auto p.71
- Secondary plane current limit auto p.71
- Primary plane current limit auto p.71
- Long duration maintained auto p.71
- Digi vrm p.71
- Igpu voltage offset mode p.72
- Igpu load line calibration auto p.72
- Igpu current capability 100 p.72
- Cpu voltage offset mode p.72
- Cpu offset voltage auto p.72
- Cpu offset mode sign p.72
- Cpu manual voltage auto p.72
- Cpu current capability 100 p.72
- Chapter 3 p.72
- Cpu pll voltage auto p.73
- Chapter 3 p.73
- Vccsa voltage auto p.73
- Vccio voltage auto p.73
- Pch voltage auto p.73
- Dram voltage auto p.73
- Cpu spread spectrum auto p.73
- The advanced menu items allow you to change the settings for the cpu and other system devices p.74
- Efi bios utility advanced mode p.74
- Chapter 3 p.74
- Be cautious when changing the settings of the advanced menu items incorrect field values can cause the system to malfunction p.74
- Asus p8z77 v lx p.74
- Advanced menu p.74
- Cpu configuration p.75
- Chapter 3 bios setup p.75
- Chapter 3 p.75
- Allows you to choose the number of cpu cores to activate in each processor package configuration options all 1 2 3 p.75
- Active processor cores all p.75
- The items shown in this screen may be different due to the cpu you installed p.75
- The items in this menu show the cpu related information that the bios automatically detects p.75
- Scroll down to display the following items p.75
- Limit cpuid maximum disabled p.75
- Intel adaptive thermal monitor enabled p.75
- Enabled enables the overheated cpu to throttle its clock speed to cool down p.75
- Enabled allows legacy operating systems to boot even without support for cpus with extended cpuid functions p.75
- Disabled disables this function p.75
- Disabled disables the cpu thermal monitor function p.75
- Execute disable bit enabled p.76
- Enhanced intel speedstep technology enabled p.76
- Cpu ratio auto p.76
- Cpu power management configuration p.76
- Cpu c1e auto p.76
- Chapter 3 p.76
- Adjacent cache line prefetch enabled p.76
- Virtualization technology disabled p.76
- Turbo mode enabled p.76
- Hardware prefetcher enabled p.76
- Pch configuration p.77
- Intel r rapid start technology disabled p.77
- Intel r rapid start technology p.77
- High precision timer enabled p.77
- Entry on s3 rtc wake enabled p.77
- Cpu c6 report auto p.77
- Cpu c3 report auto p.77
- Chapter 3 p.77
- Asus p8z77 v lx p.78
- Allows you to enable or disable the isct configuration configuration options enabled disabled p.78
- Allows you to enable or disable the active page threshold support configuration options enabled disabled p.78
- Active page threshold support disabled p.78
- Active memory threshold x p.78
- While entering setup the bios automatically detects the presence of sata devices the sata port items show not present if no sata device is installed to the corresponding sata port p.78
- This item appears only when you set the entry on s3 rtc wake to enabled and allows you to set the rtc wake timer at s3 entry configuration options immediately 1 minute 2 minute 5 minute 10 minute 15 minute 30 minute 1 hour 2 hours p.78
- This item appears only when you set the active page threshold support to enabled and allows you to set the active memory threshold when the partition size is larger than the active page threshold size the system will try to support the intel r rapid start technology when the item is set to zero the system automatically checks whether the partition size is enough at s3 entry key in the desired value using the numeric keypad p.78
- Smart connect technology p.78
- Sata configuration p.78
- Isct configuration disabled p.78
- Entry after 10 minutes p.78
- Chapter 3 p.78
- System agent configuration p.79
- Sata mode selection ahci p.79
- S m a r t status check enabled p.79
- Memory remap feature enabled p.79
- Hot plug disabled p.79
- Chapter 3 p.79
- Usb configuration p.80
- Allows you to enable or disable render standby by internal graphics devices configuration options disabled enabled p.80
- The usb devices item shows the auto detected values if no usb device is detected the item shows none p.80
- Allows you to configure the nb pci express settings p.80
- The items in this menu allow you to change the usb related features p.80
- Render standby enabled p.80
- Primary display auto p.80
- Pcie x16_1 auto p.80
- Nb pcie configuration p.80
- Initiate igpu enabled p.80
- Igpu memory 64m p.80
- Graphics configuration p.80
- Chapter 3 p.80
- Asus p8z77 v lx p.80
- Allows you to set the pcie x16_1 link speed configuration options auto gen1 gen2 gen3 p.80
- Allows you to set the igpu memory size configuration options 32m 64m 96m 128m 448m 480m 512m 1024m p.80
- Allows you to select a primary display from igfx peg or pci graphic devices or select sg for switchable gfx configuration options auto igfx peg pci p.80
- Allows you to enable or disable the lucid virtu support for both the integrated and discrete graphics the igpu shared memory size will be fixed at 64mb configuration options disabled enabled p.80
- Onboard devices configuration p.81
- Legacy usb3 support enabled p.81
- Legacy usb support enabled p.81
- Intel xhci mode smart auto p.81
- Enabled enables the support for usb devices on legacy operating systems os p.81
- Enabled enables the support for usb 3 devices on legacy operating systems os p.81
- Enabled enables the support for operating systems without an ehci hand off feature p.81
- Ehci hand off disabled p.81
- Disabled the usb devices can be used only for the bios setup program p.81
- Disabled disables the function p.81
- Chapter 3 bios setup p.81
- Chapter 3 p.81
- Auto allows the system to detect the presence of usb devices at startup if detected the usb controller legacy mode is enabled if no usb device is detected the legacy usb support is disabled p.81
- Allows you to select the intel xhci mode configuration options smart auto auto enabled disabled p.81
- Chapter 3 p.82
- Change settings io 3f8h irq 4 p.82
- Spdif out type spdif p.82
- Serial port enabled p.82
- Serial port configuration p.82
- Realtek pxe oprom disabled p.82
- Realtek lan controller enabled p.82
- Hd audio controller enabled p.82
- Front panel type hd p.82
- Rtc alarm date days p.83
- Restore ac power loss power off p.83
- Power on by rtc disabled p.83
- Power on by ring disabled p.83
- Power on by ps 2 keyboard disabled p.83
- Power on by pcie pci disabled p.83
- Chapter 3 p.83
- Chapter 3 p.84
- Asus p8z77 v lx p.84
- The monitor menu displays the system temperature power status and allows you to change the fan settings p.84
- Scroll down to display the following items p.84
- Network stack disable link p.84
- Network stack p.84
- Monitor menu p.84
- Keys to adjust the time p.84
- Hour minute second p.84
- Enables or disables the uefi network stack configuration options disable link enable p.84
- Cpu temperature mb temperature xxxºc xxxºf p.85
- Cpu q fan control enabled p.85
- Cpu fan speed xxxx rpm or ignore n a pwr fan speed xxxx rpm or ignore n a chassis fan 1 2 speed xxxx rpm or ignore n a p.85
- Cpu fan speed low limit 600 rpm p.85
- Cpu fan profile standard p.85
- Chapter 3 p.85
- Chapter 3 p.86
- Anti surge support enabled p.86
- Cpu voltage 3 v voltage 5v voltage 12v voltage p.86
- Chassis q fan control enabled p.86
- Chassis fan speed low limit 600 rpm p.86
- Chassis fan profile standard p.86
- Off sets the power on state of the numlock to off p.87
- Key to be pressed when error occurs p.87
- Full screen logo enabled p.87
- Fast boot enabled p.87
- Enabled initializes and launches an active boot option to a set of required devices p.87
- Enabled enables the full screen logo display feature p.87
- Disabled disables this function p.87
- Disabled disables the full screen logo display feature p.87
- Chapter 3 bios setup p.87
- Chapter 3 p.87
- Bootup numlock state on p.87
- Boot menu p.87
- Wait for f1 if error enabled p.87
- The boot menu items allow you to change the system boot options p.87
- Set this item to enabled to use the asus mylogo 2 feature p.87
- On sets the power on state of the numlock to on p.87
- Uefi legacy boot enable both uefi and legacy p.88
- Setup mode ez mode p.88
- Pci rom and legacy rom priority p.88
- Option rom messages force bios p.88
- Chapter 3 p.88
- Boot override p.88
- Boot option priorities p.88
- For more details refer to section 3 0 asus ez flash 2 utility p.89
- Chapter 3 bios setup p.89
- Chapter 3 p.89
- Asus o c profile p.89
- Asus ez flash 2 utility p.89
- Tools menu p.89
- To display the submenu p.89
- To confirm your choice p.89
- This item allows you to store or load multiple bios settings p.89
- The setup profile status items show not installed if no profile is created p.89
- Dimm slot slot 1 p.90
- Save to profile p.90
- Load from profile p.90
- Chapter 3 p.90
- Asus spd information p.90
- Load optimized defaults p.91
- Launch efi shell from filesystem device p.91
- Exit menu p.91
- Discard changes exit p.91
- Chapter 3 p.91
- Asus ez mode p.91
- Save changes reset p.91
- Updating bios p.92
- Launching asus update p.92
- Chapter 3 p.92
- Asus update utility p.92
- Updating the bios through the internet p.93
- Chapter 3 p.93
- Updating the bios through a bios file p.94
- Chapter 3 p.94
- To enable it p.95
- The asus ez flash 2 feature allows you to update the bios without having to use a bootable floppy disk or an os based utility p.95
- Insert the usb flash disk that contains the latest bios file to the usb port p.95
- Chapter 3 bios setup p.95
- Chapter 3 p.95
- Before you start using this utility download the latest bios from the asus website at www asus com p.95
- Asus ez flash 2 utility p.95
- To update the bios using ez flash 2 p.95
- To switch to the folder info field p.95
- To switch to the drive field p.95
- To perform the bios update process reboot the system when the update process is done p.95
- Turn on the system p.96
- To recover the bios p.96
- To load default bios values p.96
- The utility automatically checks the devices for the bios file when found the utility reads the bios file and enters asus ez flash 2 utility automatically p.96
- The asus crashfree bios 3 utility is an auto recovery tool that allows you to restore the bios file when it fails or gets corrupted during the updating process you can restore a corrupted bios file using the motherboard support dvd or a usb flash drive that contains the bios file p.96
- Recovering the bios p.96
- Insert the motherboard support dvd to the optical drive or the usb flash drive containing the bios file to the usb port p.96
- Chapter 3 p.96
- Asus p8z77 v lx p.96
- Asus crashfree bios 3 utility p.96
- Before updating bios p.97
- Asus bios updater p.97
- Chapter 3 p.97
- Booting the system in dos environment p.97
- Updating the bios file p.98
- To update the bios file using bios updater p.98
- To exit bios updater restart your computer p.98
- The bios updater screen appears as below p.98
- For bios updater version 1 4 or later the utility automatically exits to the dos prompt after updating bios p.98
- Ensure to load the bios default settings to ensure system compatibility and stability select the load optimized defaults item under the exit bios menu see chaper 3 of your motherboard user manual for details p.98
- Ensure to connect all sata hard disk drives after updating the bios file if you have disconnected them p.98
- Do not shut down or reset the system while updating the bios to prevent system boot failure p.98
- Chapter 3 p.98
- Bios updater checks the selected bios file and prompts you to confirm bios update p.98
- Asus p8z77 v lx p.98
- Chapter 3 bios setup p.99
- Chapter 3 p.99
- Asus p8z77 v lx p.100
- Xp 64 bit xp 7 64 bit 7 operating systems os always install the latest os version and corresponding updates to maximize the features of your hardware p.100
- This motherboard supports window p.100
- The support dvd that comes with the motherboard package contains the drivers software applications and utilities that you can install to avail all motherboard features p.100
- Support dvd information p.100
- Running the support dvd p.100
- Place the support dvd into the optical drive the dvd automatically displays the drivers menu if autorun is enabled in your computer click each menu tab and select the items you want to install p.100
- Installing an operating system p.100
- Chapter 4 p.100
- Obtaining the software manuals p.101
- Chapter 4 p.101
- Using ai suite ii p.102
- Software information p.102
- Installing ai suite ii p.102
- Chapter 4 p.102
- Ai suite ii p.102
- Chapter 4 p.103
- Turbov evo on the ai suite ii main menu bar p.103
- Turbov evo p.103
- Turbov allows you to overclock the bclk frequency cpu voltage imc voltage and dram bus voltage in window p.103
- Turbov p.103
- Refer to the software manual in the support dvd or visit the asus website at www asus com for detailed software configuration p.103
- Refer to the cpu documentation before adjusting cpu voltage settings setting a high voltage may damage the cpu permanently and setting a low voltage may make the system unstable p.103
- For system stability all changes made in turbov will not be saved to bios settings and will not be kept on the next system boot use the save profile function to save your customized overclocking settings and manually load the profile after windows starts p.103
- For advanced overclock ability adjust first the bios items and then proceed more detailed adjustments p.103
- Environment and takes effect in real time without exiting and rebooting the os p.103
- Chapter 4 software support p.103
- Click the gpu boost tab p.104
- Click more settings and then click the advanced mode tab to adjust the advanced voltage settings p.104
- Click apply to make the change take effect p.104
- Chapter 4 p.104
- Asus p8z77 v lx p.104
- Allows you to manually set the gpu boost p.104
- Using advanced mode p.104
- The first time you use gpu boost go to ai tweaker in bios and set the igpu voltage item to manual mode p.104
- Slide the bar to adjust the igpu max frequency or the igpu voltage p.104
- Gpu boost p.104
- Using fast tuning p.105
- Chapter 4 p.105
- Auto tuning p.105
- Using extreme tuning p.106
- Chapter 4 p.106
- Items function description p.107
- Digi vrm on the ai suite ii main menu bar p.107
- Digi vrm p.107
- Chapter 4 software support p.107
- Chapter 4 p.107
- Asus digi vrm allows you to adjust vrm voltage and frequency modulation to enhance reliability and stability it also provides the highest power efficiency generating less heat to longer component lifespan and minimize power loss p.107
- Asus p8z77 v lx p.108
- Select from the last reset to show the total co2 that has been reduced since you click the clear button p.108
- Select from epu installation to show the co2 that has been reduced since you installed epu p.108
- Refer to the software manual in the support dvd or visit the asus website at www asus com for detailed software configuration p.108
- Launching epu p.108
- Epu on the ai suite ii main menu bar p.108
- Epu is an energy efficient tool that satisfies different computing needs this utility provides several modes that you can select to save system power selecting auto mode will have the system shift modes automatically according to current system status you can also customize each mode by configuring settings like cpu frequency gpu frequency vcore voltage and fan control p.108
- Chapter 4 p.108
- Using fan xpert p.109
- Launching fan xpert p.109
- Fan xpert p.109
- Fan setting p.109
- Chapter 4 p.109
- Probe ii p.110
- Launching probe ii p.110
- Configuring probe ii p.110
- Chapter 4 p.110
- Usb 3 boost p.111
- Launching usb 3 boost p.111
- Configuring usb 3 boost p.111
- Chapter 4 p.111
- Realtek hd audio manager for windows xp p.112
- Chapter 4 p.112
- Audio configurations p.112
- System requirements for inte p.113
- Responsiveness technologies p.113
- Introduction to inte p.113
- Desktop p.113
- Chapter 4 p.113
- Chapter 4 p.114
- Smart response technology p.115
- Installing inte p.115
- Chapter 4 p.115
- Using the inte p.115
- Select the ssd that you want to create the partition p.116
- Select disable acceleration to disable this function and select change mode to switch acceleration mode to enhanced maximized p.116
- Rapid start technology allows you to quickly resume your computer from sleeping mode saving your computer s system memory to the configured ssd provides a faster wake up response time but keeps the energy in a low profile p.116
- Rapid start technology p.116
- Disk management p.116
- Creating a partition p.116
- Chapter 4 p.116
- Asus p8z77 v lx p.116
- Chapter 4 p.117
- Chapter 4 p.118
- Rapid start technology under the os p.119
- Enabling and disabling the inte p.119
- Chapter 4 p.119
- Recovering the partition p.120
- Chapter 4 p.120
- Chapter 4 p.121
- Smart connect technology p.122
- Installing the inte p.122
- Chapter 4 p.122
- Using the inte p.123
- Smart connect technology p.123
- Chapter 4 p.123
- Chapter 4 p.124
- Raid definitions p.125
- Raid configurations p.125
- Chapter 4 p.125
- Due to chipset limitation when set any of sata ports to raid mode all sata ports run at raid mode together p.126
- Connect the sata signal cables p.126
- Connect a sata power cable to the power connector on each drive p.126
- You must enable the raid function in the bios setup before creating raid set s using sata hdds to do this p.126
- Chapter 4 p.126
- Turn on the system p.126
- Asus p8z77 v lx p.126
- To install the sata hard disks for a raid configuration p.126
- To enter the inte p.126
- To display the utility main menu p.126
- The motherboard supports serial ata hard disk drives for optimal performance install identical drives of the same model and capacity when creating a disk array p.126
- Setting the raid item in bios p.126
- Set the sata mode item to raid mode p.126
- Save your changes and then exit the bios setup p.126
- Refer to chapter 3 for details on entering and navigating through the bios setup p.126
- Rapid storage technology option rom utility p.126
- Installing serial ata hard disks p.126
- Install the sata hard disks into the drive bays p.126
- Enter the bios setup during post p.126
- Chapter 4 software support p.127
- Chapter 4 p.127
- To select the hard disk drives you want to include in the raid set the select disks screen appears p.127
- To create a raid set p.127
- The utility supports maximum four hard disk drives for raid configuration p.127
- The raid bios setup screens shown in this section are for reference only and may not exactly match the items on your screen p.127
- The navigation keys at the bottom of the screen allow you to move through the menus and select the menu options p.127
- The following screen appears p.127
- Creating a raid set p.127
- Chapter 4 p.128
- The following warning message appears p.129
- The following screen appears p.129
- Take caution when deleting a raid set you will lose all data on the hard disk drives when you delete a raid set p.129
- Rapid storage technology option rom utility p.129
- Exiting the inte p.129
- Deleting a raid set p.129
- Chapter 4 software support p.129
- Chapter 4 p.129
- To return to the utility main menu p.129
- To return to the delete volume menu p.129
- To exit the utility p.129
- To delete a raid set p.129
- Creating a raid driver disk without entering the os p.130
- Creating a raid driver disk in window p.130
- Creating a raid driver disk p.130
- Chapter 4 p.130
- Os installation p.131
- Installing the raid driver during window p.131
- Chapter 4 p.131
- Using a usb floppy disk drive p.132
- Chapter 4 p.132
- Chapter 4 p.133
- Chapter 5 p.134
- Before you begin p.134
- Requirements p.134
- Crossfirex technology p.134
- Installing two crossfirex graphics cards p.135
- Chapter 5 p.135
- Launching the ati catalyst control center p.136
- Installing the device drivers p.136
- Enabling the at p.136
- Enabling dual crossfirex technology p.136
- Crossfirex technology p.136
- Chapter 5 p.136
- Installing lucidlogix virtu mvp p.137
- Insert the support dvd in the optical drive the asus support wizard appears if your computer has enabled the autorun feature p.137
- Follow the succeeding onscreen instructions to complete the installation p.137
- Click the utilites tab then click lucidlogix virtu mvp software p.137
- Chapter 5 multiple gpu technology support p.137
- Chapter 5 p.137
- To install lucidlogix virtu mvp p.137
- Lucidlogix virtu mvp allows your computer s vga output and discrete graphic cards to perform better respond faster and process media files smoother within a low power environment its gpu virtualization assigns tasks to the best available graphic source while the newly designed virtual vsync gives you a smoother gaming experience p.137
- Lucidlogix virtu mvp p.137
- To use lucidlogix virtu mvp in i mode the display must be connected to the onboard video output p.138
- To use lucidlogix virtu mvp in d mode the display must be connected to the installed graphics card p.138
- Setting up your display p.138
- Lucidlogix virtu mvp solution comes with two distinct modes that allows you to enjoy better graphics either from your built in video output i mode or from a discrete graphics card d mode p.138
- I mode p.138
- D mode p.138
- Chapter 5 p.138
- Asus p8z77 v lx p.138
- Configuring lucidlogix virtu mvp p.139
- Chapter 5 p.139
- Chapter 5 p.140
- Asus p8z77 v lx p.140
- Allows you to turn on off the hyperformanc p.140
- Performance p.140
- Or virtual vsync function p.140
- Technical support p.141
- Asustek computer inc p.141
- Asus contact information p.141
- Asus computer international america p.141
- Asus computer gmbh germany and austria p.141
- Fcc part 15 subpart c intentional radiators p.142
- Fcc part 15 subpart b unintentional radiators p.142
- This device complies with part 15 of the fcc rules operation is subject to p.142
- Ec declaration of conformity p.142
- The following two conditions 1 this device may not cause harmful p.142
- Declaration of conformity p.142
- Supplementary information p.142
- Date dec 2011 p.142
- Signature p.142
- Conforms to the following specifications p.142
- Responsible party name responsible party name p.142
- Ca 94539 p.142
- Representative person s name representative person s name steve chang president p.142
- Asus computer international p.142
- Product name motherboard p.142
- Address 800 corporate way fremon p.142
- Phone fax no 510 739 3777 510 608 4555 p.142
- Per fcc part 2 section 2 1077 a p.142
- Model number p8z77 v lx p.142
- Interference and 2 this device must accept any interference received p.142
- Including interference that may cause undesired operation p.142
- Hereby declares that the product p.142
- Fcc part 15 subpart e intentional radiators p.142
Похожие устройства
-
 Asus TUF GAMING B550-PROРуководство по быстрому запуску
 -
 Asus PRIME A520M-A IIКраткое руководство пользователя
 -
 Asus PRIME B250M-PLUSКраткое руководство
 -
 Asus TUF GAMING Z590-PLUSКраткое руководство
 -
 Asus ProArt B650-CREATORКраткий обзор функций
 -
 Asus TUF GAMING B650-PLUSБыстрый старт
 -
 Asus ROG STRIX X670E-I GAMING WIFIКраткое руководство пользователя
 -
Asus ROG FPS-IIРуководство по быстрому запуску
-
 Asus Pro WS W680M-ACE SEКраткая эксплуатационная инструкция
 -
 Asus PRIME B760M-A WIFI D4Инструкция в сокращённом виде
 -
 Asus PRIME H770-PLUSБыстрый старт
 -
 Asus B850-PLUS WIFIКраткое руководство
Узнайте, как правильно настроить и управлять технологией быстрого запуска на вашем компьютере. Следуйте простым шагам для создания и активации раздела гибернации.