
Microlab fc50 Инструкция по эксплуатации онлайн
Содержание
Похожие устройства
- Microlab fc10 Инструкция по эксплуатации
- Microlab m1910 Инструкция по эксплуатации
- Microlab b51 Инструкция по эксплуатации
- Microlab solo-9c Инструкция по эксплуатации
- Microlab solo-6c new Инструкция по эксплуатации
- Microlab h30bt Инструкция по эксплуатации
- Microlab h30bt Инструкция по эксплуатации
- Microlab m200 platinum Инструкция по эксплуатации
- Microlab md112 Инструкция по эксплуатации
- Microlab fc30 Инструкция по эксплуатации
- Microlab B53 Инструкция по эксплуатации
- Microlab B72 Инструкция по эксплуатации
- Microlab M520 Инструкция по эксплуатации
- Microlab iH11, black Инструкция по эксплуатации
- Microlab M500U Инструкция по эксплуатации
- Microlab SOLO-15 Инструкция по эксплуатации
- Microlab M111 Инструкция по эксплуатации
- Microlab M200 Инструкция по эксплуатации
- Microlab SOLO-3C Инструкция по эксплуатации
- Microlab SOLO-2C Инструкция по эксплуатации
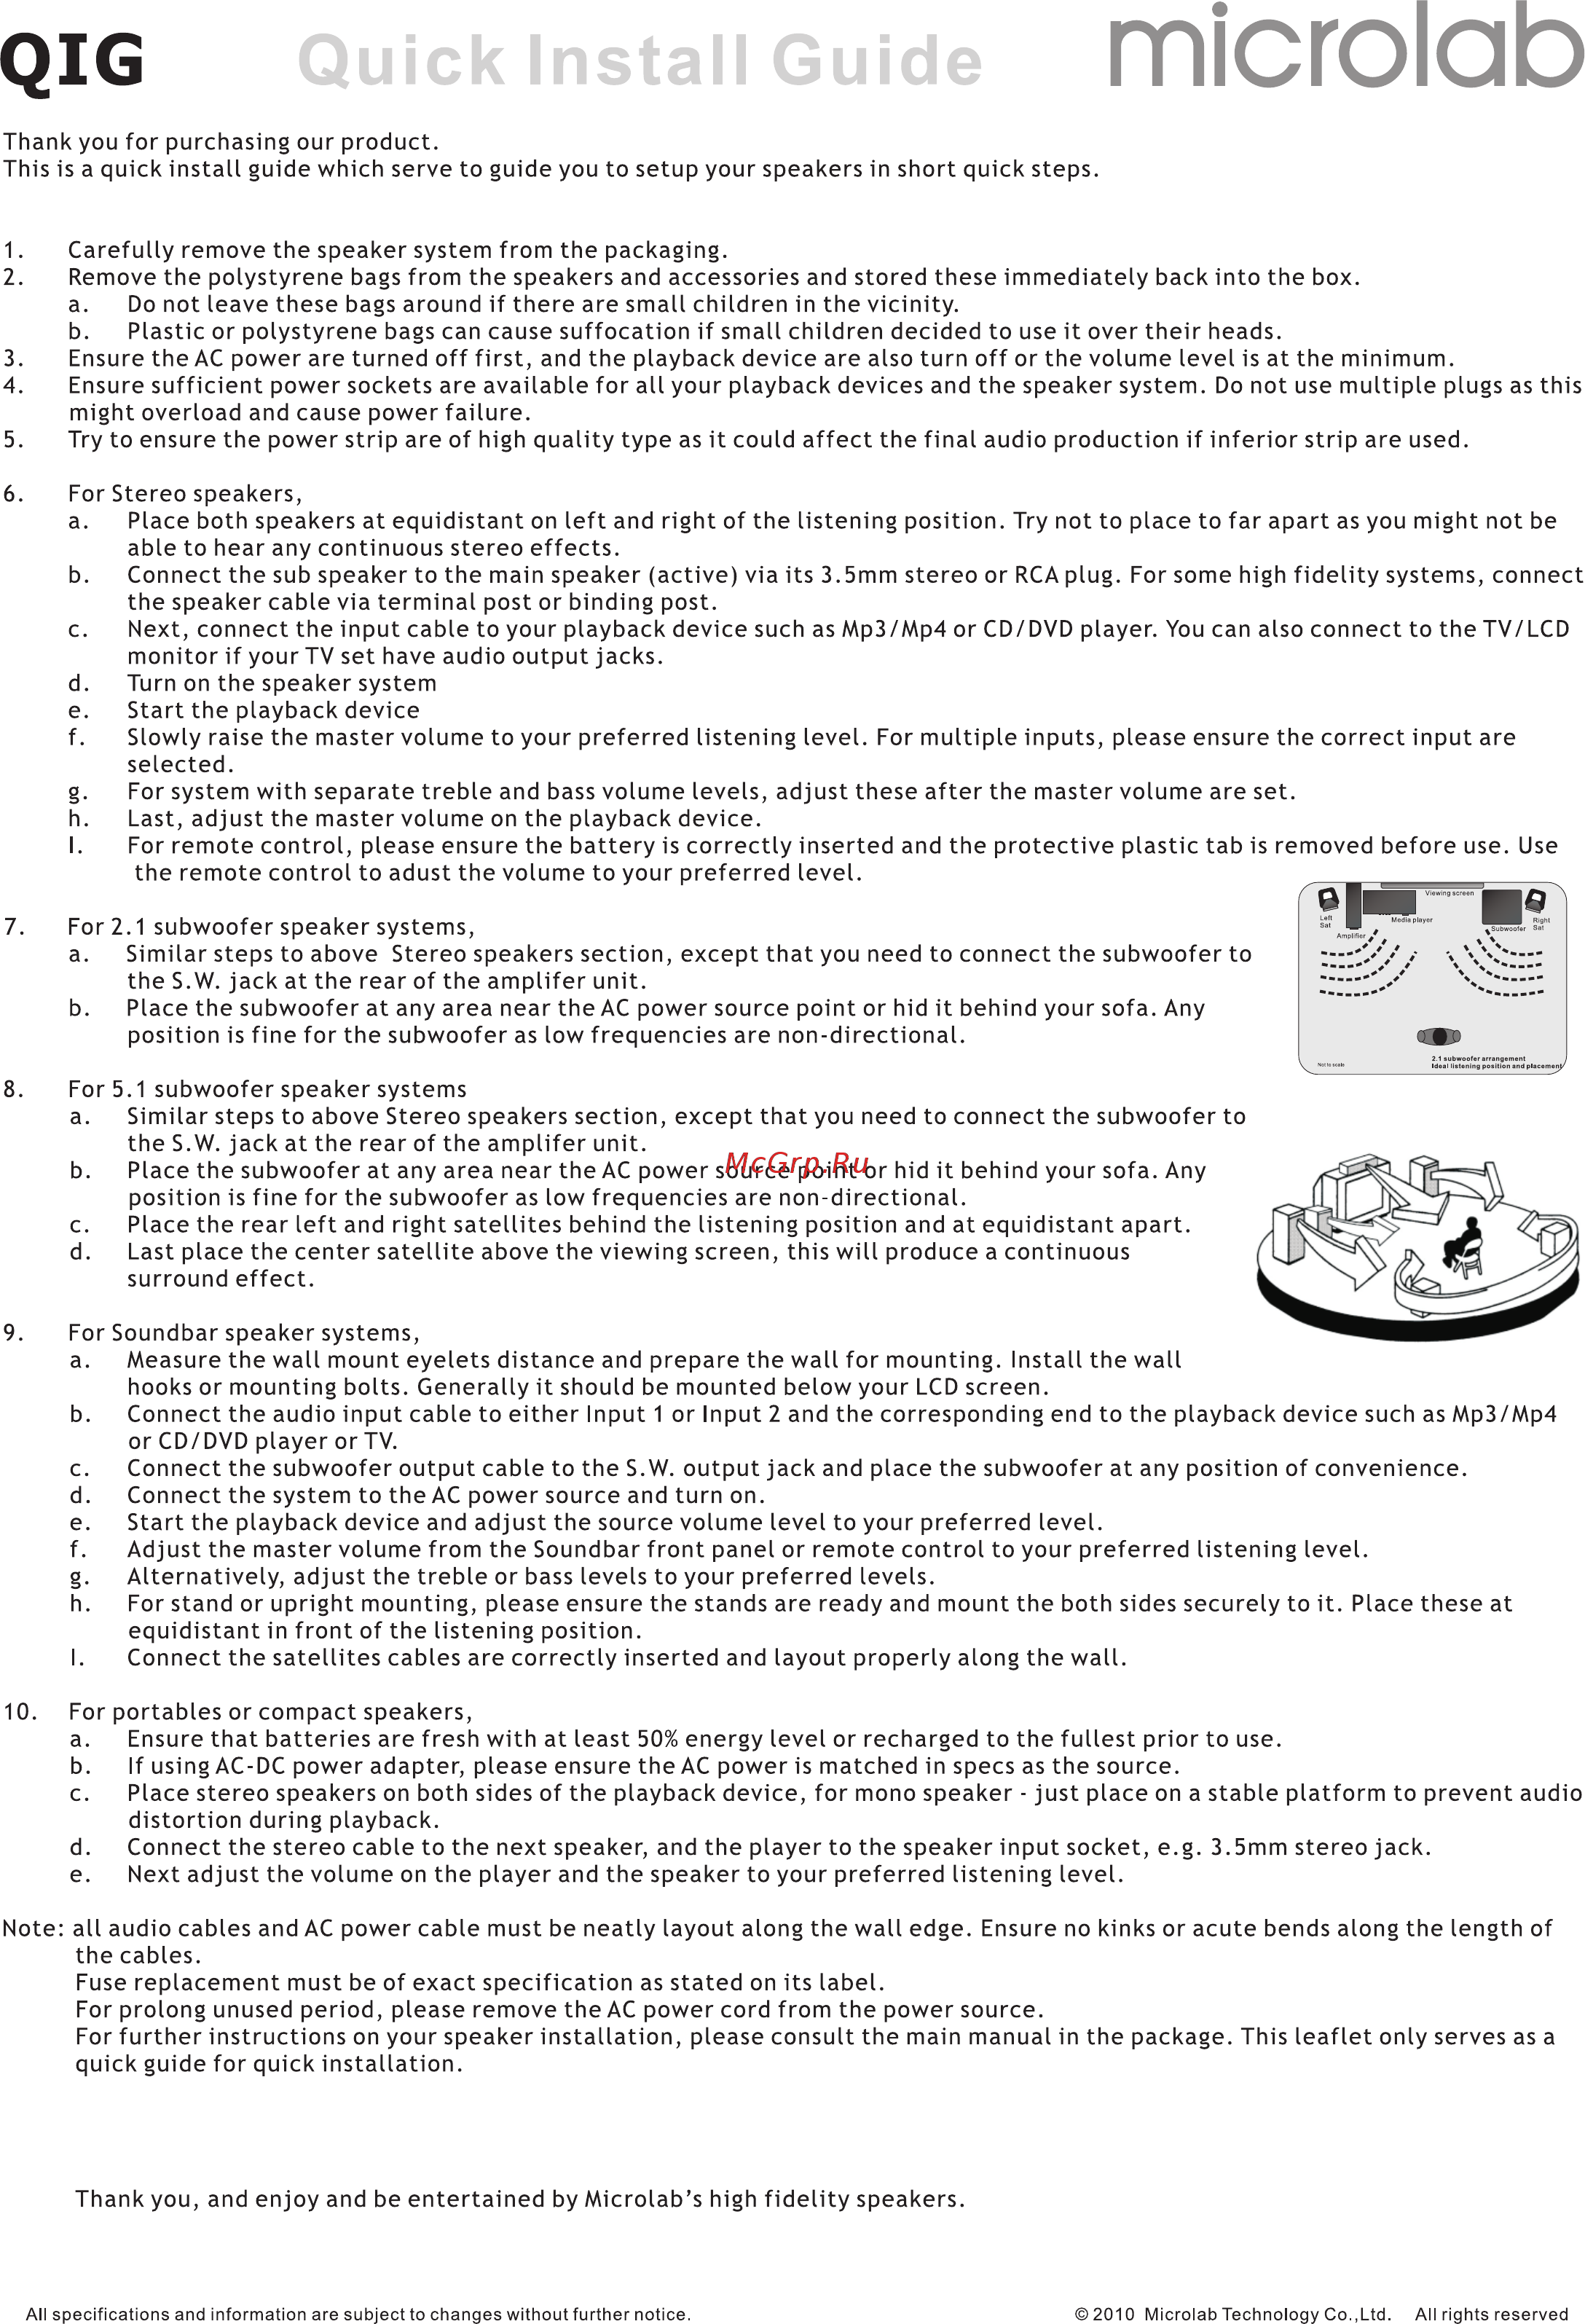
QIG Quick Install Guide microlab Thank you for purchasing our product This is a quick install guide which serve to guide you to setup your speakers in short quick steps 1 Carefully remove the speaker system from the packaging 2 Remove the polystyrene bags from the speakers and accessories and stored these immediately back into the box a Do not leave these bags around if there are small children in the vicinity b Plastic or polystyrene bags can cause suffocation if small children decided to use it over their heads 3 Ensure the AC power are turned off first and the playback device are also turn off or the volume level is at the minimum 4 Ensure sufficient power sockets are available for all your playback devices and the speaker system Do not use multiple plugs as this might overload and cause power failure 5 Try to ensure the power strip are of high quality type as it could affect the final audio production if inferior strip are used For Stereo speakers a Place both speakers at equidistant on left and right of the listening position Try not to place to far apart as you might not be able to hear any continuous stereo effects b Connect the sub speaker to the main speaker active via its 3 5mm stereo or RCA plug For some high fidelity systems connect the speaker cable via terminal post or binding post c Next connect the input cable to your playback device such as Mp3 Mp4 or CD DVD player You can also connect to the TV LCD monitor if your TV set have audio output jacks d Turn on the speaker system e Start the playback device f Slowly raise the master volume to your preferred listening level For multiple inputs please ensure the correct input are selected g For system with separate treble and bass volume levels adjust these after the master volume are set h Last adjust the master volume on the playback device I For remote control please ensure the battery is correctly inserted and the protective plastic tab is removed before use Use the remote control to adust the volume to your preferred level For 2 1 subwoofer speaker systems a Similar steps to above Stereo speakers section except that you need to connect the subwoofer to the S W jack at the rear of the amplifer unit b Place the subwoofer at any area near the AC power source point or hid it behind your sofa Any position is fine for the subwoofer as low frequencies are non directional For 5 1 subwoofer speaker systems a Similar steps to above Stereo speakers section except that you need to connect the subwoofer to the S W jack at the rear of the amplifer unit b Place the subwoofer at any area near the AC power source point or hid it behind your sofa Any position is fine for the subwoofer as low frequencies are non directional oTL c Place the rear left and right satellites behind the listening position and at equidistant apart d Last place the center satellite above the viewing screen this will produce a continuous surround effect L Ira For Soundbar speaker systems a Measure the wall mount eyelets distance and prepare the wall for mounting Install the wall hooks or mounting bolts Generally it should be mounted below your LCD screen b Connect the audio input cable to either Input 1 or Input 2 and the corresponding end to the playback device such as Mp3 Mp4 or CD DVD player or TV c Connect the subwoofer output cable to the S W output jack and place the subwoofer at any position of convenience d Connect the system to the AC power source and turn on e Start the playback device and adjust the source volume level to your preferred level f Adjust the master volume from the Soundbar front panel or remote control to your preferred listening level g Alternatively adjust the treble or bass levels to your preferred levels h For stand or upright mounting please ensure the stands are ready and mount the both sides securely to it Place these at equidistant in front of the listening position I Connect the satellites cables are correctly inserted and layout properly along the wall 10 For portables or compact speakers a Ensure that batteries are fresh with at least 50 energy level or recharged to the fullest prior to use b If using AC DC power adapter please ensure the AC power is matched in specs as the source c Place stereo speakers on both sides of the playback device for mono speaker just place on a stable platform to prevent audio distortion during playback d Connect the stereo cable to the next speaker and the player to the speaker input socket e g 3 5mm stereo jack e Next adjust the volume on the player and the speaker to your preferred listening level Note all audio cables and AC power cable must be neatly layout along the wall edge Ensure no kinks or acute bends along the length of the cables Fuse replacement must be of exact specification as stated on its label For prolong unused period please remove the AC power cord from the power source For further instructions on your speaker installation please consult the main manual in the package This leaflet only serves as a quick guide for quick installation Thank you and enjoy and be entertained by Microlab s high fidelity speakers All specifications and information are subject to changes without further notice 2010 Microlab Technology Co Ltd All rights reserved