
TSC TDP-643R Plus Краткое руководство по установке онлайн
Page1 of 2
Quick Installation Guide
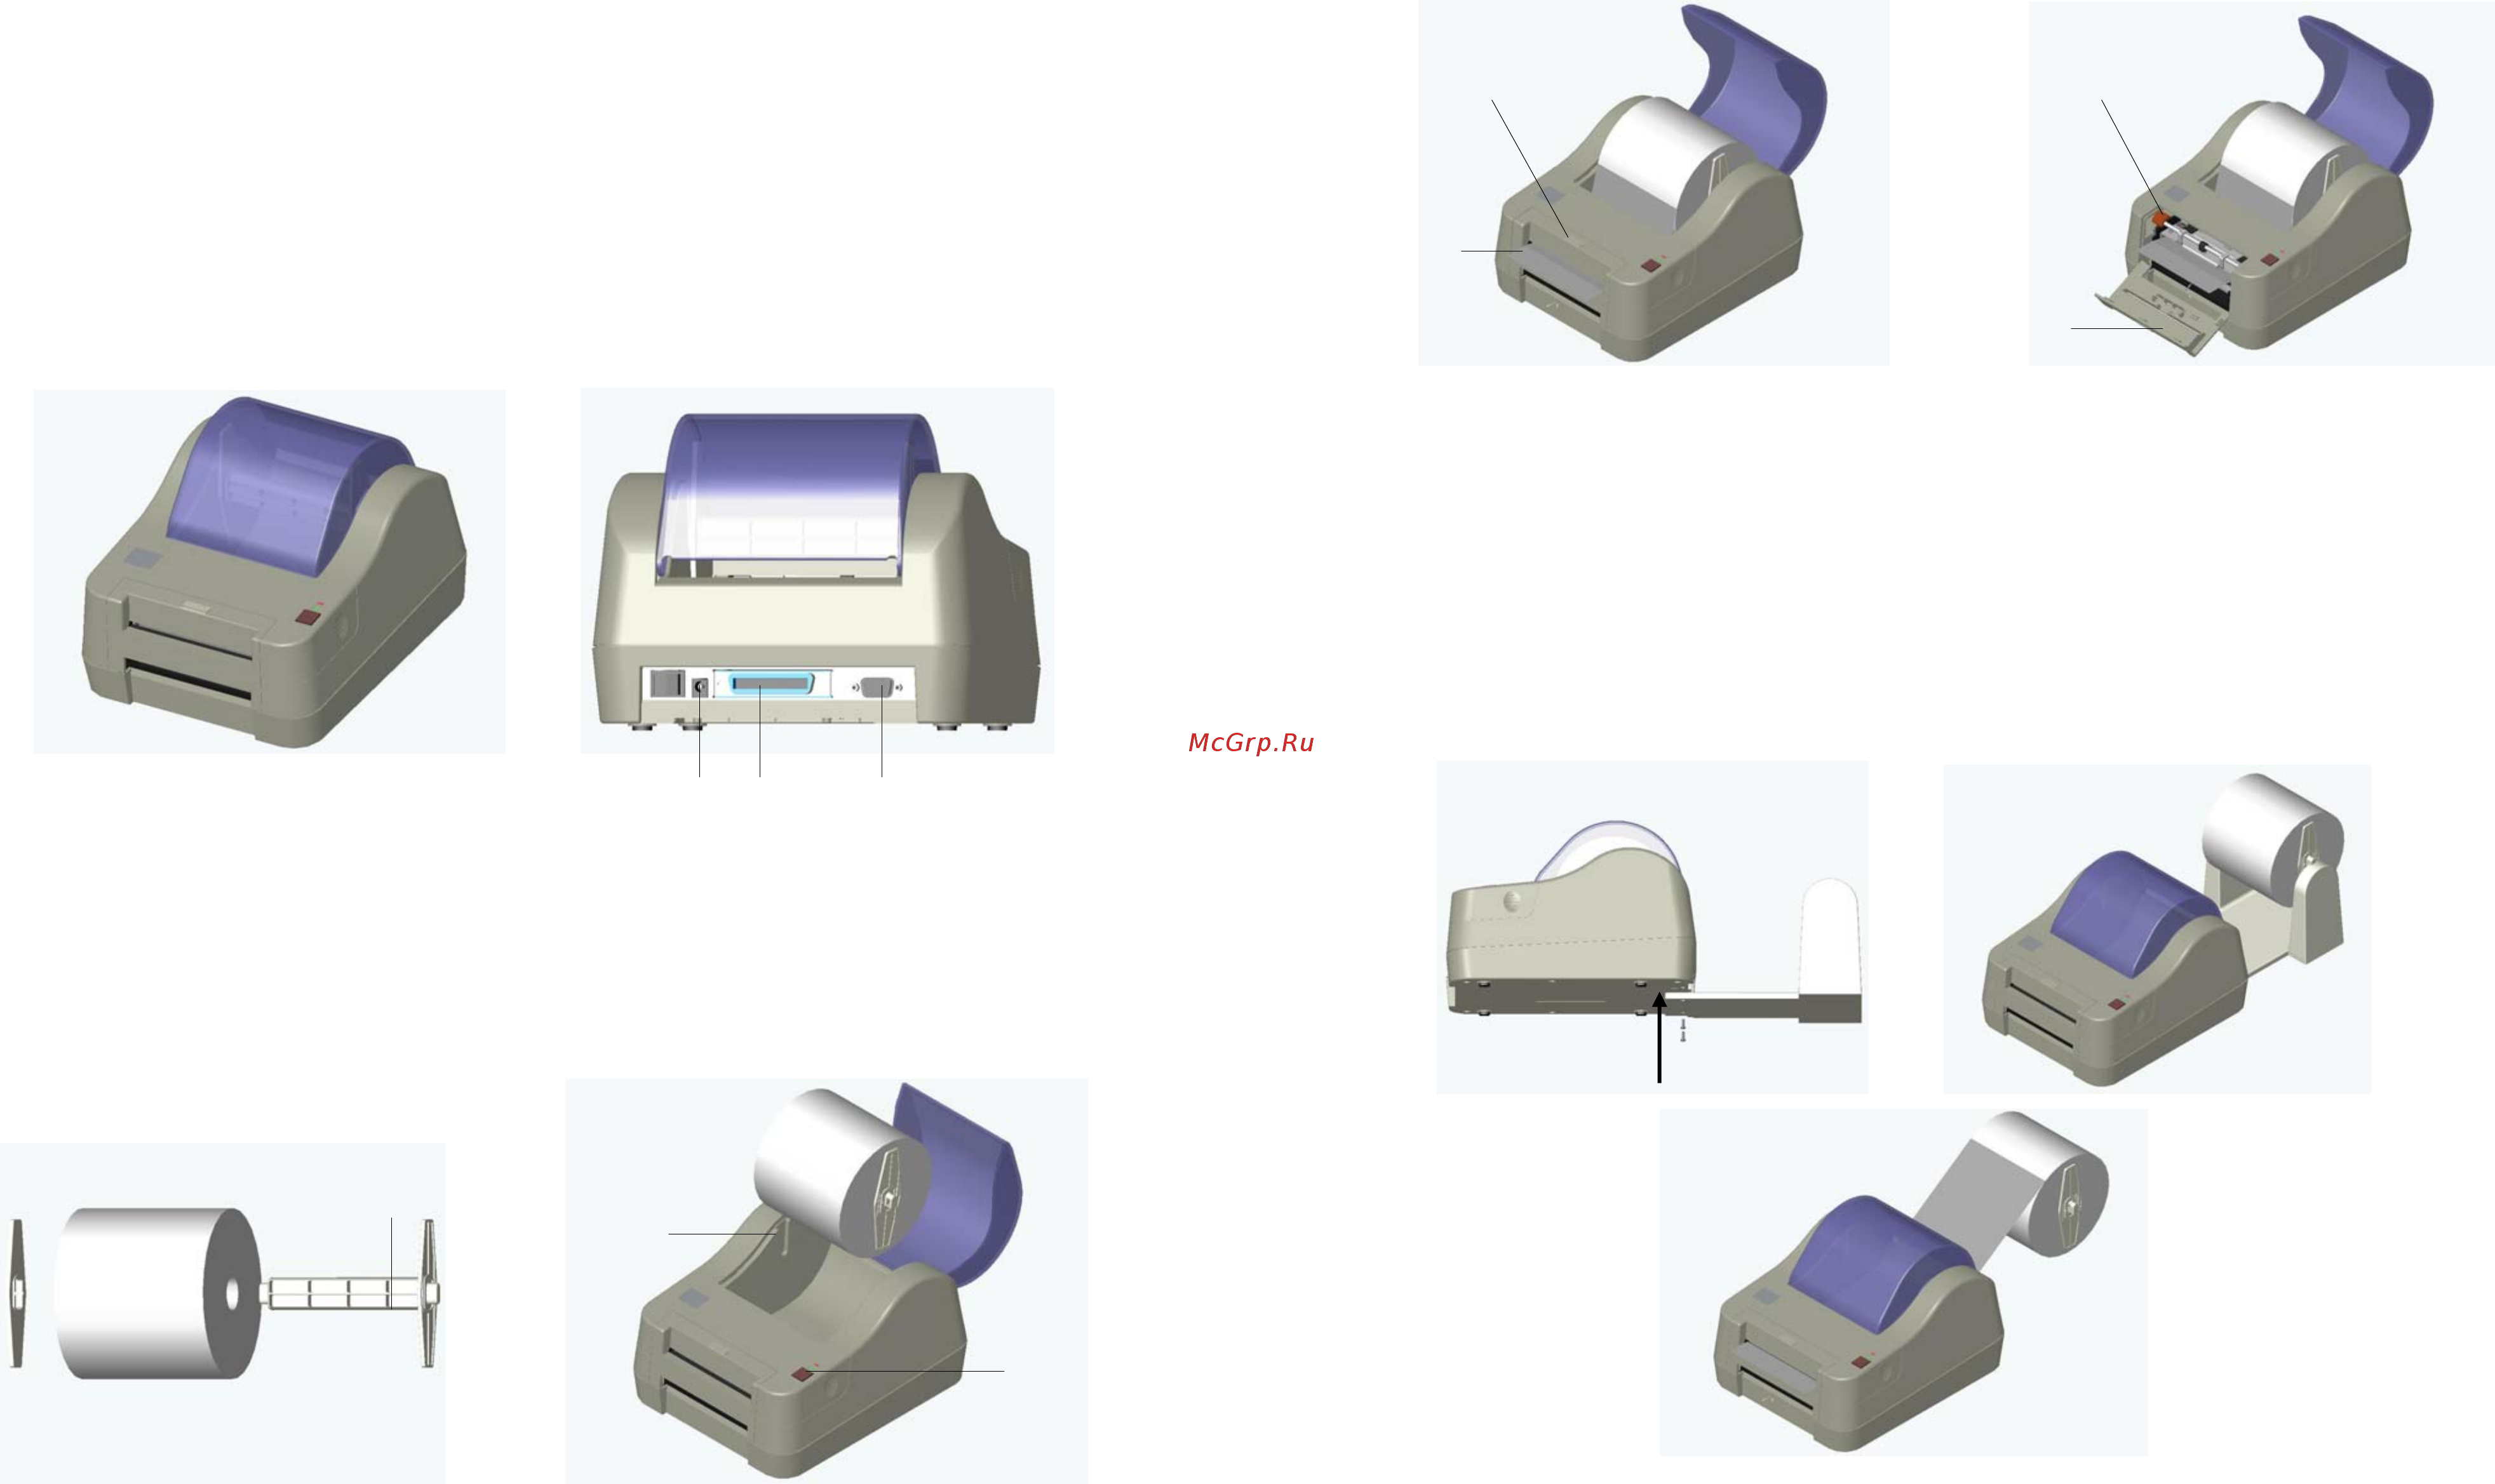
A : Installing the Bar Code Printer
1. Make sure the power is off.
2. Connect the Centronics or RS-232 cable to corresponding ports (1) or (2) at the rear of the printer, and
connect the other end of the cable to the computer as shown in (b).
3. Plug the power cord into the power jack (3) at the rear of the printer, and then plug the power cable into a
properly grounded wall outlet.
B : Label Loading Instructions:
1. Insert the spindle (4) into the core of the label roll as shown in (c).
2. With the print surface facing up, place the label roll spindle onto the slots (5) of label roll mount supports as
shown in (d).
3. Insert and push the label into the label insert opening until it stops.
4. Hold down the FEED button (6) until the front edge of the label feeds about half an inch out of the printer's
label dispense opening (7).
5. To use the self-peeling function, tear off the first few labels, pull paper release button (9) upwards, lead the
backing paper above the metal bar, and insert the backing paper between the platen and self-peeling rod.
6. If the label is not centered within the feeding path, open the front cover (10) by depressing the front cover
release button (8). Push the paper release button to the back and hold it to adjust the label position, then
release it and close the front cover as it shown in (f).
7. (Manually) Rotate the label roll until it is stretches tight.
8. Press the FEED button until the READY indicator is on, and the label has been properly installed.
C : Setting Up the External Label Roll Mount
1. Fix external label roll mount on the base of printer with two screws as shown in (h).
2. Make sure external label roll mount is tightly connected to the base of printer and feed the label roll as
shown in (i) and (j).
D :Power-On Utilities
1. Printer Initialization
To initialize the printer, press the FEED button while turning on the printer. Instantly the red and green
indicators will flash alternately. Press the FEED button again and the printer will be initialized.
Note: When initialization is done, please calibrate the gap sensor again.
(1) (2) (3)
(a) (b)
(h) (i)
(j)
(4)
(5)
(6)
(7)
(c)
(d)
(e) (f)
(9) (8)
(10)
Содержание
Похожие устройства
- TSC TDP-643R Plus Инструкция по эксплуатации
- TSC TTP-225 Краткое руководство по установке
- TSC TTP-225 Инструкция по эксплуатации
- TSC TTP-323 Краткое руководство по установке
- TSC TTP-323 Инструкция по эксплуатации
- TSC TTP-243 Pro Краткое руководство по установке
- TSC TTP-243 Pro Инструкция по эксплуатации
- TSC TTP-243E Pro Краткое руководство по установке
- TSC TTP-243E Pro Инструкция по эксплуатации
- TSC TTP-342 Pro Краткое руководство по установке
- TSC TTP-342 Pro Инструкция по эксплуатации
- TSC TTP-244 Pro Краткое руководство по установке
- TSC TTP-244 Pro Инструкция по эксплуатации
- TSC TTP-244 Plus Краткое руководство по установке
- TSC TTP-244 Plus Инструкция по эксплуатации
- TSC TTP-244 Краткое руководство по установке
- TSC TTP-244 Инструкция по эксплуатации
- TSC TX200 Краткое руководство по установке
- TSC TX200 Инструкция по эксплуатации
- TSC TX300 Краткое руководство по установке
Скачать
Случайные обсуждения