![Ariete 1329/11 Cafe Roma Plus — инструкция по использованию кофемашины для профессионалов [15/92]](/img/pdf.png)
Ariete 1329/11 Cafe Roma Plus — инструкция по использованию кофемашины для профессионалов [15/92]
![Ariete 1329/11 Cafe Roma Plus [15/92] Identification data](/views2/1280838/page15/bgf.png)
14
S - Cup grille
T - Professional lter holder
U - Thermocream® Filter
V - Perforated silicone disc
W - Thermocream® Disc
1 On/off light
2 Coffee temperature light
3 Steam temperature light
4 Dispenser ller light
5 On/Off button
6 Coffee brewing button
7 Steam button
8 Dispenser ller device button
The following machine identication data are shown on the plate found underneath the machine’s standing base:
• manufacturer and CE mark
• model (Mod.)
• serial number (SN)
• electrical supply voltage (V) and frequency (Hz)
• absorbed electric power (W)
• assistance toll-free number
Always give the model and serial number to the Authorised Service Centres when requesting assistance.
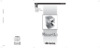
Check that the voltage of the domestic network is the same as that indicated on the technical information plate of the appli-
ance. Place the appliance on a at surface.
Remove the water tank (H) from the opening on the machine (Fig. 3), ll with fresh natural water up to the Max mark (1.5 lt),
and ret it into its housing onto the body. In order to guarantee the correct operation of the appliance, push the tank down
as far as it will go. The tank may also be lled from the top, by pouring water through the opening and after lifting the ller
cap (I), Fig. 4. Plug the appliance into the mains.
Press the main switch (5) Fig. 2; the power light (1) will light up and light (2) will start blinking until the operating temperature
has been reached. Put a cup underneath the Maxi Cappuccino device and lower the water/steam lever (Fig. 5 - F), and, at
the same time, press the coffee brewing button (6) thus bleeding any air or water out of the circuit. Fill up at least a cupful of
water. Lift the water/steam lever (F) back up and stop the brewing cycle by pressing the coffee button (6).
For the daily relling of the water tank, lift the ller ap (I) and pour in fresh natural water through the opening (Fig. 4).
Introduce the coffee into the coffee beans tank (D) Max 230 gr (Fig. 7).
Coffee may be ground coarse or ne, as per your personal preferences. To change the grinding level, press the stop button
(B) and turn the coffee grinder clock or anticlockwise, following the graded scale, Fig. 8.
Boiler heating and the dispensing function are cut out while the coffee grinder is operating
The appliance is provided with two interchangeable devices:
1) “Continuous ow” device (M) Fig. 1 for the coffee instantaneous grinding. Put the lter holder into the specially provided
fork so as to press the button (M/a) located underneath the ground coffee opening, Fig. 9.
2) “Dispenser/Measuring Device” (N) Fig. 10. Keep the switch (8) Fig. 2 pressed until the ground coffee Dispenser is full:
operate the Measuring Device lever once or twice, according to how many cups of coffee you wish to prepare, and keep
the lter ring inserted into the fork. To release, pull the devices (M) or (N) in your direction.
If the coffee grinder jams, the dispenser lling indicator lamp (4) starts to blink. The reason might be that there are impurities
mixed with the coffee beans.
To unblock the coffee grinder, press the dispenser lling button (8) so that the blinking indicator lamp turns off. Press the
Содержание
- Max 1 5 lt p.2
- Avvertenze importanti p.3
- Uso previsto p.3
- Rischi residui p.3
- L apparecchio può essere usato da bambini con un età superio re a 8 anni e da persone che hanno capacità fisiche sensoriali o mentali ridotte oppure con mancanza di esperienza o di co noscenza solo se sono seguiti da una persona responsabile o se hanno ricevuto e compreso le istruzioni e i pericoli presenti durante l uso dell apparecchio p.3
- A proposito di questo manuale p.3
- Conservare sempre queste istruzioni p.5
- Collocare la macchina su un piano stabile dove non possa es sere rovesciata p.5
- Prevenire ogni rischio p.5
- Descrizione dei componenti p.5
- Prima accensione p.6
- Messa in funzione p.6
- Fasi preliminari per l uso p.6
- Descrizione dei comandi p.6
- Scelta del tipo di dispositivo erogatore del caffè macinato p.7
- Come fare un cappuccino p.7
- Come fare il caffè p.7
- Riutilizzo per caffè p.8
- Pulizie periodiche p.8
- Pulizia del filtro contenente il macinato p.8
- Consigli utili per ottenere un buon espresso all italiana p.8
- Come fare tè o infusi p.8
- Messa fuori servizio p.9
- Decalcificazione p.9
- Pulizia della sede del portafiltro p.9
- Pulizia della griglia e dei cassetti recupero acqua p.9
- Pulizia del serbatoio p.9
- Pulizia del dispositivo maxi cappuccino p.9
- Pulizia del disco in silicone p.9
- Pulizia del corpo macchina p.9
- Come rimediare ai seguenti inconvenienti p.10
- With regard to this manual p.12
- This appliance can be used by children aged from 8 years and above and persons with reduced physical sensory or mental capabilities or lack of experience and knowledge if they have been given supervision or instruction concerning use of the ap pliance in a safe way and understand the hazards involved p.12
- Residual risks p.12
- Intended use p.12
- Important safeguards p.12
- Do not leave the power cord within the reach of children under the age of 8 years p.13
- Danger of damage originating from other causes p.13
- Danger due to electricity p.13
- Children shall not play with the appliance cleaning and user maintenance shall not be made by children without supervision p.13
- The plug must be removed from the socket outlet before the boiler is filled with water p.13
- Never leave the appliance unattended when it is connected to the power supply when placing the iron on its stand ensure that the surface on which the stand is placed is stable the appliance is not to be used if it has been dropped if there are visible sign of damage or if it is leaking do not use the ap pliance if the power cord or the plug are damaged or if the ap pliance is faulty to prevent any accident all repairs including the replacement of the power cord must be carried out by an authorised service centre or in any case by qualified person nel p.13
- Place the machine on a stable surface where it cannot be kno cked over p.14
- Keep these instructions in a safe place p.14
- Description of components p.14
- Starting the first time p.15
- Starting the appliance p.15
- Preliminary phases for use p.15
- Identification data p.15
- Control description p.15
- Choice of the ground coffee supply device p.15
- How to make coffee p.16
- How to make a cappuccino p.16
- Cleaning the filter holder seat p.17
- Cleaning the filter containing the grounds p.17
- Cleaning the appliance p.17
- Useful tips for obtaining a good italian espresso p.17
- Reutilization for coffee p.17
- How to make tea or tisanes p.17
- Cleaning the silicone disc p.17
- Troubleshooting p.18
- Putting out of service p.18
- Decalcification p.18
- Cleaning the tank p.18
- Cleaning the maxi cappuccino device p.18
- Cleaning the machine body p.18
- Cleaning the grill and water recovery drawers p.18
- Utilisation prévue p.20
- Risques résiduels p.20
- Remarques importantes p.20
- Cet appareil ne peut être utilisé par les enfants de plus de 8 ans et par les personnes ayant des capacités physiques sen sorielles ou mentales réduites ou bien qui manquent d expé rience et de connaissances à condition d être accompagnés par un adulte responsable ou d avoir reçu et compris les ins p.20
- A propos du manuel p.20
- Toujours conserver ces instructions p.22
- Placer la machine sur un plan stable où il n y a pas risque de la renverser p.22
- Description des composants p.22
- Après vente ariete ou par des techniciens agréés ariete de façon à prévenir les risques éventuels p.22
- Premier allumage p.23
- Operations avant l emploi p.23
- Mise en marche p.23
- Données d identification p.23
- Description des commandes p.23
- Comment faire un cappuccino p.24
- Comment faire le cafe p.24
- Choix du type de dispositif de distribution du café moulu p.24
- Nettoyage du filtre contenant la mouture p.25
- Nettoyage de l appareil p.25
- Conseils utiles pour obtenir un bon cafe espresso a l italienne p.25
- Comment faire le thé ou les infusions p.25
- Retour a l emploi café p.25
- Nettoyage du siège du porte filtre p.26
- Nettoyage du réservoir p.26
- Nettoyage du disque en silicone p.26
- Nettoyage du dispositif maxi cappuccino p.26
- Nettoyage du corps de la machine p.26
- Nettoyage de la grille et des bacs de récupération de l eau p.26
- Décalcification p.26
- Mise hors service p.27
- Comment remedier aux inconvenients suivants p.27
- Zu dieser bedienungsanleitung p.29
- Wichtige hinweise p.29
- Vorgesehener gebrauch p.29
- Restrisiken p.29
- Das gerät darf von kindern ab dem 8 lebensjahr oder von physisch sensoriell oder geistig behinderten menschen oder von personen die über die nötige erfahrung und wissen nicht verfügen verwendet werden unter der bedingung dass es eine angemessene kontrolle durch einen verantwortlichen ausge p.29
- Beschreibung der bauteile p.31
- Stromkabelwechsels nur durch das service center ariete bzw autorisierte ariete fachtechniker durchgeführt werden p.31
- Gebrauchsanleitung gut aufheben p.31
- Das gerät auf einer festen unterlage aufstellen wo es nicht kippen kann p.31
- Kenndaten p.32
- Inbetriebnahme p.32
- Erstes einschalten p.32
- Beschreibung der schalter p.32
- Auswahl des typs der ausgabevorrichtung für das kaffeepulver p.32
- Einen kaffee zubereiten p.33
- Wiedereinstellen auf kaffeezubereitung p.34
- Wie sie einen guten italienischen espresso zubereiten p.34
- Tee oder aufgüsse zubereiten p.34
- Reinigung des kaffeefilters p.34
- Pflege des gerätes p.34
- Einen cappuccino zubereiten p.34
- Entkalkung p.35
- Reinigung des wasserbehälters p.35
- Reinigung des grills und der auffangbehälter p.35
- Reinigung des gerätegehäuses p.35
- Reinigung der silikonscheibe p.35
- Reinigung der maxi cappuccino vorrichtung p.35
- Reinigung der fassung des kaffeefilters p.35
- Was tun wenn es probleme gibt p.36
- Ausserbetriebnahme p.36
- Uso previsto p.38
- Riesgos residuos p.38
- El aparato puede ser utilizado por niños de edad superior a 8 años y personas con capacidades físicas sensoriales o men tales disminuidas o bien con falta de experiencia o de cono cimientos sólo si están controlados por una persona respon sable o si han recibido y comprendido las instrucciones y los p.38
- Advertencias importantes p.38
- A proposito de este manual p.38
- Descripción de los componentes p.40
- Conservar siempre estas instrucciones p.40
- Colocar la máquina en un plano estable donde no sea posible volcarla p.40
- Te para evitar cualquier riesgo p.40
- Puesta en función p.41
- Primer encendido p.41
- Fases preliminares de uso p.41
- Descripción de los mandos p.41
- Datos de identificación p.41
- Elección del tipo de dispositivo distribuidor del café molido p.42
- Como preparar un cappuccino p.42
- Como hacer el café p.42
- Nuevo uso para el café p.43
- Limpieza del filtro que contiene el café molido p.43
- Limpieza del aparato p.43
- Consejos útiles para obtener un buen café exprés a la italiana p.43
- Como preparar té o infusos p.43
- Limpieza de la rejilla y de las bandejas de recolección del agua p.44
- Descalcificación p.44
- Limpieza del dispositivo maxi cappuccino p.44
- Limpieza del disco de silicona p.44
- Limpieza del deposito p.44
- Limpieza del cuerpo de la máquina p.44
- Limpieza del alojamiento del porta filtro p.44
- Puesta fuera de servicio p.45
- Como solucionar los siguientes inconvenientes p.45
- Uso previsto p.47
- Riscos resíduos p.47
- O aparelho pode ser usado por crianças maiores de 8 anos e por pessoas com capacidades físicas sensoriais ou mentais reduzidas ou com falta de experiência ou conhecimento so mente quando supervisionadas por uma pessoa responsável ou se tiverem recebido e compreendido as instruções e os pe rigos presentes durante o uso do aparelho p.47
- Advertências importantes p.47
- A propósito deste manual p.47
- Não deixe o cabo de alimentação ao alcance de crianças me nores de 8 anos p.48
- Não deixar o aparelho sem vigilância enquanto este estiver ligado à rede eléctrica o aparelho deve ser utilizado e deixado em repouso sobre uma superfície estável o aparelho não deve ser utilizado se tiver caído se houver sinais de danos visíveis ou se houver perdas de água não usar o aparelho se o cabo eléctrico ou a tomada estiverem da nificados ou se o próprio aparelho resultar defeituoso todas as reparações incluída a substituição do cabo de alimentação p.48
- Desligar sempre o aparelho e desligar a ficha do cabo de ali mentação retirando a da tomada eléctrica antes de encher a caldeira com água p.48
- As crianças não devem brincar com o aparelho a limpeza e a manutenção apresentadas nestas instruções não devem ser feitas por crianças sem a supervisão de um adulto p.48
- Perigo devido à electricidade p.48
- Perigo de danos devidos a outras causas p.48
- Devem ser realizadas somente por centros de assistência arie te ou por técnicos autorizados ariete de modo a prevenir qual quer perigo p.49
- Descrição dos componentes p.49
- Conservar sempre estas instruções p.49
- Colocar a máquina sobre um plano estável onde não possa ser tombada p.49
- Ligar a máquina pela primeira vez p.50
- Fases preliminares para a sua utilização p.50
- Descrição dos comandos p.50
- Dados de identificação p.50
- Accionamento p.50
- Selecção do tipo de dispositivo para a saída do café moído p.51
- Como preparar o café p.51
- Conselhos úteis para obter um bom expresso à italiana p.52
- Como preparar chá ou infusos p.52
- Como fazer um capuccino p.52
- Reutilização da máquina para fazer o café p.52
- Limpeza do filtro que contém o café moído p.52
- Limpeza do aparelho p.52
- Pôr o aparelho fora de serviço p.53
- Limpeza do reservatório p.53
- Limpeza do plano e das bandejas de recolha da água p.53
- Limpeza do dispositivo maxi cappuccino p.53
- Limpeza do disco de silicone p.53
- Limpeza do corpo da máquina p.53
- Limpeza do alojamento do porta filtro p.53
- Descalcificação p.53
- Como remediar os seguintes inconvenientes p.54
- Over deze handleiding p.56
- Het apparaat kan worden gebruikt door kinderen die ouder zijn dan 8 jaar en door personen met beperkte lichamelijke zin tuiglijke of geestelijke vermogens of personen zonder ervaring en kennis maar uitsluitend als ze door een verantwoordelijke p.56
- Belangrijke aanwijzingen p.56
- Bedoeld gebruik p.56
- Overige risico s p.56
- Zet het apparaat op een stabiel vlak waar deze niet kan omval len p.58
- Vanging van de stroomkabel dienen uitsluitend te worden ver richt door een ariete servicedienst of door ariete vakmensen om iedere vorm van gevaar te voorkomen p.58
- Bewaar deze instructies altijd p.58
- Beschrijving van de onderdelen p.58
- Voor het eerst inschakelen p.59
- Inwerkingstelling p.59
- Identificatiegegevens p.59
- Fases voorafgaand aan het gebruik p.59
- Beschrijving van de bediening p.59
- Keus van het type apparaat dat de koffie maalt p.60
- Hoe maak je koffie p.60
- Hoe maak je cappuccino p.60
- Nuttige informatie voor het maken van een goede espresso p.61
- Hoe maak je thee en dergelijke p.61
- Het opnieuw gebruiken voor het koffiezetten p.61
- Reiniging van het filter waar de maling in zit p.61
- Reiniging van het apparaat p.61
- Schoonmaak van het maxi cappuccino apparaat p.62
- Schoonmaak van de plek waar de filterhouder zit p.62
- Schoonmaak reservoir p.62
- Reiniging van het rooster en van de wateropvangladen p.62
- Reiniging van de siliconenring p.62
- Reiniging van de behuizing van de machine p.62
- Ontkalken p.62
- Buitenwerkingstelling p.62
- Overzicht van oplossingen voor een aantal problemen p.63
- Υπολειμματικοι κινδυνοι p.65
- Σχετικα με το παρον εγχειριδιο p.65
- Σημαντικεσ προειδοποιησεισ p.65
- Προβλεπομενη χρηση p.65
- Απαγορεύεται η χρήση της συσκευής από παιδιά κάτω από 8 ετών και άτομα με ειδικές ανάγκες ή από άτομα που δεν έχουν την απαιτούμενη πείρα εκτός και αν επιτηρούνται από p.65
- Φυλαξτε τισ οδηγιεσ αυτεσ p.67
- Φις του όλες οι επισκευές και η αντικατάσταση του ηλεκτρικού καλωδίου πρέπει να εκτελούνται αποκλειστικά από εξουσιο δοτημένα κέντρα τεχνικής υποστήριξης σέρβις ή από τεχνι κούς της ariete ώστε να αποφεύγεται οποιοσδήποτε κίνδυνος p.67
- Τοποθετήστε τη συσκευή σε ένα σταθερό επίπεδο όπου δεν υπάρχει κίνδυνος να αναποδογυρίσει p.67
- Περιγραφη των εξαρτηματων p.67
- Στοιχεία αναγνώρισης p.68
- Πρώτο άναμμα p.68
- Προκαταρκτικεσ εργασιεσ για τη χρηση p.68
- Περιγραφή εξαρτημάτων χειρισμού p.68
- Θέση σε λειτουργία p.68
- Πωσ να φτιαξετε καφε p.69
- Επιλογή εξαρτήματος παροχής αλεσμένου καφέ p.69
- Συμβουλεσ για να επιτυχετε εναν καλο ιταλικο καφε p.70
- Πωσ να φτιαξετε τσαι η αφεψηματα p.70
- Πωσ να φτιαξετε καπουτσινο p.70
- Καθαρισμοσ συσκευησ p.70
- Επαναχρησιμοποιηση για καφε p.70
- Καθαρισμός φίλτρου αλεσμένου καφέ p.71
- Καθαρισμός της σχάρας και στα σκαφάκια συλλογής νερού p.71
- Καθαρισμός σώματος μηχανής p.71
- Καθαρισμός στο πιατάκι από σιλικόνη p.71
- Καθαρισμός εξαρτήματος maxi cappucino p.71
- Καθαρισμός δοχείου p.71
- Καθαρισμός έδρας υποδοχής φίλτρου p.71
- Πωσ να αποκαταστησετε τισ παρακατω ανωμαλιεσ p.72
- Αχρηστευση συσκευησ p.72
- Αφαιρεση αλατων p.72
- Важные правила пользования p.74
- Применение по назначению p.74
- По отношению к данной инструкции p.74
- Возможный риск p.74
- Oпастность в отношении электричества p.75
- Oпасность возникнущая по другим причинам p.75
- Хранить питающий кабель в недоступном для детей месте в возрасте до 8 лет p.75
- Прибором могут пользоваться дети старше 8 лет или лица с ограниченными физическими сенсорными или умствен ными возможностями либо же лица с отсутствием опыта или умения обращаться с подобными устройствами но только под наблюдением и только после того как им будут разъяснены все условия пользования прибором а также опасности которым они могут подвергнуться во время ис пользования не разрешайте детям играть с прибором дети не должны выполнять изложенные в настоящей ин струкции правила чистки и обслуживания прибора без на блюдения взрослых p.75
- Перед тем как наполнить котел водой отключить прибор и вынуть вилку из розетки сеи электропитания p.75
- Oпастность для детей p.75
- Расположить машину на опрепделённый устойчивый уровень где она не может перевернуться p.76
- Не оставлять подключенный к электросети прибор без присмотра применять и оставлять прибор необходимо на устойчивой поверхности прибор не должен применяться после его падения ког да заметны следы повреждений или наблюдаются утечки воды нельзя использовать прибор если шнур электропи тания вилка или сам прибор повреждены любой ремонт включая замену шнура электропитания должен произво диться только в сервисных центрах ариэте или авторизван ным персоналом ариэте во избежание любых рисков p.76
- Всегда хранить данную инструкцию p.76
- Продготовка к применению p.77
- Подготовительные фазы перед использованием p.77
- Описание прибора p.77
- Описание команд p.77
- Идентификационные данные p.77
- Приготовление кофе p.78
- Первое включение p.78
- Выбор вида устройства для подачи молотого кофе p.78
- Очистка аппарата p.79
- Как делать чай или настойки p.79
- Приготовление каппуччино p.79
- Полезные советы для приготовления хорошего кофе эспрессо по итальянски p.79
- Повторное использование для приготовления кофе p.79
- Очищение решётки и ящичков сбора воды p.80
- Очистка фильтра содержащего помол p.80
- Очистка сита из силикона p.80
- Очистка прибора maxi cappuccino p.80
- Очистка корпуса машины p.80
- Очистка гнезда держателя фильтров p.80
- Руководство по устранению некоторых проблем p.81
- Очистка резервуара p.81
- Невозможное применение p.81
- Декальцифицирование p.81
- ةئماقلا راطخلأا p.83
- ب يتكلا اذه صوصخب p.83
- لماعتسلاا لبق تمايلعتلا صرحب أرقا p.83
- زاهجلا نم ضرغلا p.83
- ةماه تاهيبنت p.83
- تمايلعتلا هذهب ائماد ظفتحا p.85
- تابكرلما تافصاوم p.85
- اهبلاقنا مدع نمضي لكشبو تباث حطس لىع ةنيكالما عض p.85
- لماعتسلاا تمايلعت p.86
- تافصاوم تاودأ مكحتلا p.86
- ةينف تامولعم p.86
- ةنيكالما ليغشت p.86
- ةرم لولأ ةنيكالما ليغشت p.86
- ةوهقلا دادعإ ةقيرط p.87
- ةنوحطلما ةوهقلا عيزوت ةادأ عون رايتخا p.87
- ةيلاطيلإا ةقيرطلا لىع سبرسكلإا ةوهق دادعلإ ةديفم حئاصن p.88
- ةوهقلا دادعلإ ديدج نم ةنيكالما مادختسا p.88
- ءالماب عقنت يتلا ىرخلأا تابوشرلماو ياشلا دادعإ ةقيرط p.88
- ونيشتو بكلا دادعإ ةقيرط p.88
- ونيشتو بك سيكام ةادأ فيظنت p.89
- نوكيليسلا صرق فيظنت p.89
- للاخ نم اهداعبإ بجي لياتلابو ترلفلا لماح هيف كبشي يذلا رقلما في ةوهقلا ةلاثح فلختت نأ نكيم لماعتسلاا عم 6 لكش ترلفلا لماح كبش نودب يرجي ءالما كرت وأ 19 لكش جنفسإ ةحسممو نانسلأا شكن دوع لماعتسا p.89
- ترلفلا لماح رقم فيظنت p.89
- ةنيكالما فيظنت p.89
- ةنوحطلما ةوهقلا لىع يوتحي يذلا ترلفلا فيظنت p.89
- نازخلا فيظنت p.90
- لمعلا نع ةنيكالما فاقيإ p.90
- لكاشلما ضعب لحل تاداشرإ p.90
- ةيسلكلا تابسترلا ةلازإ p.90
- ةنيكالما مسج فيظنت p.90
- ءالما ةداعتسا قيدانصو كبشلا فيظنت p.90
Похожие устройства
-
 Ariete 1342/05 Vintage BlueРуководство по эксплуатации
 -
 Ariete 1342/05 Vintage BlueИнструкция по эксплуатации
 -
 Ariete 1342/04 Vintage GreenИнструкция по эксплуатации
 -
 Ariete 1342/03 Vintage BeigeИнструкция по эксплуатации
 -
 Ariete 1389 Vintage GreenИнструкция по эксплуатации
 -
 Ariete 1389 Vintage BlueИнструкция по эксплуатации
 -
 Ariete 1389 Vintage BeigeИнструкция по эксплуатации
 -
 Ariete 1387 NovecentoИнструкция по эксплуатации
 -
 Ariete 1363 Matisse RedИнструкция по эксплуатации
 -
 Ariete 1363 Matisse BeigeИнструкция по эксплуатации
 -
 Ariete 1334 MinuettoИнструкция по эксплуатации
 -
 Ariete 1388A Retro RedИнструкция по эксплуатации
Узнайте, как правильно использовать кофемашину с подробной инструкцией по настройке, заполнению водой и приготовлению кофе. Идеально для профессионалов.