![Merida Matts 6.500, рама 20", Met. Black (white/green) [18/56] After an accident](/img/pdf.png)
Merida Matts 6.500, рама 20", Met. Black (white/green) [18/56] After an accident
14
a
b
c
d
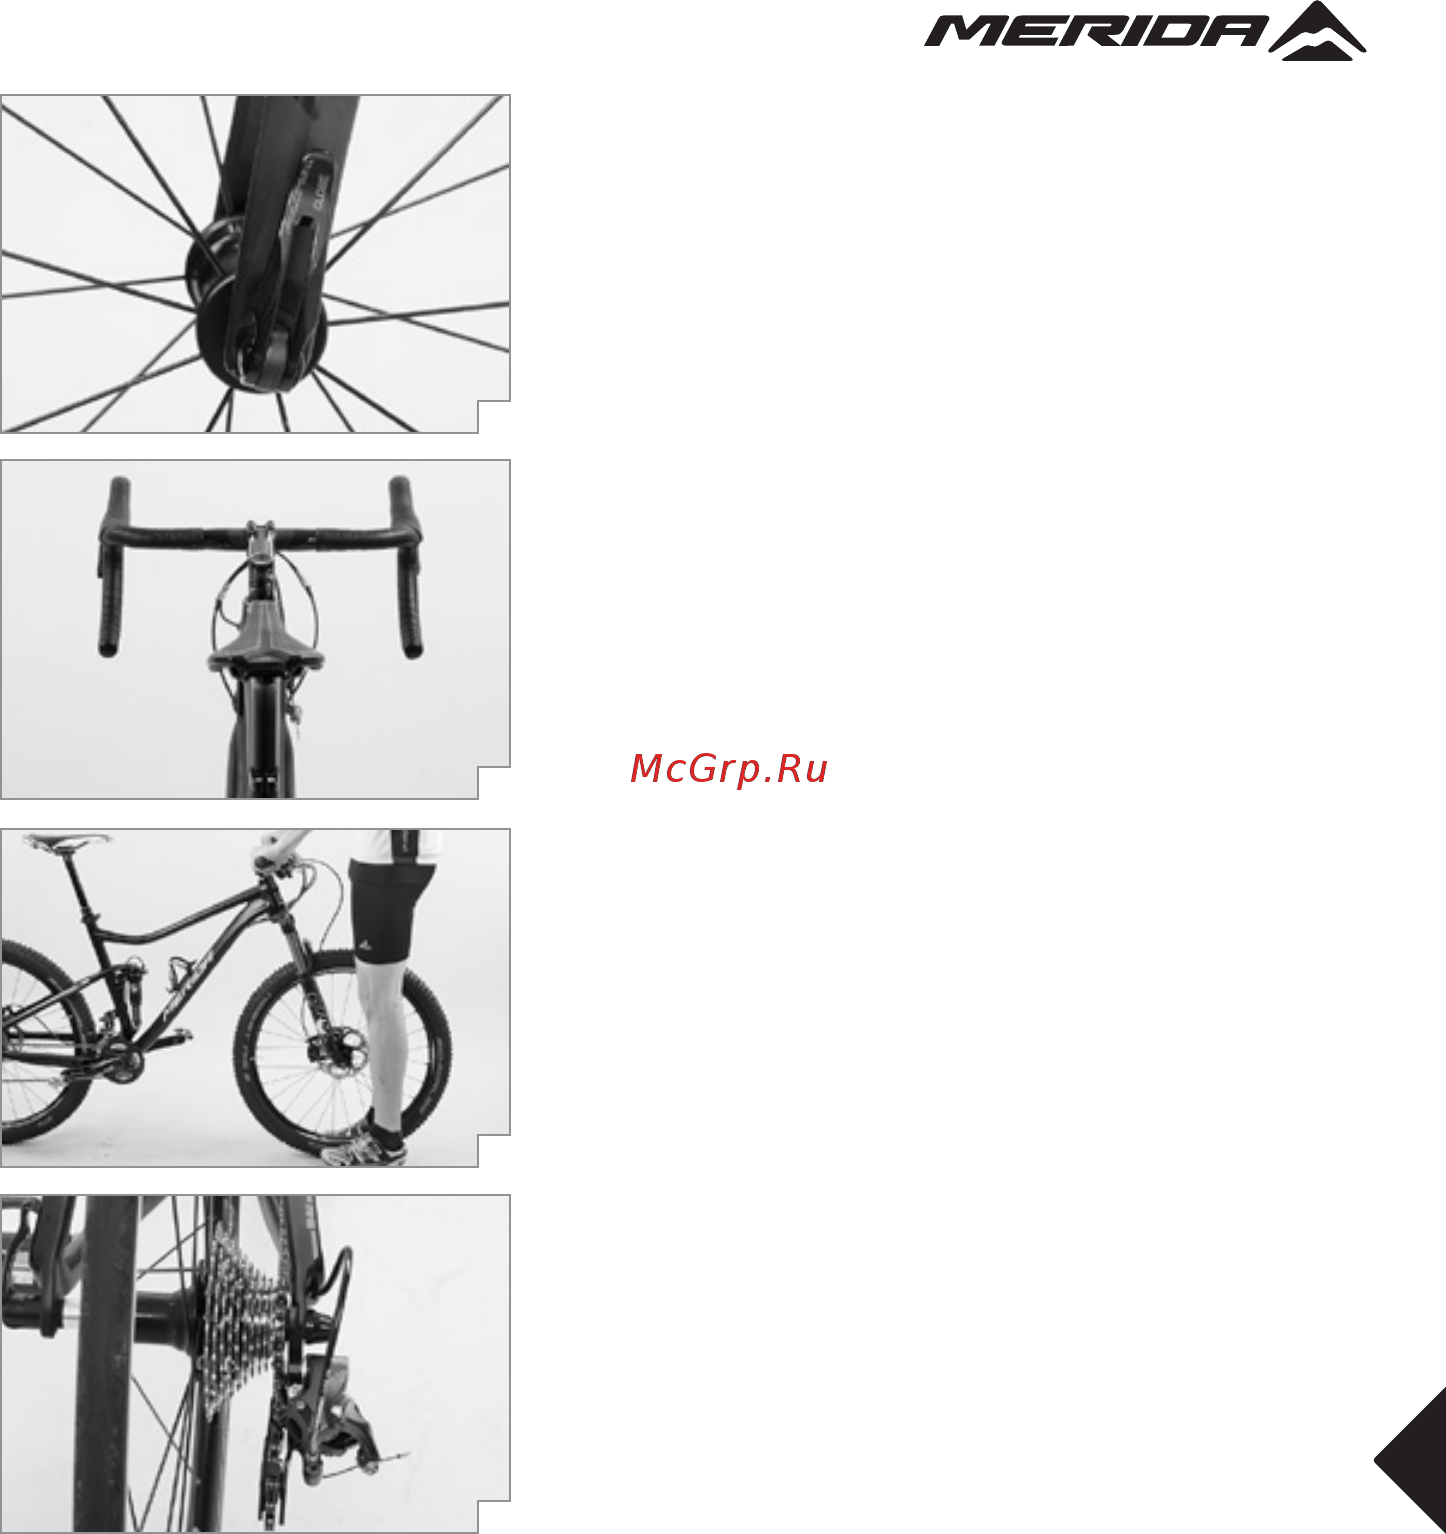
After an accident
1. Check whether the wheels are still firmly fixed in the
drop-outs
(a)
and whether the rims are still centred
with respect to the frame or fork. Spin the wheels
and observe the gap either between brake pads and
rim sides or between frame and tire. If you have rim
brakes and if the width of the gap changes mark-
edly and you have no way to true the rim where
you are, you need to open the brakes a little with
the special device so that the rim can run between
the brake pads without touching them. Please note
that in this case the brakes may not act as power-
fully as you are used to. No matter whether you
have rim or disc brakes, have the wheels trued by
your MERIDA dealer immediately after you are back
home. For more information see the chapters “The
brake system”, “How to use quick-releases and
thru axles” and “The wheels and the tires” in these
MERIDA short operating instructions as well as in
your comprehensive MERIDA user manual and in
the instructions of the component manufacturers on
the enclosed MERIDA CD-ROM.
2. Check that handlebars and stem are neither bent
nor broken and that they are level and upright
(b)
.
Make sure the stem is firmly fixed on the fork by try-
ing to turn the handlebars relative to the front wheel
(c)
. Briefly lean on the brake levers to make sure
the handlebars are firmly fixed in the stem. Realign
the components, if necessary, and gently tighten
the bolts to ensure a reliable clamping of the com-
ponents. The maximum torque values are printed
directly on the components or specified in the in-
structions of the component manufacturers on the
enclosed MERIDA CD-ROM. For more information
see the chapters “Adjusting the MERIDA bike to the
rider” and “The headset” in these MERIDA short op-
erating instructions as well as in your comprehen-
sive MERIDA user manual and in the instructions
of the component manufacturers on the enclosed
MERIDA CD-ROM.
3. Check whether the chain still runs on the chain-
wheels and the sprockets. If your MERIDA bike fell
over to the chain side, verify the proper functioning
of the gears. Ask somebody to lift your MERIDA
bike by the saddle and carefully shift through all the
gears. Pay particular attention when shifting to the
small gears and make sure the rear derailleur does
not get too close to the spokes
(d+e)
as the chain
climbs onto the larger sprockets. If the rear derailleur
or the drop-outs/derailleur hanger is bent, the rear
derailleur may collide with the spokes. This in turn
can destroy the rear derailleur, the rear wheel or the
frame. Check the function of the front derailleur, as
a displaced front derailleur can throw off the chain,
thus interrupting the drive of your MERIDA bike. For
more information see the chapter “The gears” in
these MERIDA short operating instructions as well
as in your comprehensive MERIDA user manual
and in the instructions of the component manufac-
turers on the enclosed MERIDA CD-ROM.
Содержание
- Merida p.1
- Short operating instructions p.1
- Merida short operating instructions p.5
- Table of contents p.6
- Some notes on these merida short operating instructions p.7
- General safety instructions p.8
- Intended use p.10
- Before your first ride p.13
- Before every ride p.16
- After an accident p.18
- How to use quick releases and thru axles p.20
- How to fasten components securely with a quick release p.20
- Quick releases p.20
- Useful information for mounting wheels with thru axles p.21
- Thru axles p.21
- Adjusting the merida bike to the rider p.22
- Adjusting the saddle to the correct height p.23
- Adjusting the height of the handlebars p.25
- Conventional stems p.26
- Adjustable stems p.26
- System p.27
- Correcting the fore to aft position and horizontal tilt of the saddle p.27
- Stems for threadless systems the aheadse p.27
- Adjusting saddle position and tilt p.28
- Adjusting the tilt of the handlebars and brake levers p.30
- Adjusting the brake lever reach on merida road bikes p.30
- What to bear in mind with merida time trial handlebars of merida triathlon and time trial machines p.31
- Adjusting the tilt of the handlebars and brake levers of merida road racing machines and cyclo cross bikes p.31
- Adjusting the brake lever reach on merida city merida trekking merida cross merida kids and merida mountain bikes p.32
- Adjusting the tilt of the handlebars and brake levers of merida city merida trekking merida cross merida kids and merida mountain bikes p.32
- The brake system p.34
- The gears p.35
- Suspension forks p.36
- Rear shocks p.37
- Special characteristics of carbon p.38
- Maintenance and servicing p.39
- General notes on care and servicing p.39
- Cleaning and caring for your merida bike p.40
- Safekeeping and storing your merida bike p.41
- Service and maintenance schedule p.42
- It is advisable to have your merida bike serviced regularly after the bedding in phase the schedule given in the table below is a rough guide for cyclists who ride their bike between 1 000 and 2 000 km or 50 to 100 hours of use a year p.42
- If you consistently ride more or if you ride a great deal on poor road surfaces the maintenance periods will shorten accordingly p.42
- Jobs marked are best left to your merida dealer p.43
- If you have a certain degree of mechanical skills experience and suitable tools such as a torque wrench you should be able to do the checks marked x by yourself if you come across any defects take appropriate measures without delay if you are in doubt or if you have any questions contact your merida dealer p.43
- For your own safety bring your merida bike to your merida bike dealer for its first inspection after 100 to 300 kilometers 5 to 15 hours of initial use or four to six weeks and at the very latest after three months p.43
- Where no maximum torque setting is given start with 2 nm observe the indicated values and observe the values on the components and or in the operating instructions of the component manufacturers on the enclosed merida cd rom p.44
- Recommended torque settings p.44
- All bolted connections of the bike components have to be tightened carefully and checked regularly to ensure the safe and reliable operation of the merida bike this is best done with a torque wrench that disengages at the desired torque value or a click type torque wrench tighten carefully by approaching the prescribed maximum torque value in small steps 0 nm increments and check in between the proper fit of the component never exceed the maximum torque value indicated by the manufacturer p.44
- Recommended torque settings for disc brakes and hydraulic rim brakes p.45
- Www trpbrakes com p.45
- Www tektro com p.45
- Www sram com p.45
- Www shimano com p.45
- Www magura com p.46
- Www tektro com p.46
- Www sram com p.46
- Www shimano com p.46
- These values do not apply to the components of other manufacturers p.46
- These values are reference values of the above mentioned component manufacturers observe the values in the instructions of the component manufacturers on the enclosed merida cd rom p.46
- Some components have the maximum permissible torque values printed on them use a torque wrench and never exceed the maximum torque value if you are in doubt or if you have any questions contact your merida dealer p.46
- Due to the unmanageable number of components on the market merida is not in a position to foresee every product that will be replaced or newly assembled by third parties therefore merida denies any liability for such kind of additions or modifications with regard to compatibility torque values etc whoever assembles or modifies the merida bike shall ensure that the bike was assembled according to the state of the art in science and technology p.46
- Www trpbrakes com p.46
- Warranty and guarantee p.47
- A note on wear p.47
- Guarantee on merida bikes p.48
- Service schedule p.50
- Intended use p.53
- Bike card p.53
- Handover report p.54
Похожие устройства
-
 Merida Big.Nine 70, рама 19", Matt Black (signal red/dk.grey)Инструкция по эксплуатации
 -
Merida Big.Nine 70, рама 21", Matt Anthracite (blue/white)Инструкция по эксплуатации
-
Merida Crossway 20-D, рама 19", Matt Anthracite (dark grey/sky blue)Инструкция по эксплуатации
-
Merida Crossway 20-D (2015)Инструкция по эксплуатации
-
Merida Crossway 20-MD, рама 19", Matt Anthracite (dark grey/sky blue)Инструкция по эксплуатации
-
Merida Crossway 20-MD, рама 19", Matt Black (dark grey/lime)Инструкция по эксплуатации
-
Merida Juliet 6. 40-MD (2015), рама 20"Инструкция по эксплуатации
-
Merida Juliet 7. 100, рама 18.5", Silk White (green/grey)Инструкция по эксплуатации
-
Merida Matts 6.100, рама 18", Orange (dk.grey/black)Инструкция по эксплуатации
-
Merida Matts 6.20-D, рама 18", White (grey/green)Инструкция по эксплуатации
-
Merida Matts 6.20-D, рама 20", Matt Black (dk.grey/yellow)Инструкция по эксплуатации
-
Merida Matts 6.40-D (2015), колеса 26", рама 18", 24 скорости, серый матовый (белый/светло-синий)Инструкция по эксплуатации