
Popcorn Hour A-300 Hard Disk Installation Guide онлайн
A-300 Hard Disk Installation Guide
25.5 cm (H)
38 cm (W)
Hard Drive Installation Guide For Popcorn Hour A-300
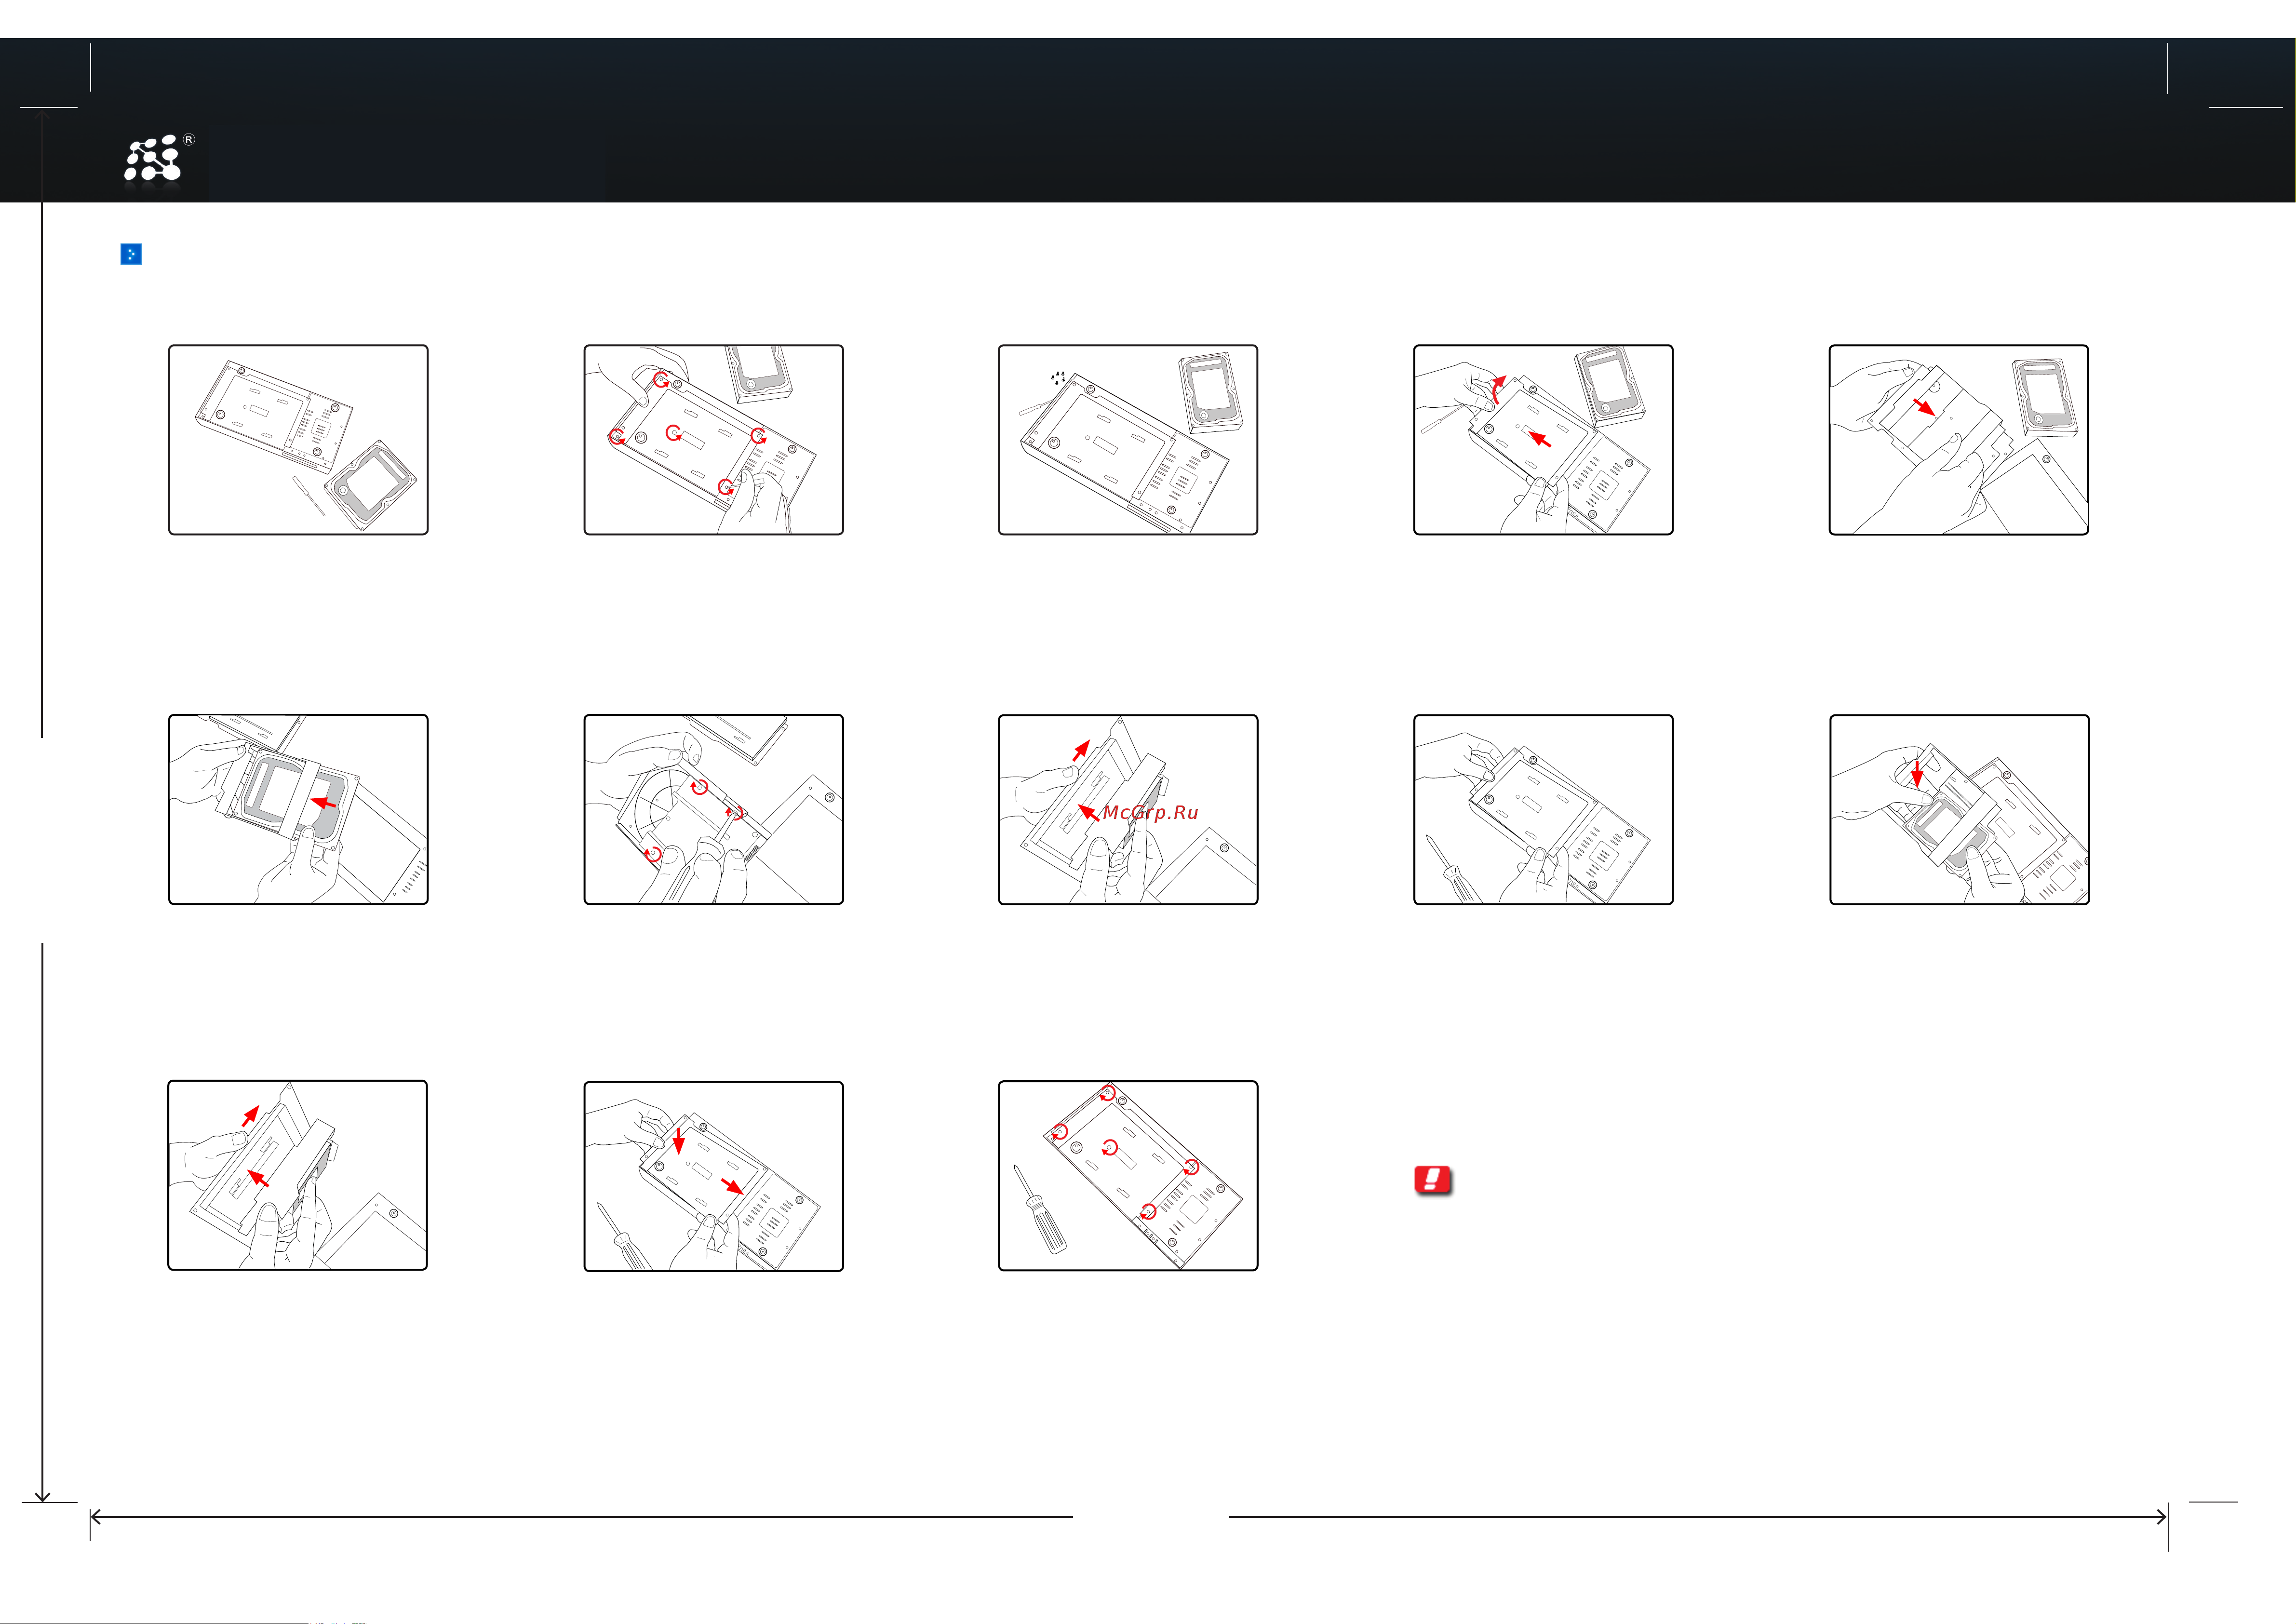
Step 1
What you need:
1) Phillips head screw driver.
2) 3.5” HDD or 2.5” HDD.
3) Popcorn Hour A-300.
Step 5
Slide the hard drive carriage bay to the right.
Step 2
Turn over the A-300 and place the bottom
on top of your desk. Locate the 5 screws
to unscrew with your Phillips head screw
driver.
Step 6
Slide your 3.5” hard drive to the bay,
ensure that the top side is placed on
the open area of the bay. For 2.5”
hard drive, skip to Step 10
Step 3
Place the screws aside and make sure it
is very easy to locate them later.
Step 7
Locate the 4 screw holes where you need to
secure the hard drive.
Step 4
Tilt the bottom panel with your right hand
and slide it to the left to expose the hard
drive carriage bay which is underside of
the panel.
Step 8
Slide back the hard drive carriage bay to the
bottom panel and make sure it is secure, to
avoid any vibration sound from the hard drive.
Step 9
Place the bottom panel back to the
A-300 case and slide the panel towards
the SATA connector, you should feel a
nudge indicating that it is now inserted.
Replace all 5 screws to secure the panel.
Note: 1) Disconnect all cables from the A-300 before proceeding.
2) The hard disk drive (HDD) is not provided.
Step 10
Slide your 2.5” hard drive to the bay, ensure
that the top side is placed on the open area
of the bay.
Step 13
Complete the assembly and assure all
screws are tightened.
Step 11
Slide back the hard drive carriage bay to the
bottom panel and make sure it is secure, to
avoid any vibration sound from the hard drive.
Step 12
Place the bottom panel back to the A-300
case and slide the panel towards the SATA
connector, you should feel a nudge indicating
that it is now inserted. Replace all 5 screws
to secure the panel.
Содержание
- A 300 hard disk installation guide 1
- A300_installation_a3 1
- Hard drive installation guide for popcorn hour a 300 1
- A 300 hard disk installation guide 2
- A300_installation_a3_multi 2
- Deutsch 2
- Español 2
- Français 2
- Guida all istallazione dell hard disk drive per il popcorn hour a 300 guía de instalación del disco duro para popcorn hour a 300 harddisk installations guide for popcorn hour a 300 2
- Handledning för hårddiskinstallation i popcorn hour a 300 guide d installation du disque dur pour le popcorn hour a 300 festplatten installationsanleitung für den popcorn hour a 300 2
- Harde schijf installatie handleiding voor popcorn hour a 300 installasjonsveiledning til harddisk for popcorn hour a 300 2
- Italiano 2
- Nederlands 2
- Swenska 2
Похожие устройства
- Popcorn Hour A-300 Apps Market
- Popcorn Hour A-200 Installation Guide
- Popcorn Hour A-200 Apps Market
- Popcorn Hour A-200 Upgrade Kit Hard Disk Installation Guide
- Popcorn Hour A-200 Инструкция по эксплуатации
- Popcorn Hour A-110 Инструкция по эксплуатации
- Popcorn Hour A-110 Краткое руководство
- Sony NEX-5 Краткое руководство
- Sony NEX-5 Инструкция по эксплуатации
- Epson EB-S6 Сохранение руководства на компьютере
- Epson EB-S6 Инструкция по эксплуатации
- Epson EB-S6 Просмотр руководства
- Epson EB-S6 Краткое руководство
- Epson EB-S6 Руководство пользователя
- Epson EB-S12 Руководство пользователя
- Epson EB-S12 Сохранение руководства на компьютере
- Epson EB-S12 Наклейка С Уведомлением О Защите Паролем
- Epson EB-S12 Open Source Software License
- Epson EB-S12 Краткое руководство
- Epson EB-S12 Инструкция по эксплуатации