
Autel MaxiSys ADAS, Full Kit, ACC Размещение рамы шаблонов онлайн
Содержание
Похожие устройства
- Autel MaxiSys ADAS, Full Kit, ACC Инструкция по обновлению
- Autel MaxiSys ADAS, Full Kit, ACC Размещение шаблонов
- Autel MaxiSys ADAS, Full Kit, ACC Инструкция для калибр рамы
- Autel MaxiSys ADAS, Full Kit, ACC Инструкция по установке
- Inspector Master Инструкция по эксплуатации
- Inspector Camper Инструкция по эксплуатации
- Inspector Cleaner Инструкция по эксплуатации
- Inspector Power Инструкция по эксплуатации
- Inspector Uno Инструкция по эксплуатации
- Inspector HD3030 Инструкция по эксплуатации
- Inspector HD3010 Инструкция по эксплуатации
- Inspector Octopus Инструкция по эксплуатации
- Inspector Marlin A5 Инструкция по эксплуатации
- Starmix uClean ARDL 1420 EHP Деталировка
- Starmix uClean ARDL 1420 EHP Руководство по эксплуатации
- Starmix uClean ADL 1432 EHP Деталировка
- Starmix uClean ADL 1432 EHP Руководство по эксплуатации
- Starmix uClean ARDL 1432 EHP Деталировка
- Starmix uClean ARDL 1432 EHP Руководство по эксплуатации
- Starmix uClean ADL 1445 EHP Деталировка
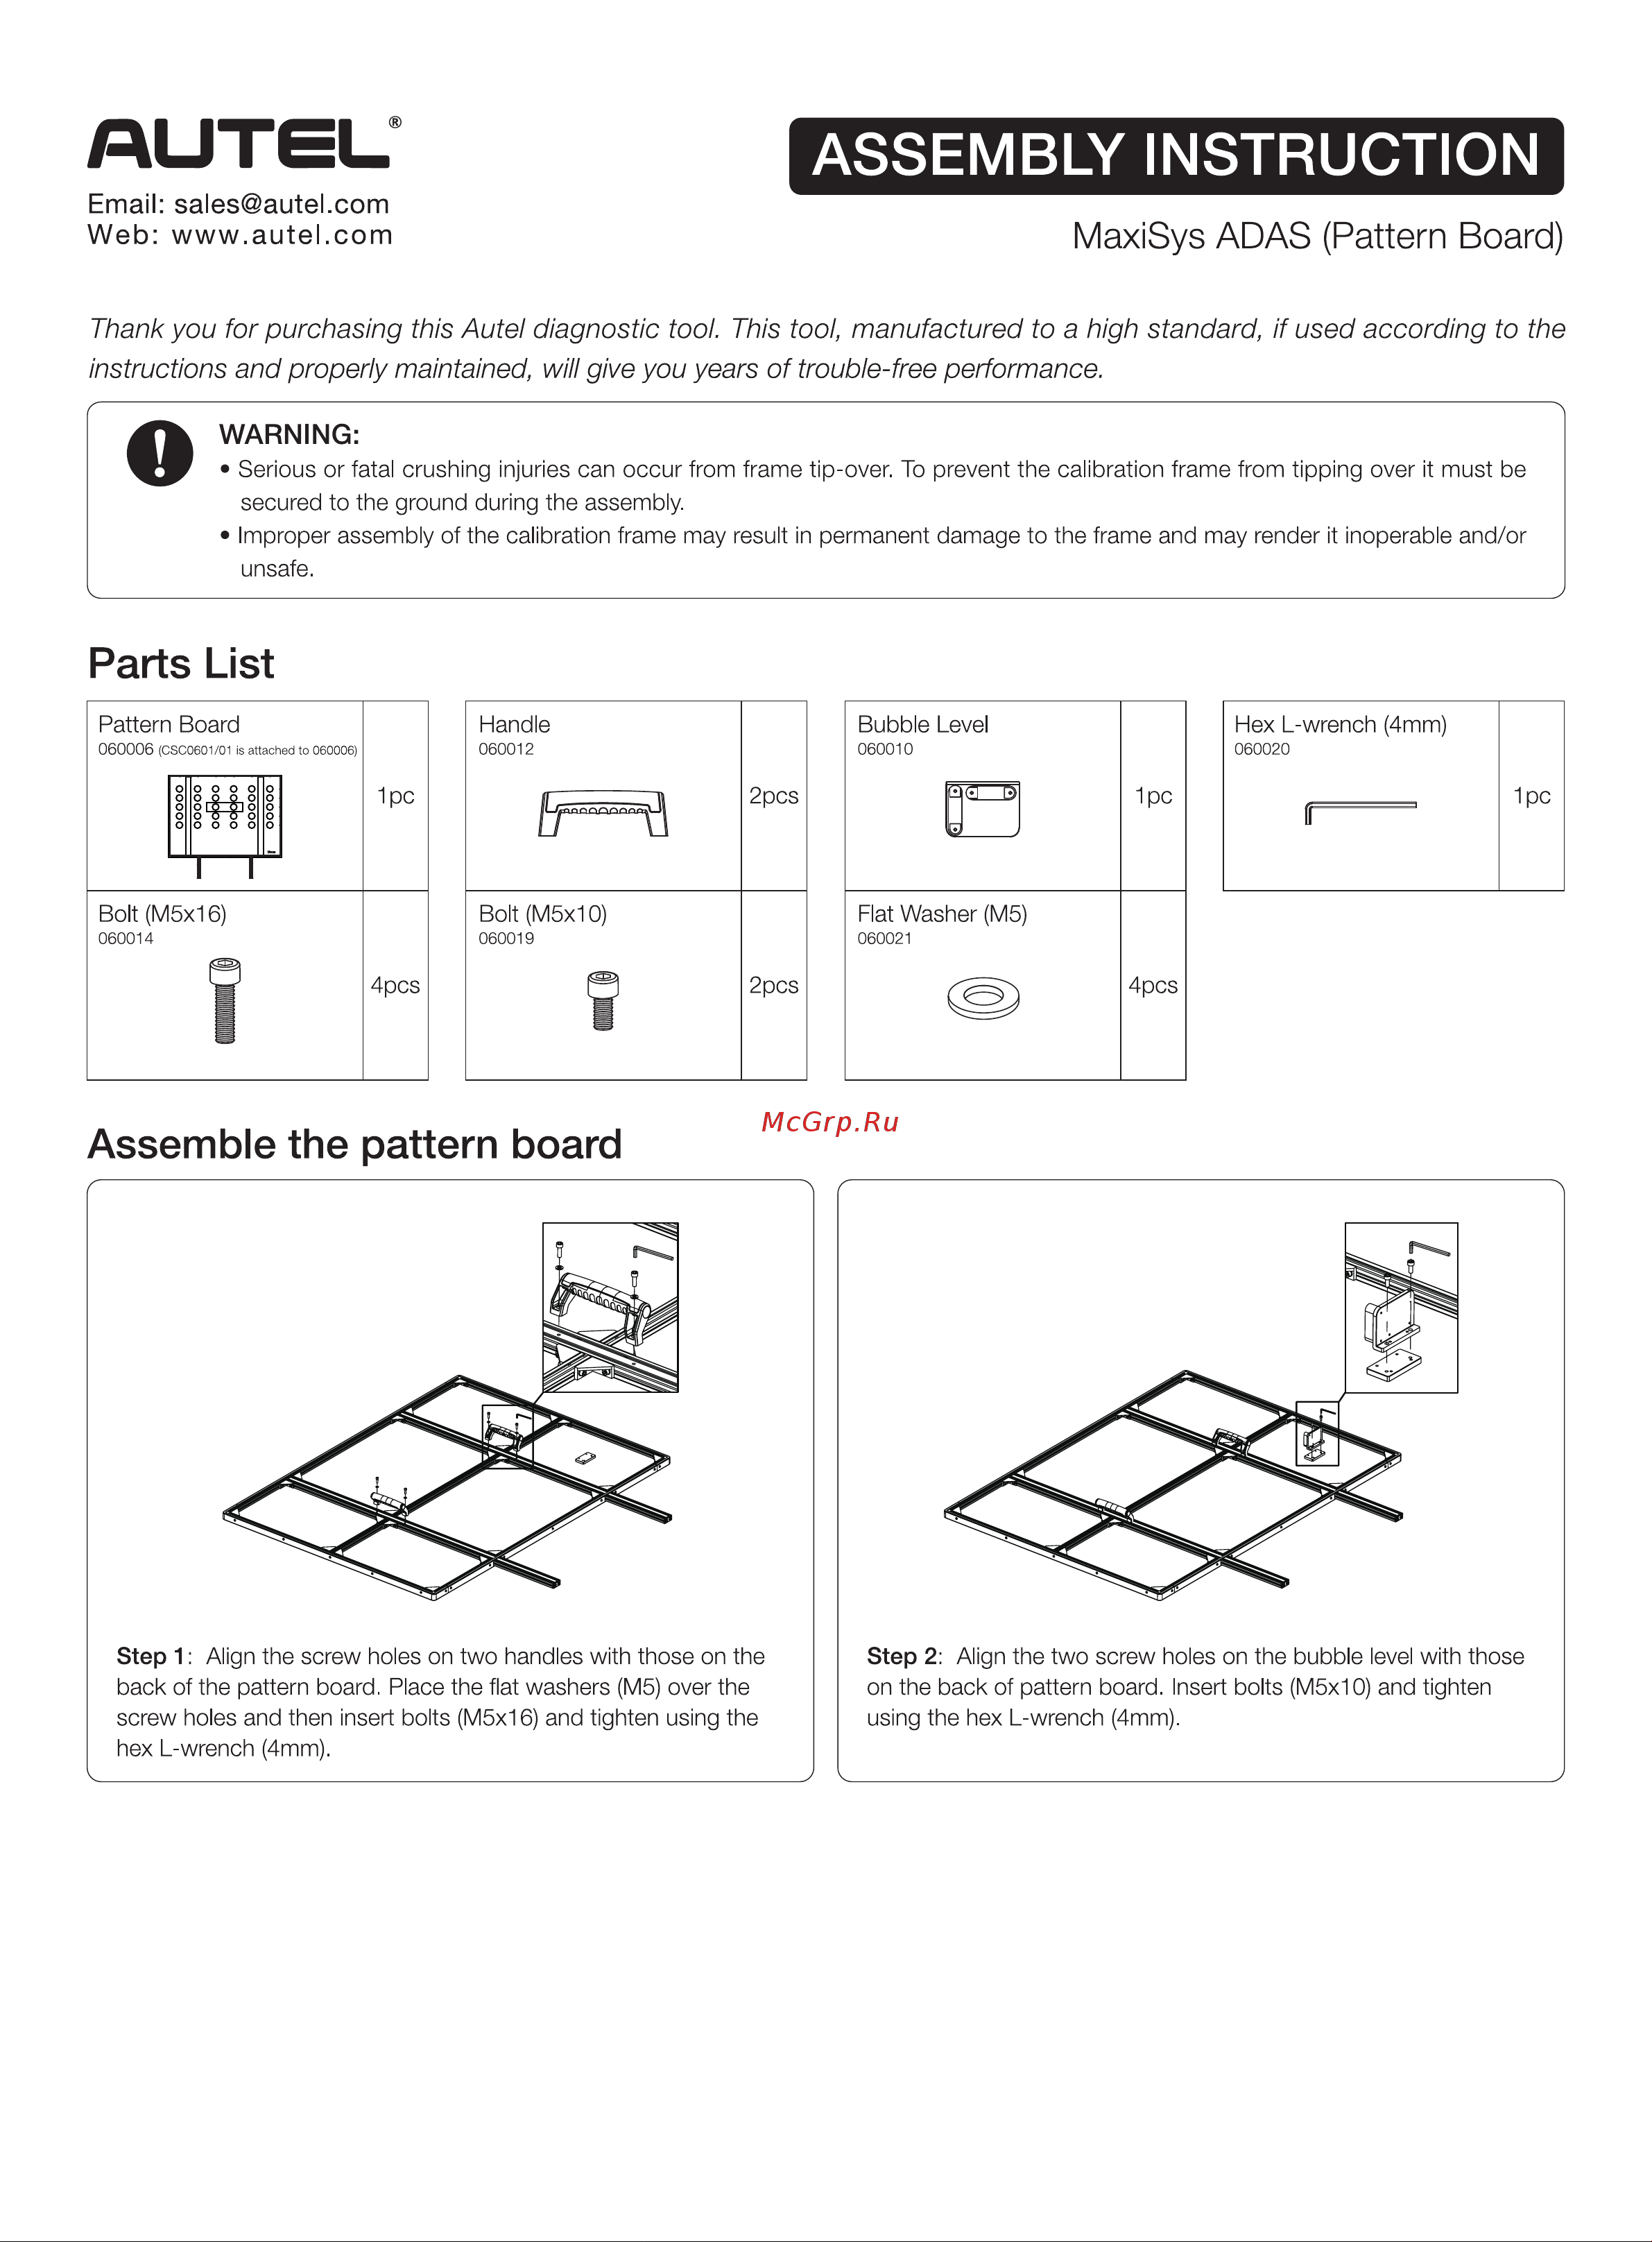
ASSEMBLY INSTRUCTION L____________________________________________________________________________________________________________________________ J Email sales autel com Web www autel com MaxiSys ADAS Pattern Board Thank you for purchasing this Autel diagnostic too This tool manufactured to a high standard if used according to the instructions and properly maintained will give you years of trouble free performance O WARNING Serious or fatal crushing injuries can occur from frame tip over To prevent the calibration frame from tipping over it must be secured to the ground during the assembly Improper assembly of the calibration frame may result in permanent damage to the frame and may render it inoperable and or unsafe Parts List Handle Hex L wrench 4mm 060020 060012 2pcs 1pc ll fer â Bolt M5x10 060019 2pcs Assemble the pattern board Step 1 Align the screw holes on two handles with those on the back of the pattern board Place the flat washers M5 over the screw holes and then insert bolts M5x16 and tighten using the hex L wrench 4mm Step 2 Align the two screw holes on the bubble level with those on the back of pattern board Insert bolts M5x10 and tighten using the hex L wrench 4mm