
Aten VM8584 Краткое руководство по установке онлайн
VM7584 / VM8584
4-Port 10G Optical Input Board / Output Board Quick Start Guide
Hardware Review
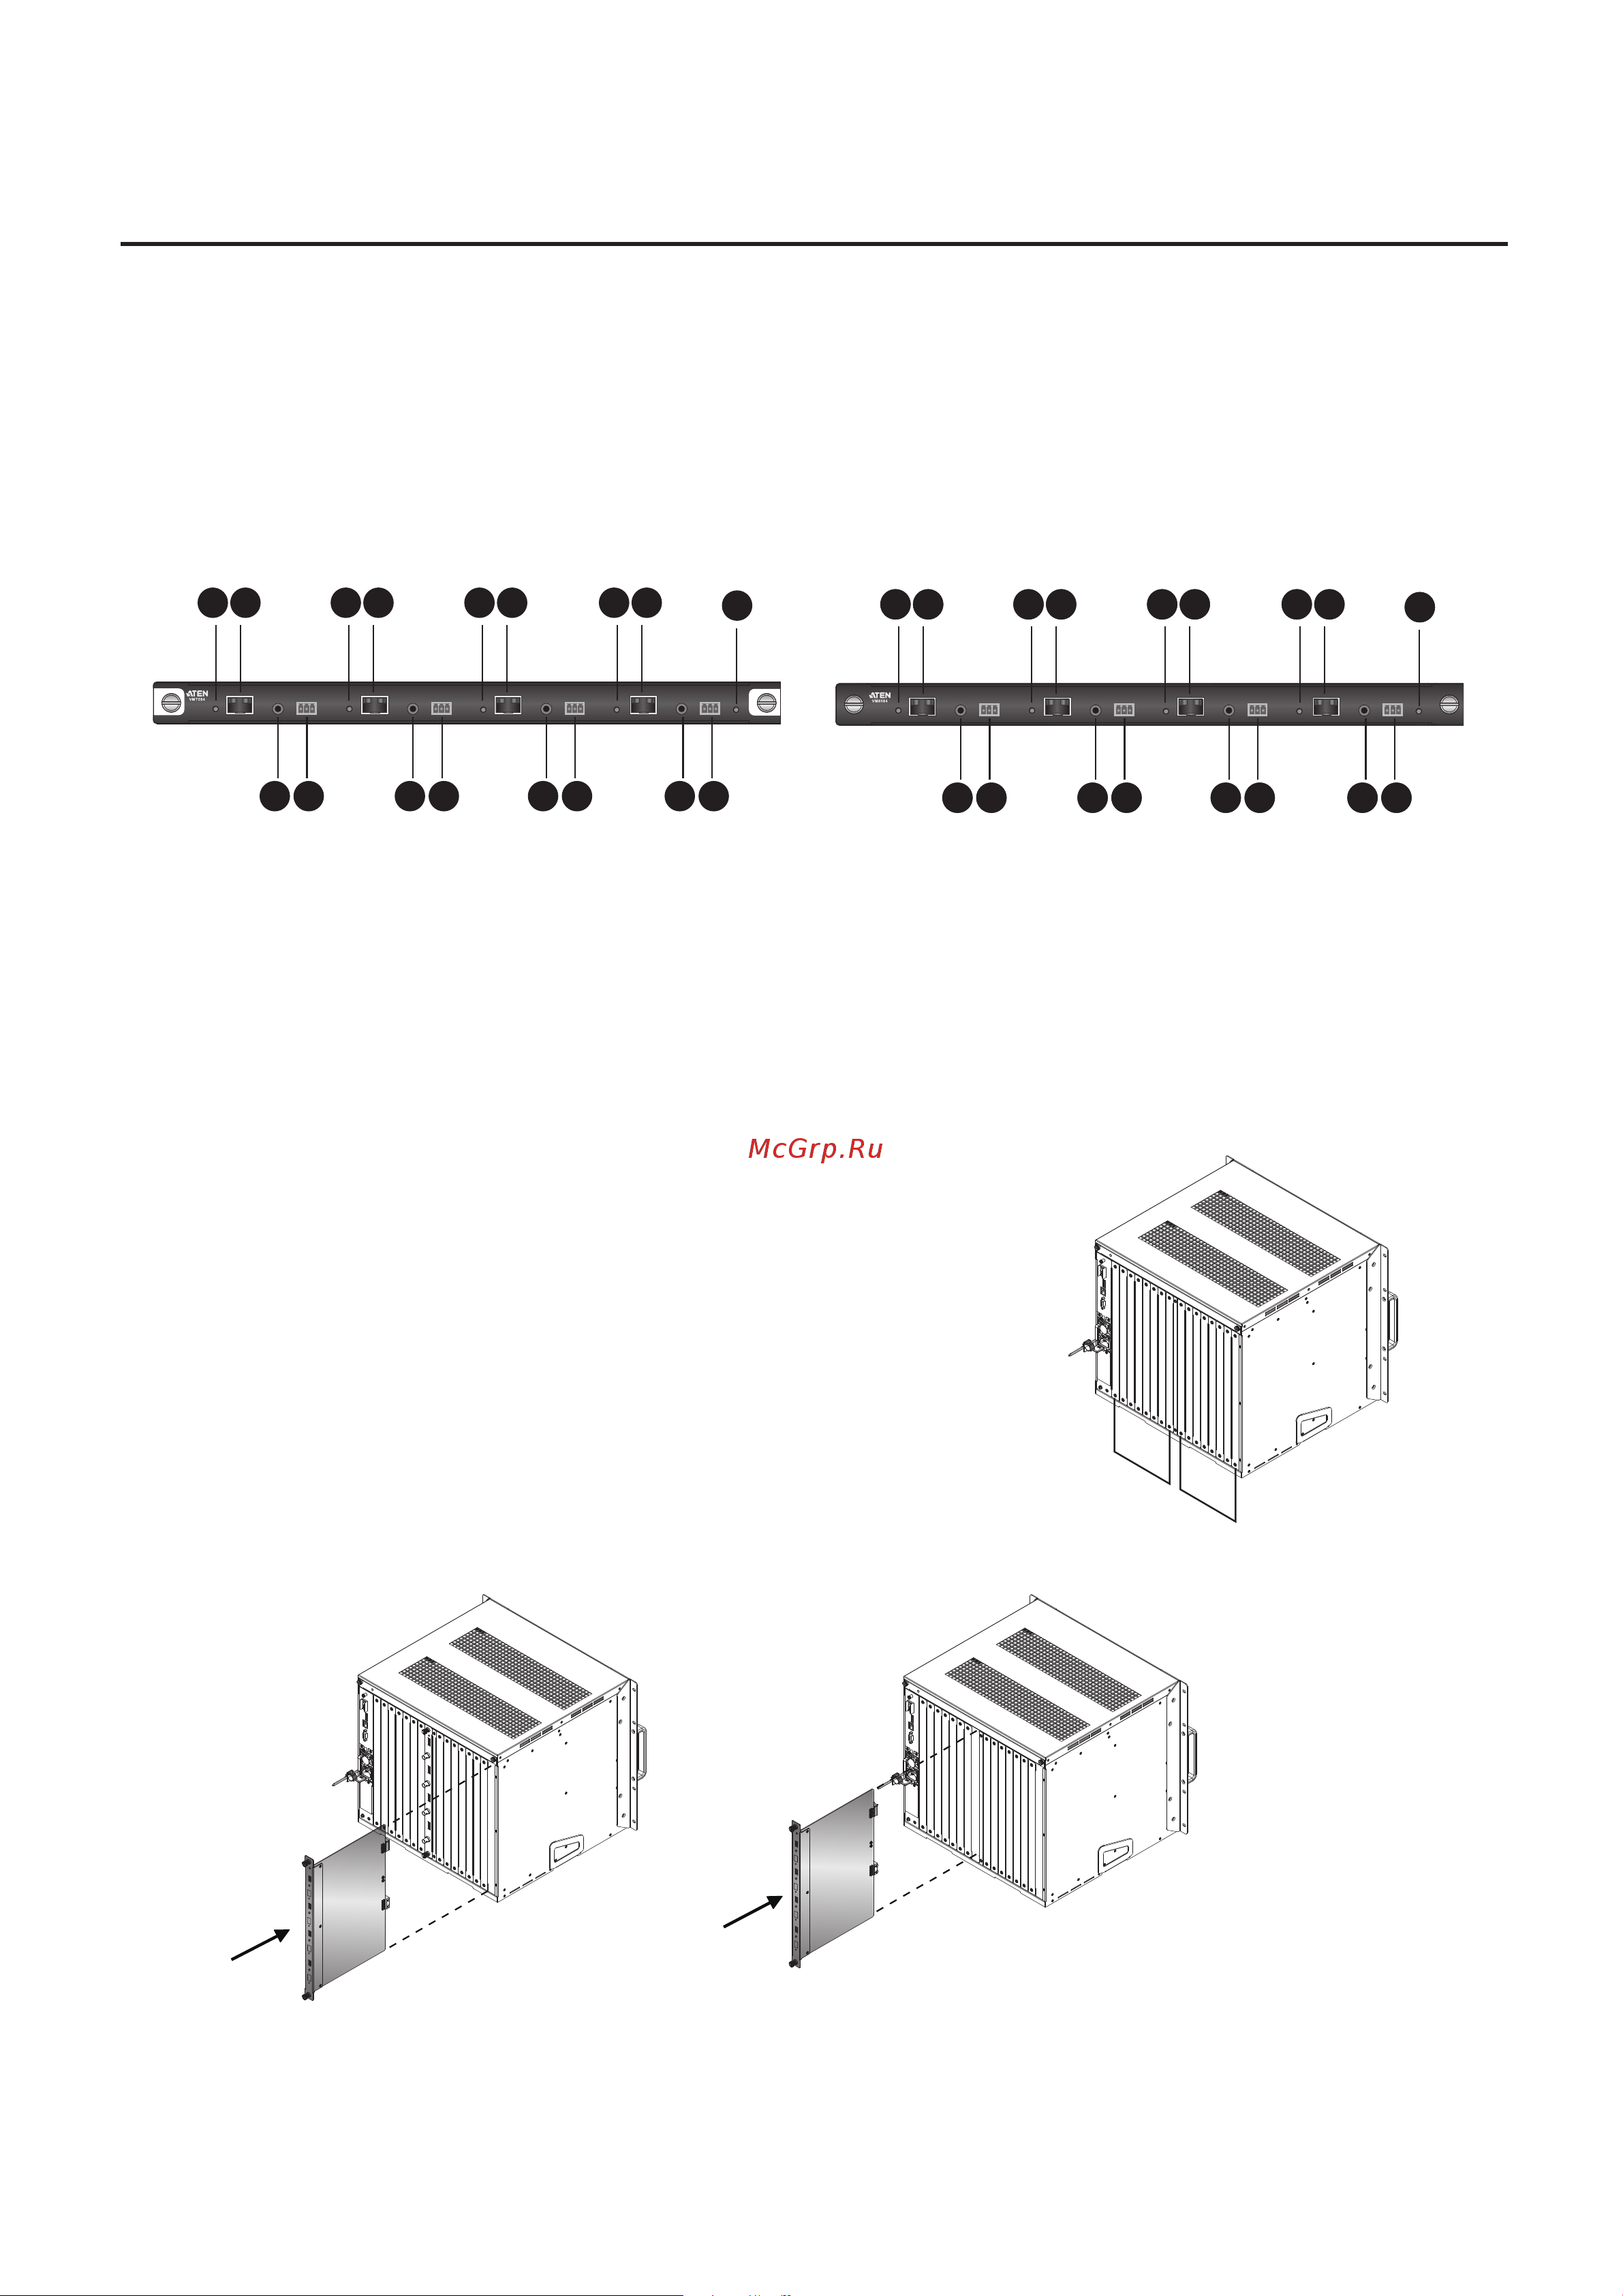
Panel View
1. Link LEDs
2. SFP+ Ports
3. IR Ports
4. RS-232 Channel Ports
5. Status LED
Hardware Setup
I/O Board Installation
Follow the steps below to safely install the VM7584 / VM8584 board to a
supporting Modular Matrix Switch. For a list of the supported Modular Matrix
Switch, visit the VM7584/VM8584 product web pages.
Note: The VM3250 is used as an example in the instructions below.
1. Power off the Modular Matrix Switch.
Note: The VM7584/VM8584 boards are hot-swappable.
2. On the rear of the Modular Matrix Switch, unscrew the Phillips head screws
for one input slot (right) and one output slot (left), and then remove back
panel covers.
3. Slide the VM7584 into the input board slot, and the VM8584 into the output
slot. Make sure they secure in place.
4. Tighten the screws on the boards to secure the input and output
boards to the Modular Matrix Switch.
5. To install more I/O boards, repeat steps 2 to 4.
6. Proceed to the next section to install sources and displays.
VM7584 Front View VM8584 Front View
5
1 2
3 4 3 4
1 2 1 2
3 4 3 4
1 2
5
1 2
3 4 3 4
1 2 1 2
3 4 3 4
1 2
5
1 2
3 4 3 4
1 2 1 2
3 4 3 4
1 2
Output Slots
Input Slots
K1 Package (300 m) Contents
1 VM7584 4-Port 10G Optical Input Board or
VM8584 4-Port 10G Optical Output Board
4 SFP+ modules
4 3-Pole Terminal Blocks
1 IR Receiver
1 IR Emitter
1 User Instructions
K2 Package (10 km) Contents
1 VM7584 4-Port 10G Optical Input Board or
VM8584 4-Port 10G Optical Output Board
4 SFP+ modules
4 3-Pole Terminal Blocks
1 IR Receiver Cable
1 IR Emitter Cable
1 User Instructions
VM7584 VM8584
Содержание
- Hardware review 1
- Hardware setup 1
- Port 10g optical input board output board quick start guide 1
- Vm7584 front view vm8584 front view 1
- Vm7584 vm8584 1
- Connect one or more ve883t units to the sfp ports of the vm7584 2 connect one or more ve883r units to the sfp ports of the vm8584 3 optional to bypass rs 232 serial signals via the vm7584 8584 connect a serial controller to the rs 232 serial port on either the vm7584 or vm8584 4 optional to bypass ir signals connect the supplied ir receiver to the ir port on either the vm7584 or vm8584 depending on which side you prefer to emit ir signals and then the ir emitter to the ir port on other board 5 ground the modular matrix switch and all the devices in the installation 6 power on the modular matrix switch and all the devices in the installation 2
- Source and display device installation 2
- Support and documentation notice 2
- Technical support 2
- Www aten com support 2
Похожие устройства
- Aten VM7904 Краткое руководство по установке
- Aten VM7814 Краткое руководство по установке
- Aten VM8814 Краткое руководство по установке
- Aten VM1600A Краткое руководство по установке
- Aten VM1600A Руководство к видеоматрице
- Aten VM1600A Руководство к приложению для видеоматрице
- Aten VM1600A Руководство пользователя
- Aten VM3200 Руководство к видеоматрице
- Aten VM3200 Краткое руководство по установке
- Aten VM3200 Руководство к приложению для контроля вмдеоматрицы
- Aten VM3200 Руководство пользователя
- Aten VM7404 Краткое руководство по установке
- Aten VM7104 Краткое руководство по установке
- Aten VM7514 Краткое руководство по установке
- Aten VM8514 Краткое руководство по установке
- Aten VM8804 Краткое руководство по установке
- Aten VM7804 Краткое руководство по установке
- Aten VM8604 Краткое руководство по установке
- Aten VM7604 Краткое руководство по установке
- Aten VE8952R Краткое руководство по установке