![Prestigio multiboard 70” (pmb554h70) [15/35] Prestigio](/img/pdf.png)
Prestigio multiboard 70” (pmb554h70) [15/35] Prestigio
Содержание
- Prestigio 1
- Contents 3
- Caution 4
- Installation and relocation 4
- Lcd panel 4
- Prestigio 4
- Safety precautions 4
- Power cord and power supply 5
- Sight distance 5
- Ventilation 5
- Ф prestigio 5
- Cd rom 6
- Earphone 6
- Prestigio 6
- Preparation 7
- Use the stand 7
- Use the wall mount kit 7
- Application and driver disk 8
- Audio cable 8
- Open your package 8
- Prestigio 8
- Unboxing 8
- Optional accessories 9
- Part number ean description 9
- Prestigio 9
- Your multiboard at a glance 9
- Number item specification 10
- Prestigio 10
- Prestigio 11
- Number item specification 12
- Prestigio 12
- Remote control 12
- Prestigio 13
- Prestigio 14
- Insert the batteries 15
- Prestigio 15
- Remote control area 15
- Getting started 16
- Prestigio 16
- Use internal pc 16
- Connected with an external computer 17
- Prestigio 17
- A v connection 18
- Connected with other devices 18
- Prestigio 18
- Prestigio 19
- Prestigio 20
- Video out connection 20
- Prestigio 21
- Usb device and network cable 21
- Connecting to the network 22
- Network connection 22
- Prestigio 22
- Wired installation 22
- Prestigio 23
- Wireless installation 23
- General settings 24
- Picture settings 24
- Prestigio 24
- Set up your multiboard 24
- Auto volume 25
- Balance 25
- Color temp 25
- Noise reduction 25
- Prestigio 25
- Sound mode 25
- Sound settings 25
- Treble 25
- Auto standby 26
- Chord effect 26
- Microphone switch 26
- Microphone volume 26
- Osd timer 26
- Prestigio 26
- Sleep timer 26
- Time settings 26
- Block program 27
- Key lock 27
- Lock settings 27
- Lock system 27
- Prestigio 27
- Set password 27
- Aspect ratio 28
- Blue screen 28
- Check or set the pvr file system 28
- Hearing impaired 28
- Osd language 28
- Other settings 28
- Prestigio 28
- Pvr file system 28
- Q ji o â h 28
- Record list 28
- Reset to factory settings 28
- Select to view the record list 28
- Set the display aspect ratio till the picture is fit onto the screen the options are different to different source 28
- Set the hearing impaired mode on or off 28
- Set the language for the on screen display menu 28
- Set the language for the tele text 28
- Set the screen background color to blue or not when there is no valid signal of analog tv 28
- Software update usb 28
- Tt language 28
- Update your multiboard by downloading file bin to usb device 28
- Caution 29
- Daily care and maitenance 29
- Prestigio 29
- Display 30
- Modle no pmb554h657 pmb554h707 pmb554h847 30
- Pc module 30
- Prestigio 30
- Technical specifications 30
- Touch system 30
- Ambient conditions 31
- Prestigio 31
- Pc mode 32
- Prestigio 32
- Problem possible solution 32
- Touch function 32
- Troubleshooting 32
- Video not working properly 32
- Audio not working properly 33
- Prestigio 33
- Www prestigio com 35
Похожие устройства
- Princess 127000 Инструкция по эксплуатации
- Princess 132502, на 7 кексов Инструкция по эксплуатации
- Princess 233022 Инструкция по эксплуатации
- Princess 492900 Инструкция по эксплуатации
- Princess 303000 Инструкция по эксплуатации
- Princess 117001 Инструкция по эксплуатации
- Princess 282984 Инструкция по эксплуатации
- Princess 115000 Инструкция по эксплуатации
- Princess 202041 Инструкция по эксплуатации
- Princess 292994 Инструкция по эксплуатации
- Princess 282601 Инструкция по эксплуатации
- Princess 292993 Инструкция по эксплуатации
- Princess 282700 Инструкция по эксплуатации
- Princess 212062 Инструкция по эксплуатации
- Princess 282602 Инструкция по эксплуатации
- Procam zx8 Инструкция по эксплуатации
- Qnap ts-431 Инструкция по эксплуатации
- Qnap ts-212p Инструкция по эксплуатации
- Qnap ts-212-e Инструкция по эксплуатации
- Qnap ts-451 Инструкция по эксплуатации
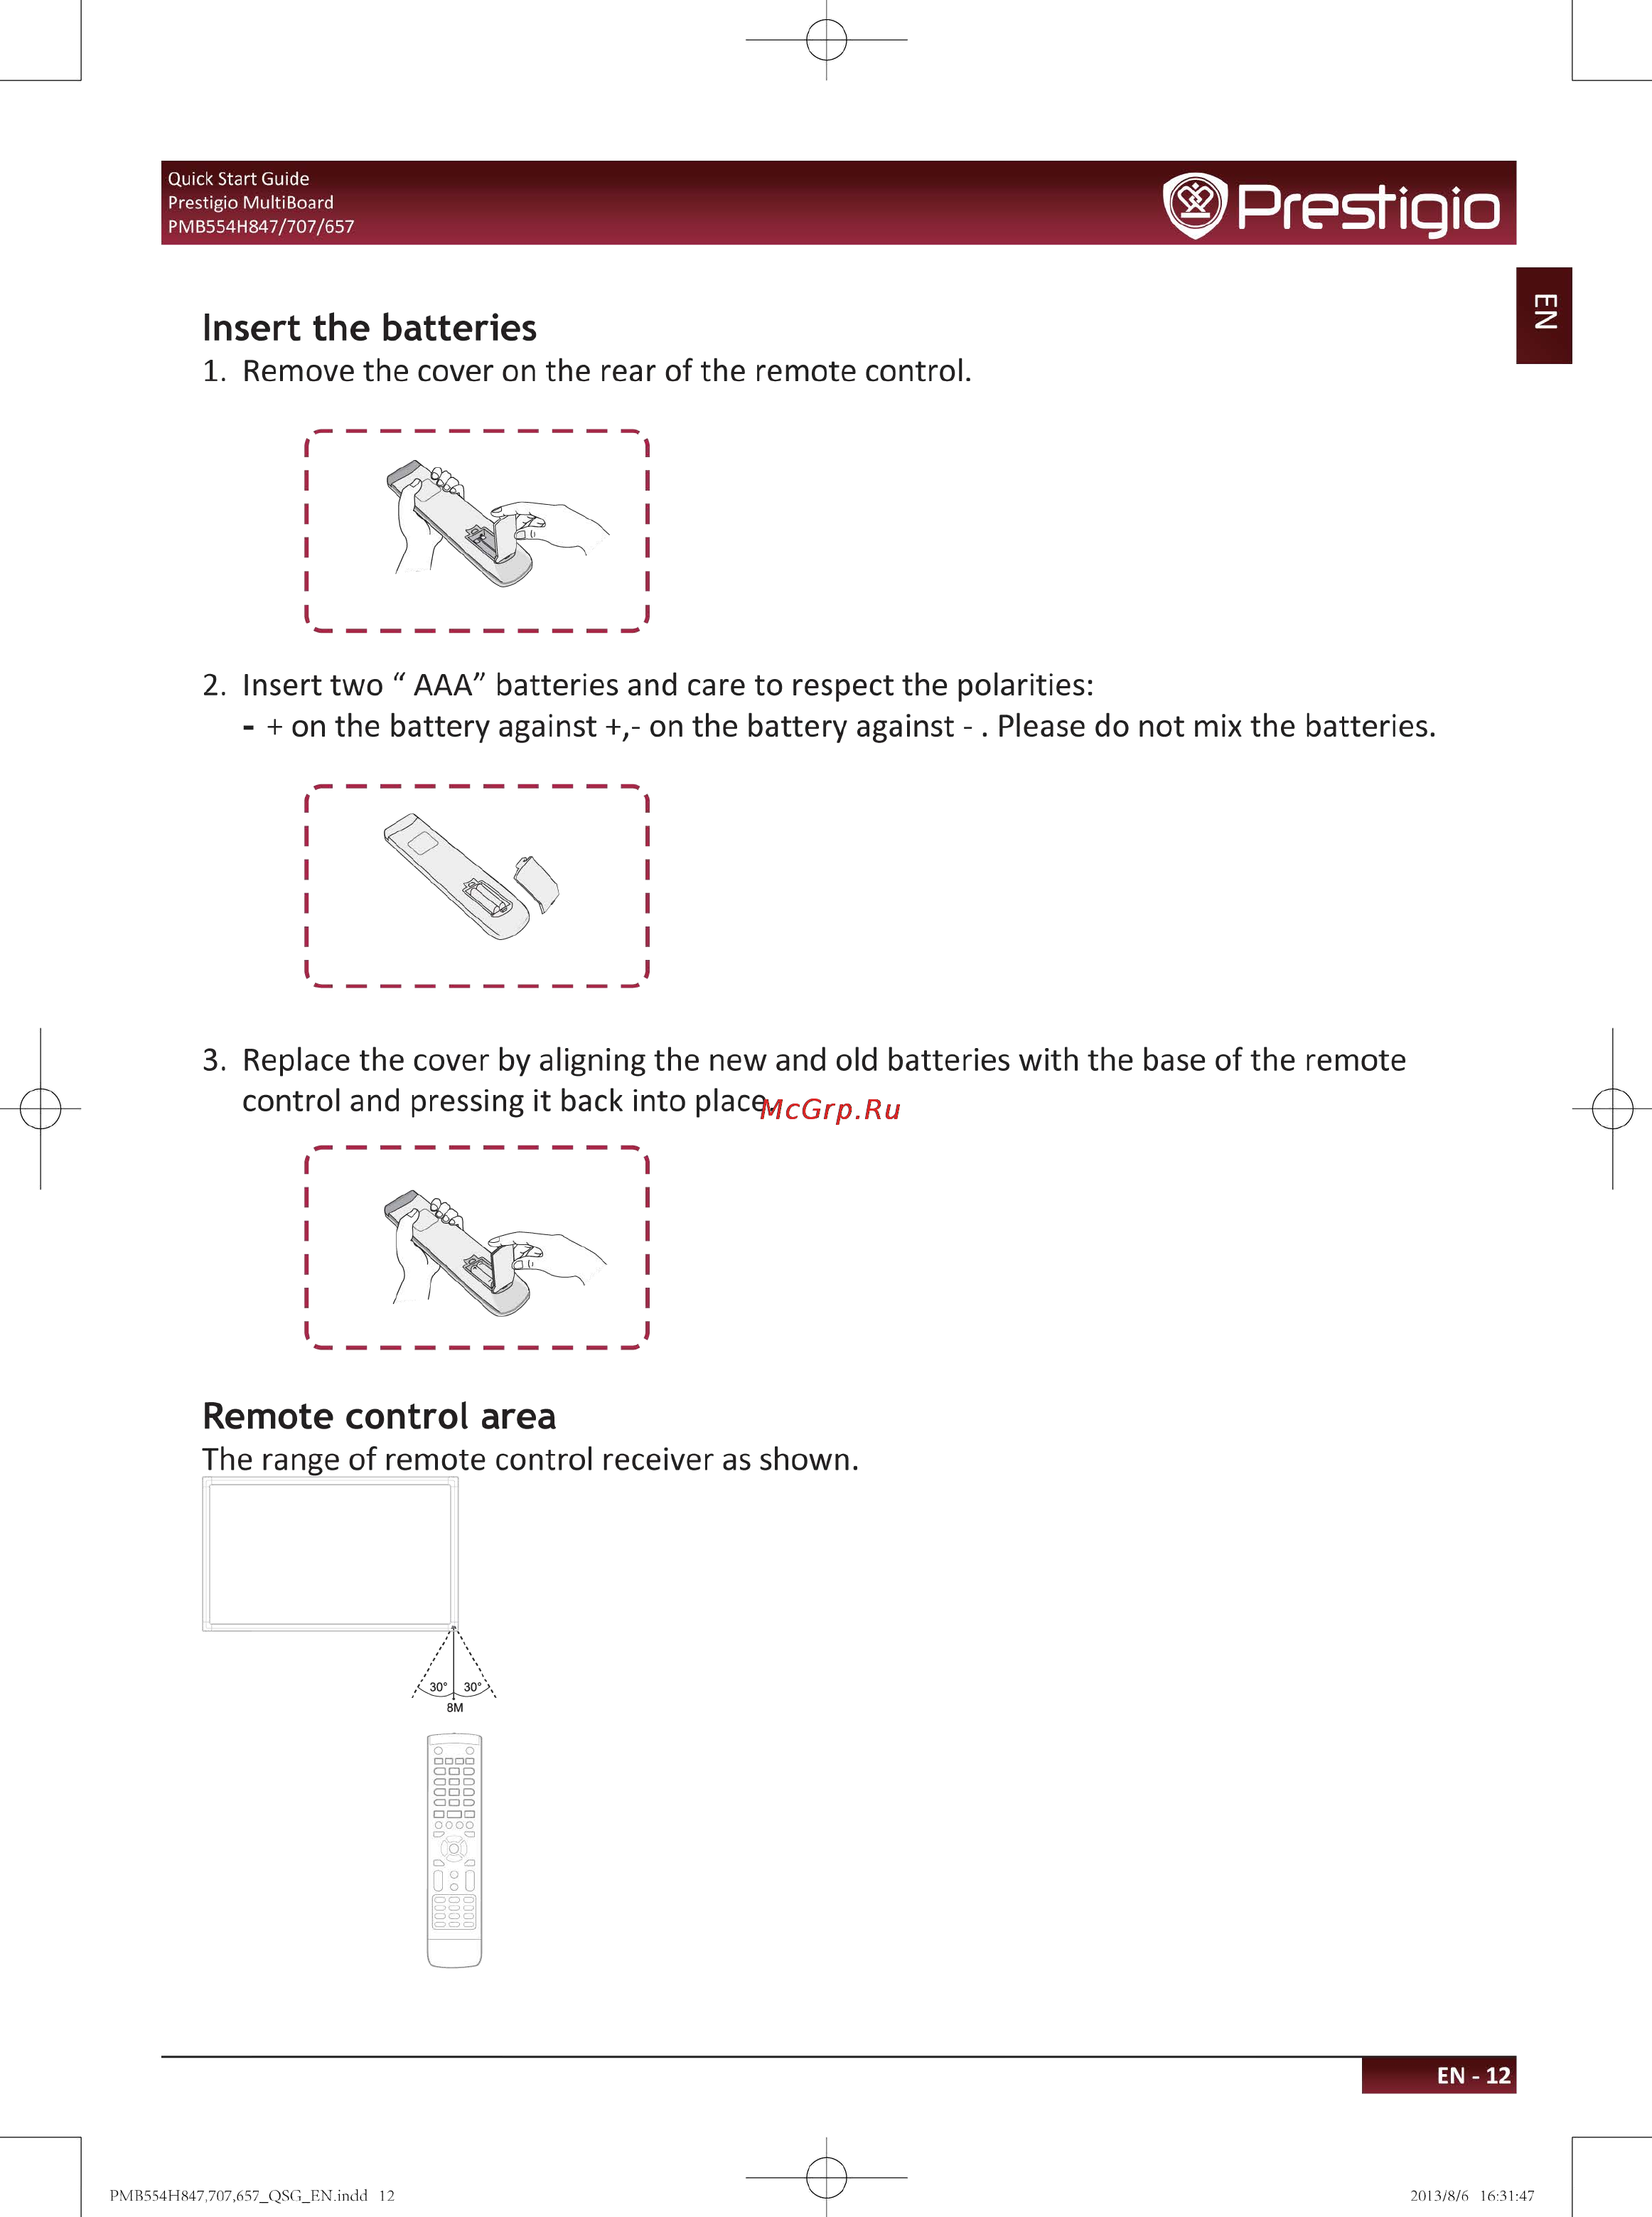
Quick Start Guide Prestigio MultiBoard PMB554H847 707 657 Prestigio Insert the batteries 1 Remove the cover on the rear of the remote control 2 Insert two AAA batteries and care to respect the polarities on the battery against on the battery against Please do not mix the batteries 3 Replace the cover by aligning the new and old batteries with the base of the remote control and pressing it back into place Remote control area The range of remote control receiver as shown 8M EN 12
Скачать
Случайные обсуждения