
Gigabyte MIB T3140 Инструкция онлайн
Содержание
- Accessory box 1
- Casing s internal structure 1
- Cm fan 1
- Components introduction 1
- Connect hinge onto chassis and mount monitor before adjusting the angle of the hinge 1
- Gigabyte 1
- Install thumb screw 1
- Installation of 3 hdd slim odd 1
- Installation of front multi media i o ports 1
- Installation of lcd monitor to case 1
- Mibt3140 1
- Mini itx motherboard 1
- Mount monitor downwards 1
- Power supply 1
- Remove screw and drive bay 3 hdd 1
- Remove top cover 1
- Slim odd 1
- Step 1 1
- Step 3 1
- Step 4 1
- Usb 2 ports ac 97 1 hd audio 1
Похожие устройства
- Gigabyte Sumo 5112 Инструкция
- Gigabyte iSolo 3134 Инструкция
- Gigabyte Setto 1020 Инструкция
- Gigabyte GZ-X7 Инструкция
- Daikin EWYT300B-SSA2-VFDFAN Инструкция по эксплуатации
- Daikin EWYT300B-SSA2-VFDFAN Инструкция по монтажу
- Daikin EWYT300B-SSA2-VFDFAN Технические данные
- Gigabyte GZ-X8 Инструкция
- Daikin EWYT340B-SSA2 Технические данные
- Daikin EWYT340B-SSA2 Инструкция по эксплуатации
- Daikin EWYT340B-SSA2 Инструкция по монтажу
- Daikin EWYT340B-SSA2-VFDFAN Технические данные
- Daikin EWYT340B-SSA2-VFDFAN Инструкция по эксплуатации
- Daikin EWYT340B-SSA2-VFDFAN Инструкция по монтажу
- Daikin EWYT390B-SSA2 Инструкция по эксплуатации
- Daikin EWYT390B-SSA2 Инструкция по монтажу
- Daikin EWYT390B-SSA2 Технические данные
- Daikin EWYT390B-SSA2-VFDFAN Инструкция по эксплуатации
- Daikin EWYT390B-SSA2-VFDFAN Технические данные
- Daikin EWYT390B-SSA2-VFDFAN Инструкция по монтажу
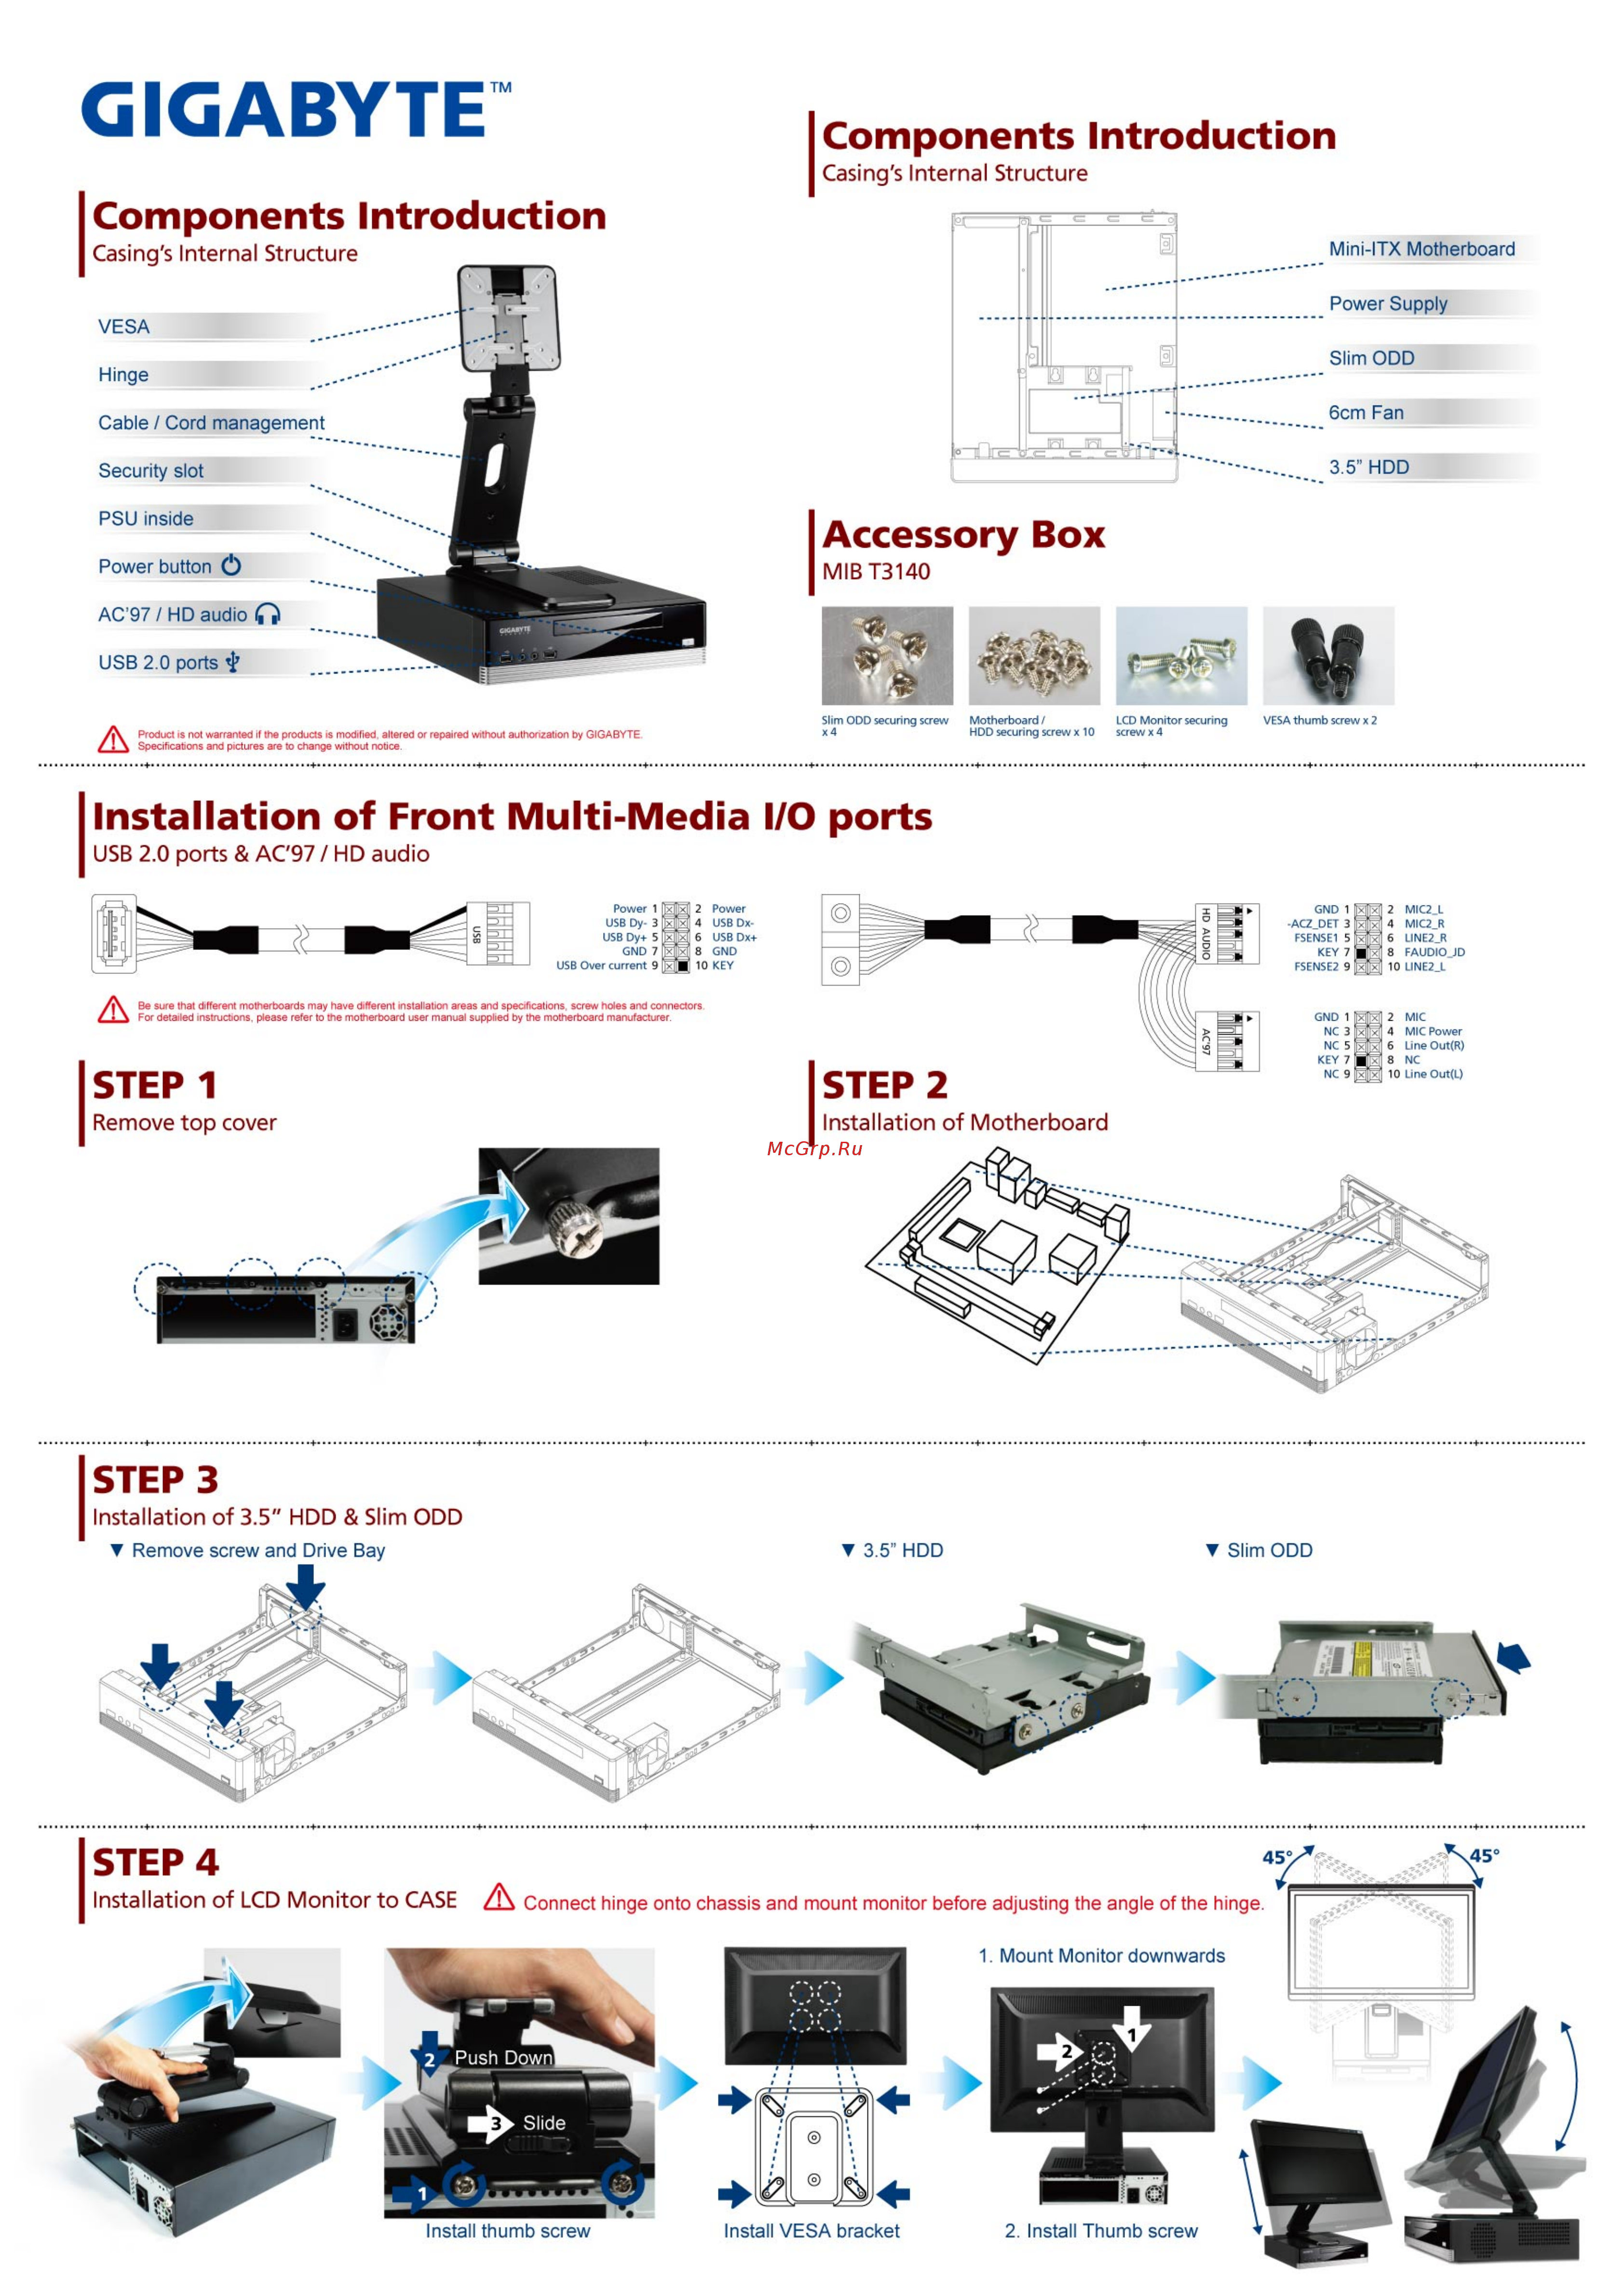
GIGABYTE Components Introduction Casing s Internal Structure Components Introduction Mini ITX Motherboard Power Supply Slim ODD 6cm Fan 3 5 HDD Accessory Box MIBT3140 Slim ODD securing screw x4 Product is not warranted if the products is modified altered or repaired without authorization by GIGABYTE Specifications and pictures are to change without notice Motherboard LCD Monitor securing VESA thumb screw x 2 HDD securing screw x 10 screw x 4 Installation of Front Multi Media I O ports USB 2 0 ports AC 971 HD audio Power 1 USB Dy 3 USB Dy 5 GND 7 USB Over current 9 gig l gig gu 2 Power 4 USB Dx6 USB Dx 8 GND 10 KEY Be sure that different motherboards may have different installation areas and specifications screw holes and connectors For detailed instructions please refer to the motherboard user manual supplied by the motherboard manufacturer STEP 1 Remove top cover STEP 3 Installation of 3 5 HDD Slim ODD Remove screw and Drive Bay 3 5 HDD STEP 4 Installation of LCD Monitor to CASE Connect hinge onto chassis and mount monitor before adjusting the angle of the hinge 1 Mount Monitor downwards Install thumb screw