![Haier HSU-07RD03 [6/18] Buttons and display of the remote controller](/img/pdf.png)
Haier HSU-07RD03 [6/18] Buttons and display of the remote controller
![Haier HSU-07RD03 [6/18] Buttons and display of the remote controller](/views2/1806497/page6/bg6.png)
Содержание
- Operation manual p.1
- Split type room air conditioner p.1
- Contents p.2
- Cautions p.3
- Disposal of the old air conditioner p.3
- Disposal of the packaging of your new air conditioner p.3
- Safety instructions and warnings p.3
- Specifications p.4
- The machine is adaptive in following situation p.4
- Cautions p.4
- Outdoor unit p.5
- Indoor unit p.5
- Parts and functions p.5
- Buttons and display of the remote controller p.6
- Operation p.6
- Parts and functions p.6
- Clock set p.6
- Put on the cover again confirmation indicator p.7
- Power failure resume please set and apply as necessary p.7
- Operation p.7
- Loading of the battery p.7
- Load the battery p.7
- Remove the battery cover p.7
- Remote controller s operation p.7
- Operation p.8
- Enjoy yourself by just a gentle press p.8
- Auto run fan operation p.8
- 4 unit stop p.8
- 2 select operation mode p.8
- 1 unit start p.8
- Cool heat and dry operation p.9
- P v a u p.9
- Operation p.9
- Left and right air flow adjustment manual p.10
- Operation p.10
- Cautions p.10
- 6 unit stop p.10
- 5 air flow direction adjustment p.10
- Up and down use remote controller p.10
- To cancel timer mode p.11
- Timer operation p.11
- Timer on off p.11
- Qu q3 0 qq p.11
- Operation p.11
- To cancel timer mode p.12
- Timer on off p.12
- Operation p.12
- 6 time confirming for timer off p.12
- 5 time setting for timer off p.12
- 4 time confirming for timer on p.12
- 3 time setting for timer on p.12
- 2 press timer button to change timer mode p.12
- 1 after unit start select your desired operation mode p.12
- Health mode operation p.13
- Operation p.13
- Emergency operation p.14
- Test operation p.14
- Removal of the restriction of emergency or test operation p.14
- Operation p.14
- Emergency operation and test operation p.14
- Power failure resume function p.15
- Operation p.15
- In heat mode p.15
- In cool mode p.15
- Comfortable sleep p.15
- Cleaning of air filter p.16
- Maintenance p.16
- Cleaning of unit casing p.16
- Cleaning of remote controller p.16
- Better use of air conditioner p.17
- Never fail to observe the followings p.17
- Maintenance p.17
- Trouble shooting p.18
- Before asking for service check the following first p.18
Похожие устройства
-
 Haier HSU-24HEK203/R2Эксплуатационная инструкция
 -
Haier HSU-18HEK203/R2Инструкция по применению
-
Haier HSU-12HEK203/R2Эксплуатационная инструкция
-
Haier HSU-09HEK203/R2Инструкция по работе
-
Haier HSU-07HEK203/R2Руководство по работе с устройством
-
Haier HSU-24HEK203/R2(DB)Инструкция по работе
-
Haier HSU-18HEK203/R2(DB)Инструкция к устройству
-
Haier HSU-12HEK303/R2(DB)Руководство по работе с устройством
-
Haier HSU-09HEK303/R2(DB)Руководство по эксплуатации
-
Haier AS24NE3HRA/1U24GR4ERAИнструкция к устройству
-
Haier AS18ND1HRA/1U18EN2ERAИнструкция пользователя
-
Haier AS12NB3HRA/1U12BR4ERAЭксплуатационная инструкция
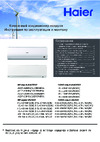
Parts and Functions Operation Buttons and display of the remote controller Note For some models without negative ion function don t have the HEALTH button Clock set 1 Mode display AUTO 9 COOL DRY A HEAT O FAN alls 1 il ill 2 SWING display 3 FAN SPEED display I AUTO IO MED III 4 SLEEP display 5 LOCK display 6 SIGNAL SENDING 7 TIMER OFFdisplay 8 TIMER ON display 9 CLOCK display 10 TEMP display 11 POWER ON OFF Used for unit start and stop 12 MODE Used to select AUTO run COOL DRY HEAT and FAN operation 13 FAN Used to select fan speed LO MED HI AUTO 14 HOUR Used to set clock and timer setting 15 SWING Used to set auto fan direction 16 SLEEP Used to select sleep mode 17 LOCK Used to lock buttons and LCD display 18 TEMP Used to select your desired temp 19 SET Used to confirm timer and clock settings 20 TIMER Used to select TIMER ON TIMER OFF TIMER ON OFF 21 CLOCK Used to set correct time 22 RESET Used to reset the controller back to normal condition23 HEALTH When unit is started for the first time and after replacing batteries in remote controller clock should be adjusted as follows Press CLOCK button AM or PM flashes Press or V to set correct time Each press will increase or decrease 1 min If the button is kept depressed time will change quickly After time setting is confirmed press SET AM and PM stop flashing while clock starts working Hints After replacing with new batteries remote controller will conduct self check displaying all information on LCD Then it will become normal 4