
Autel MaxiSys ADAS MA600 Руководство по эксплуатации онлайн
Похожие устройства
- Autel Autolink AL529, OBD II Инструкция по эксплуатации
- Autel Autolink AL529, OBD II Руководство по эксплуатации
- Autel MaxiTPMS ITS600 Инструкция по эксплуатации
- Autel MaxiTPMS ITS600 Руководство по эксплуатации
- Autel MaxiBAS BT608, 3000 CCA Инструкция по эксплуатации
- Autel MaxiBAS BT608, 3000 CCA Руководство по эксплуатации
- Autel MaxiFlash Elite, J2534 Руководство по эксплуатации
- Autel MaxiSys ADAS, Basic Kit, ACC Размещение рамы шаблонов
- Autel MaxiSys ADAS, Basic Kit, ACC Крепление перекладины
- Autel MaxiSys ADAS, Basic Kit, ACC Инструкция по обновлению
- Autel MaxiSys ADAS, Basic Kit, ACC Инструкция по установке
- Autel MaxiSys ADAS, Basic Kit, ACC Инструкция для калибр рамы
- Autel MaxiSys ADAS, Basic Kit, ACC Инструкция для планшета
- Autel MaxiSys ADAS, Full Kit, ACC Инструкция для планшета
- Autel MaxiSys ADAS, Full Kit, ACC Крепление перекладины
- Autel MaxiSys ADAS, Full Kit, ACC Размещение рамы шаблонов
- Autel MaxiSys ADAS, Full Kit, ACC Инструкция по обновлению
- Autel MaxiSys ADAS, Full Kit, ACC Размещение шаблонов
- Autel MaxiSys ADAS, Full Kit, ACC Инструкция для калибр рамы
- Autel MaxiSys ADAS, Full Kit, ACC Инструкция по установке
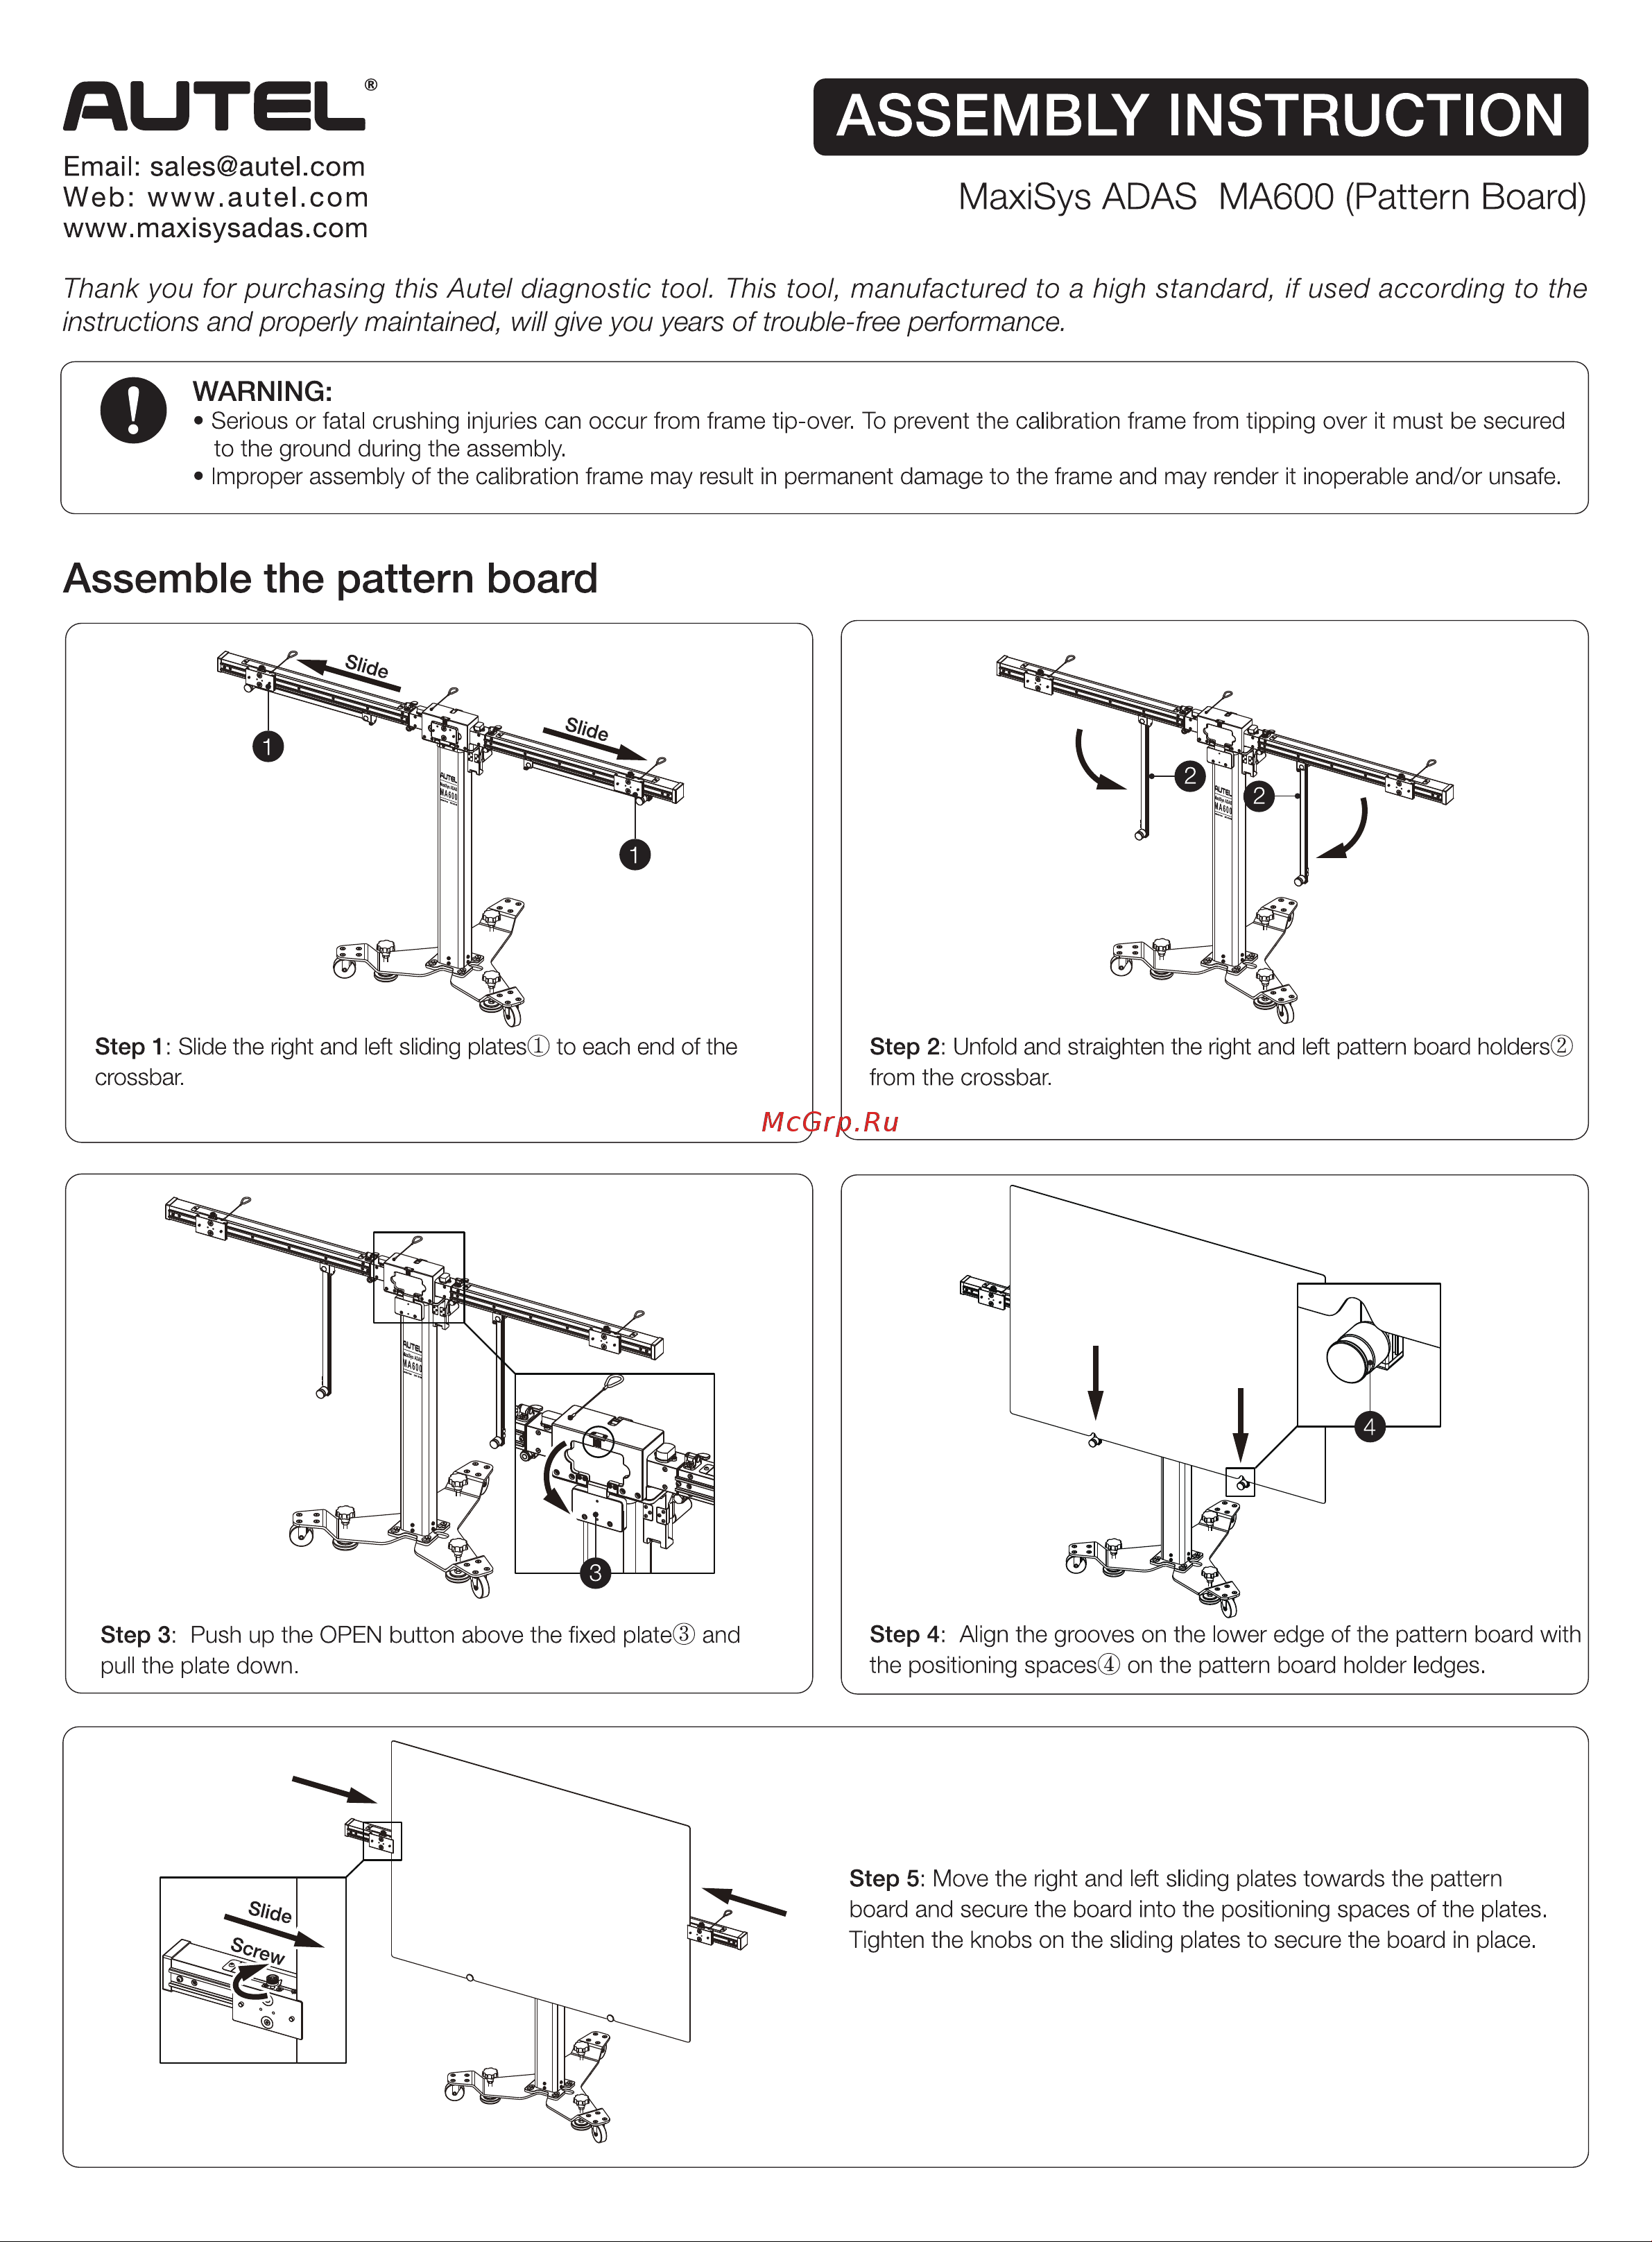
ASSEMBLY INSTRUCTION Email sales autel com Web www autel com www maxisysadas com MaxiSys ADAS MA600 Pattern Board Thank you for purchasing this Autel diagnostic tool This tool manufactured to a high standard if used according to the instructions and properly maintained will give you years of trouble free performance O WARNING Serious or fatal crushing injuries can occur from frame tip over To prevent the calibration frame from tipping over it must be secured to the ground during the assembly Improper assembly of the calibration frame may result in permanent damage to the frame and may render it inoperable and or unsafe Assemble the pattern board Step 1 Slide the right and left sliding plates to each end of the crossbar Step 2 Unfold and straighten the right and left pattern board holders from the crossbar Step 3 Push up the OPEN button above the fixed plate and pull the plate down Step 4 Align the grooves on the lower edge of the pattern board with the positioning spaces on the pattern board holder ledges