![Xiaomi BPLDS02DM [74/108] Verbinden met wifi](/img/pdf.png)
Xiaomi BPLDS02DM [74/108] Verbinden met wifi
![Xiaomi BPLDS02DM [74/108] Verbinden met wifi](/views2/1859628/page74/bg4a.png)
72
Gebruik
Houd de knop ingedrukt om te wisselen tussen direct bries en
natuurlijke bries. De indicator is uit in de directe bries modus en aan in
de natuurlijke bries modus. Nadat de ventilator is uitgeschakeld en weer
wordt ingeschakeld, is de modus de modus die het laatst gebruikt is.
Wisselen van modus
Dit product kan gebruikt worden met de Mi Home/Xiaomi Home
app*. Bedien je apparaat met de Mi Home/Xiaomi Home app.
Scan de QR-code om de app te downloaden en te
installeren. U wordt doorverwezen naar de pagina
voor verbindingsinstellingen als de app al is
geïnstalleerd. Of zoek op "Mi Home/Xiaomi Home"
in de app Store om deze te downloaden en te
installeren. Open de Mi Home/Xiaomi Home app, tik
op "+" rechtsboven, en volg dan de aanwijzingen
om uw apparaat toe te voegen.
* In Europa wordt de naam Xiaomi Home-app
gebruikt (met uitzondering van Rusland). De naam
van de app die op uw apparaat wordt weergegeven,
moet als standaard worden gebruikt.
Opmerking: De versie van de app kan zijn geüpdatet, volg
de instructies van de huidige app-versie.
Verbinden met de Mi Home app
Houd de knoppen en tegelijkertijd ingedrukt. Zodra u
een lange pieptoon hoort, wacht de ventilator op verbinding,
dan kunt u deze via de app koppelen met een apparaat.
Verbinden met Wifi
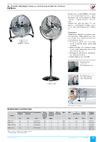
De luchtstroomrichting aanpassen
Til of duw de ventilatorkop
of het ventilatorrooster
voorzichtig naar beneden of
naar boven om de
luchtstroom naar boven of
beneden te regelen.
23° naar boven
16° naar beneden
Druk op de knop om oscillatie in of uit te schakelen. U kunt het
bereik van de oscillatiehoek instellen in de app. Nadat de ventilator is
uitgeschakeld en weer wordt ingeschakeld, is de oscillatie-instelling de
instelling die het laatst gebruikt is. Trek de stekker uit het stopcontact en
steek daarna de stekker weer in het stopcontact of reset de Wifi
verbinding, en zet vervolgens de ventilator aan. Deze zal automatisch zijn
hoek oscilleren als de oscillatiefunctie is ingeschakeld. De oscillatietijd
varieert aankelijk van de verschillende hoeken, wacht geduldig.
Oscillatie inschakelen/uitschakelen
Druk op de knop om door de geplande uitschakeltijden te bladeren: 1
uur, 2 uur, 3 uur, 4 uur, en uitgeschakeld, en de bijbehorende indicator(en)
zullen gaan branden (zie de tabel hieronder). Vijf seconden nadat de
geplande uitschakelfunctie is gebruikt, gaan de indicator (en) weer aan om
de corresponderende status van de huidige snelheid aan te geven.
Gepland uitschakelen
Opmerking: betekent dat de indicator is ingeschakeld, betekent dat de indicator is uitgeschakeld.
Gepland
Indicator
Uitgeschakeld 1 uur 2 uur 3 uur 4 uur
Opmerking: Voor meer geplande uitschakelopties (tot maximaal 8 uur) ga naar de Mi Home/Xiaomi Home app.
Opmerking: Wanneer de Wifi verbinding wordt gereset, verandert het bereik van de oscillatiehoek
in de standaardhoek van 90 °.
Содержание
- Aviso de garanti p.1
- Гарантийное уведомлени p.1
- Warranty notic p.1
- Garantieerklärun p.1
- Garanti p.1
- Avviso sulla garanzi p.1
- Aviso de garantí p.1
- Warnings p.3
- Safety instructions p.3
- Safety instructions p.4
- Precautions p.4
- Package contents p.5
- Step 1 install the fan base p.6
- Product overview p.6
- Installation p.6
- Step 4 install the fan blade assembly p.7
- Step 3 install the rear grille p.7
- Step 2 open the fan assembly p.7
- Installation p.7
- Turning on off p.8
- Switching speed mode p.8
- Step 6 fasten the front grille p.8
- Step 5 install the front grille p.8
- Installation p.8
- How to use p.8
- Connecting to an electrical outlet p.8
- How to use p.9
- Enable disable oscillation p.9
- Connecting to wi fi p.9
- Connect with the mi home app p.9
- Adjust the airflow direction p.9
- Scheduled turn off p.9
- Washable parts p.10
- Reseting wi fi connection p.10
- Not washable parts p.10
- How to use care maintenance p.10
- Enabling disabling wi fi connection p.10
- Child lock function p.10
- Troubleshooting p.11
- Specifications p.12
- Regulatory compliance information p.13
- Warnungen p.14
- Sicherheitshinweise p.14
- Vorsichtsmaßnahmen p.15
- Sicherheitshinweise p.15
- Verpackungsinhalt p.16
- Installation p.17
- Schrit 1 installieren des ventilatorsockels p.17
- Produktübersicht p.17
- Schrit 4 installieren der ventilatorflügel baugruppe p.18
- Schrit 3 installieren des hinteren giters p.18
- Schrit 2 öffnen sie die ventilator baugruppe p.18
- Installation p.18
- Wechsel von drehzahl modus p.19
- Verwendung p.19
- Schrit 6 befestigen sie das vordere giter p.19
- Schrit 5 installieren sie das vordere giter p.19
- Installation p.19
- Ein aus p.19
- Anschluss an eine steckdose p.19
- Mit wlan verbinden p.20
- Mit der mi home app verbinden p.20
- Einstellen der lufstromrichtung p.20
- Zeitgesteuertes ausschalten p.20
- Verwendung p.20
- Oszillation aktivieren deaktivieren p.20
- Wlan verbindung zurücksetzen p.21
- Verwendung pflege und wartung p.21
- Nicht abwaschbare teile p.21
- Kindersicherung p.21
- Aktivieren deaktivieren der wlan verbindung p.21
- Abwaschbare teile p.21
- Fehlerbehebung p.22
- Spezifikationen p.23
- Informationen zur einhaltung gesetzlicher vorschrifen p.24
- Norme di sicurezza p.25
- Avvertenze p.25
- Precauzioni p.26
- Norme di sicurezza p.26
- Contenuto della confezione p.27
- Passaggio 1 installare la base del ventilatore p.28
- Panoramica del prodoto p.28
- Installazione p.28
- Passaggio 4 installare la pala del ventilatore p.29
- Passaggio 3 installare la griglia posteriore p.29
- Passaggio 2 aprire il montaggio del ventilatore p.29
- Installazione p.29
- Passaggio 6 fissare la griglia anteriore p.30
- Passaggio 5 installare la griglia anteriore p.30
- Modalità velocità di commutazione p.30
- Modalità d utilizzo p.30
- Installazione p.30
- Collegamento a una presa eletrica p.30
- Acceso spento p.30
- Abilita disabilita oscillazione p.31
- Spegnimento programmato p.31
- Regolare la direzione del flusso d aria p.31
- Modalità d utilizzo p.31
- Connetiti a una rete wi fi p.31
- Connessione con l app mi home p.31
- Ripristino la connessione wi fi p.32
- Parti non lavabili p.32
- Parti lavabili p.32
- Modalità d utilizzo cura e manutenzione p.32
- Blocco di sicurezza per bambini p.32
- Abilitazione disabilitazione della connessione wi fi p.32
- Risoluzione dei problemi p.33
- Specifiche tecniche p.34
- Informazioni sulla conformità a normative e standard p.35
- Consignes relatives à la sécurité p.36
- Avertissements p.36
- Précautions p.37
- Consignes relatives à la sécurité p.37
- Contenu du paquet p.38
- Étape 1 installer le socle du ventilateur p.39
- Présentation du produit p.39
- Installation p.39
- Étape 4 installer l assemblage de la pale du ventilateur p.40
- Étape 3 installer la grille arrière p.40
- Étape 2 ouvrir l assemblage du ventilateur p.40
- Installation p.40
- Étape 5 installation de la grille avant p.41
- Utilisation p.41
- Marche arrêt p.41
- Installation p.41
- Connexion à une prise électrique p.41
- Changement de vitesse mode p.41
- Étape 6 serrage de la grille avant p.41
- Utilisation p.42
- Connexion avec l application mi home p.42
- Connexion au wi fi p.42
- Arrêt programmé p.42
- Ajustez la direction du flux d air p.42
- Activation désactivation de l oscillation p.42
- Verrouillage de protection anti enfant p.43
- Utilisation entretien et maintenance p.43
- Réinitialisation du wi fi p.43
- Pièces non lavables p.43
- Parties lavables p.43
- Activer désactiver la connexion wi fi p.43
- Dépannage p.44
- Caractéristiques p.45
- Informations sur la conformité et les réglementations p.46
- Instrucciones de seguridad p.47
- Advertencias p.47
- Precauciones p.48
- Instrucciones de seguridad p.48
- Contenido del paquete p.49
- Paso 1 instalar la base del ventilador p.50
- Instalación p.50
- Descripción del producto p.50
- Paso 4 instalación del ensamblaje de las hojas p.51
- Paso 3 instalación de la parrilla trasera p.51
- Paso 2 apertura del ensamblaje del ventilador p.51
- Instalación p.51
- Instalación p.52
- Encendido y apagado p.52
- Conexión a una toma de corriente p.52
- Cambiar la velocidad modo p.52
- Paso 6 fijar la parrilla delantera p.52
- Paso 5 instalación de la rejilla frontal p.52
- Modo de uso p.52
- Modo de uso p.53
- Conectarse a wi fi p.53
- Conectar con la aplicación mi home p.53
- Apagado programado p.53
- Ajustar la dirección del flujo de aire p.53
- Activar desactivar la oscilación p.53
- Restablecer la red wi fi p.54
- Piezas no lavables p.54
- Partes lavables p.54
- Modo de uso cuidado y mantenimiento p.54
- Habilitar deshabilitar la conexión wi fi p.54
- Función de bloqueo infantil p.54
- Solución de problemas p.55
- Especificaciones p.56
- Información sobre el cumplimiento de la normativa p.57
- Инструкция по технике безопасности p.58
- Предупреждения p.58
- Меры предосторожности p.59
- Инструкция по технике безопасности p.59
- Комплект поставки p.60
- Установка p.61
- Этап 1 установка подставки электропитания вентилятора p.61
- Описание изделия p.61
- Этап 4 установка узла лопастей вентилятора p.62
- Этап 3 установите заднюю решетку p.62
- Этап 2 откройте вентилятор в сборке p.62
- Установка p.62
- Инструкция p.63
- Переключение скорости режима p.63
- Вкл выкл p.63
- Этап 6 закрепите переднюю решетку p.63
- Этап 5 установите переднюю решетку p.63
- Установка p.63
- Подключение к электрической розетке p.63
- Инструкция p.64
- Регулировка направления потока воздуха p.64
- Подключитесь к приложению mi home p.64
- Подключение к wi fi p.64
- Запланированное отключение p.64
- Включить отключить колебания p.64
- Инструкция уход и техническое обслуживание p.65
- Сброс соединения wi fi p.65
- Не моющиеся части p.65
- Моющиеся детали p.65
- Включение отключение соединения wi fi p.65
- Функция блокировки от детей p.65
- Устранение неполадок p.66
- Технические характеристики p.67
- Радиочастотные характеристики рабочий диапазон частот максимальная выходная мощность p.67
- Радиочастота и мощность радиопередачи p.67
- G 2412 2472 mhz 20 дбм p.67
- Waarschuwingen p.68
- Veiligheidsinstructies p.68
- Voorzorgsmaatregelen p.69
- Veiligheidsinstructies p.69
- Inhoud pakket p.70
- Stap 1 de voet van de ventilator installeren p.71
- Productoverzicht p.71
- Installatie p.71
- Stap 2 open de ventilatieconstructie p.72
- Installatie p.72
- Stap 4 de ventilatorbladconstructie installeren p.72
- Stap 3 het achterste rooster installeren p.72
- Wisselen van snelheid modus p.73
- Stap 6 het voorste rooster bevestigen p.73
- Stap 5 het voorste rooster installeren p.73
- Installatie p.73
- In en uitschakelen p.73
- Gebruik p.73
- Aansluiten op een stopcontact p.73
- Verbinden met wifi p.74
- Verbinden met de mi home app p.74
- Oscillatie inschakelen uitschakelen p.74
- Gepland uitschakelen p.74
- Gebruik p.74
- De luchtstroomrichting aanpassen p.74
- De wifi verbinding reseten p.75
- Wifi verbinding inschakelen uitschakelen p.75
- Onderdelen die niet gereinigd kunnen worden p.75
- Onderdelen die gereinigd kunnen worden p.75
- Kinderslotfunctie p.75
- Gebruik verzorging en onderhoud p.75
- Problemen oplossen p.76
- Specificaties p.77
- Informatie naleven van de wet en regelgeving p.78
- Instruções de segurança p.79
- Avisos p.79
- Precauções p.80
- Instruções de segurança p.80
- Conteúdo da embalagem p.81
- Visão geral do produto p.82
- Passo 1 instale a base do ventilador p.82
- Instalação p.82
- Passo 4 instale as hélices do ventilador p.83
- Passo 3 instale a grade traseira p.83
- Passo 2 abra a montagem do ventilador p.83
- Instalação p.83
- Trocar velocidade modo p.84
- Passo 6 aperte a grade frontal p.84
- Passo 5 instale a grade frontal p.84
- Ligar desligar p.84
- Instalação p.84
- Conexão a uma tomada elétrica p.84
- Como usar p.84
- Desligamento agendado p.85
- Conexão ao wi fi p.85
- Conecte se ao app mi home p.85
- Como usar p.85
- Ajustar a direção do fluxo de ar p.85
- Habilitar desabilitar oscilação p.85
- Redefinição de conexão wi fi p.86
- Peças não laváveis p.86
- Peças laváveis p.86
- Habilitar desabilitar conexão wi fi p.86
- Função de trava infantil p.86
- Como usar cuidados e manutenção p.86
- Solução de problemas p.87
- Especificações p.88
- Informações sobre conformidade regulamentar p.89
- Warranty notice p.90
- Remedies p.90
- Limited product warranty p.90
- How to obtain warranty service p.90
- Exclusions and limitations p.90
- Damage limitation p.91
- Xiaomi contacts p.91
- Implied warranties p.91
- Rechtsmittel p.92
- Nutzung des garantieservices p.92
- Garantieerklärung p.92
- Eingeschränkte produktgarantie p.92
- Ausschlüsse und einschränkungen p.92
- Stillschweigende garantien p.93
- Schadensbeschränkung p.94
- Kontakt xiaomi p.94
- Riparazioni p.95
- Garanzia limitata di prodotto p.95
- Esclusioni e limitazioni p.95
- Come ottenere il servizio di garanzia p.95
- Avviso sulla garanzia p.95
- Contatti xiaomi p.96
- Limitazione del danno p.96
- Garanzie implicite p.96
- Solutions p.97
- Garantie limitée de produit p.97
- Garantie p.97
- Exclusions et limitations p.97
- Comment profiter d un service de garantie p.97
- Limitation des dommages p.98
- Garanties implicites p.98
- Contacts xiaomi p.98
- Medidas compensatorias p.99
- Garantía limitada del producto p.99
- Excepciones y limitaciones p.99
- Cómo obtener el servicio de garantía p.99
- Aviso de garantía p.99
- Contactos de xiaomi p.100
- Limitación de daños p.100
- Garantías implícitas p.100
- Средства правовой защиты p.101
- Ограниченная гарантия на продукт p.101
- Как получить гарантийное обслуживание p.101
- Исключения и ограничения p.101
- Гарантийное уведомление p.101
- Подразумеваемые гарантии p.102
- Ограничение повреждения p.102
- Контакты компании xiaomi p.103
- Verkrijgen van garantieservice p.104
- Verhaal p.104
- Uitsluitingen en beperkingen p.104
- Mededeling betreffende garantie p.104
- Beperkte productgarantie p.104
- Contact met xiaomi p.105
- Schadebeperking p.105
- Impliciete garanties p.105
- Recursos p.106
- Garantia limitada do produto p.106
- Exclusões e limitações p.106
- Como obter o serviço de garantia p.106
- Aviso de garantia p.106
- Limitação de danos p.107
- Informações de contato da xiaomi p.107
- Garantias implícitas p.107
Похожие устройства
-
 Xiaomi JLLDS01XYИнструкция по эксплуатации
 -
 Domfy DCW-F-40P-1Инструкция по эксплуатации
 -
Domfy DCW-F-40PE-1Инструкция по эксплуатации
-
 Polaris PSF 2140RCРуководство по эксплуатации
 -
 Polaris PSF 2840RCРуководство по эксплуатации
 -
 Polaris PSF 1640Руководство по эксплуатации
 -
 Scarlett SF-111B17Руководство по эксплуатации
 -
 Soler&Palau HTB 90 RCРуководство по эксплуатации
 -
 Soler&Palau Artic 255 N GRРуководство по эксплуатации
 -
 Soler&Palau Artic 405 CN TCРуководство по эксплуатации
 -
 Soler&Palau HTB 140 RCРуководство по эксплуатации
 -
 Soler&Palau HTB 75 RCРуководство по эксплуатации