
Aten VK330 Краткое руководство по установке онлайн
VK330 10.1” Touch Panel
www.aten.com
2
1
3
panel plate
wall plate
B
Mounting the VK330
© Copyright 2023 ATEN
®
International Co. Ltd.
ATEN and the ATEN logo are registered trademarks of ATEN International Co., Ltd. All rights
reserved. All other trademarks are the property of their respective owners.
Released: 01/2023
10.1” Touch Panel
Quick Start Guide
VK330
Wall Mount
Desk Mount
Package Contents
1 VK330 10.1" Touch Panel
1 90° RJ-45 cable adapter
1 user instructions
Support and Documentation Notice
All information, documentation, fi rmware,
software utilities, and specifi cations
contained in this package are subject to
change without prior notifi cation by the
manufacturer.
To reduce the environmental impact of
our products, ATEN documentation and
software can be found online at
http://www.aten.com/download/
Technical Support
www.aten.com/support
Scan for more information
ATEN Website User Manual
Note:
Accessories for wall mount (VK302) and desk mount (VK304)
installations are available for purchase. For more information, visit the
VK330 product web page.
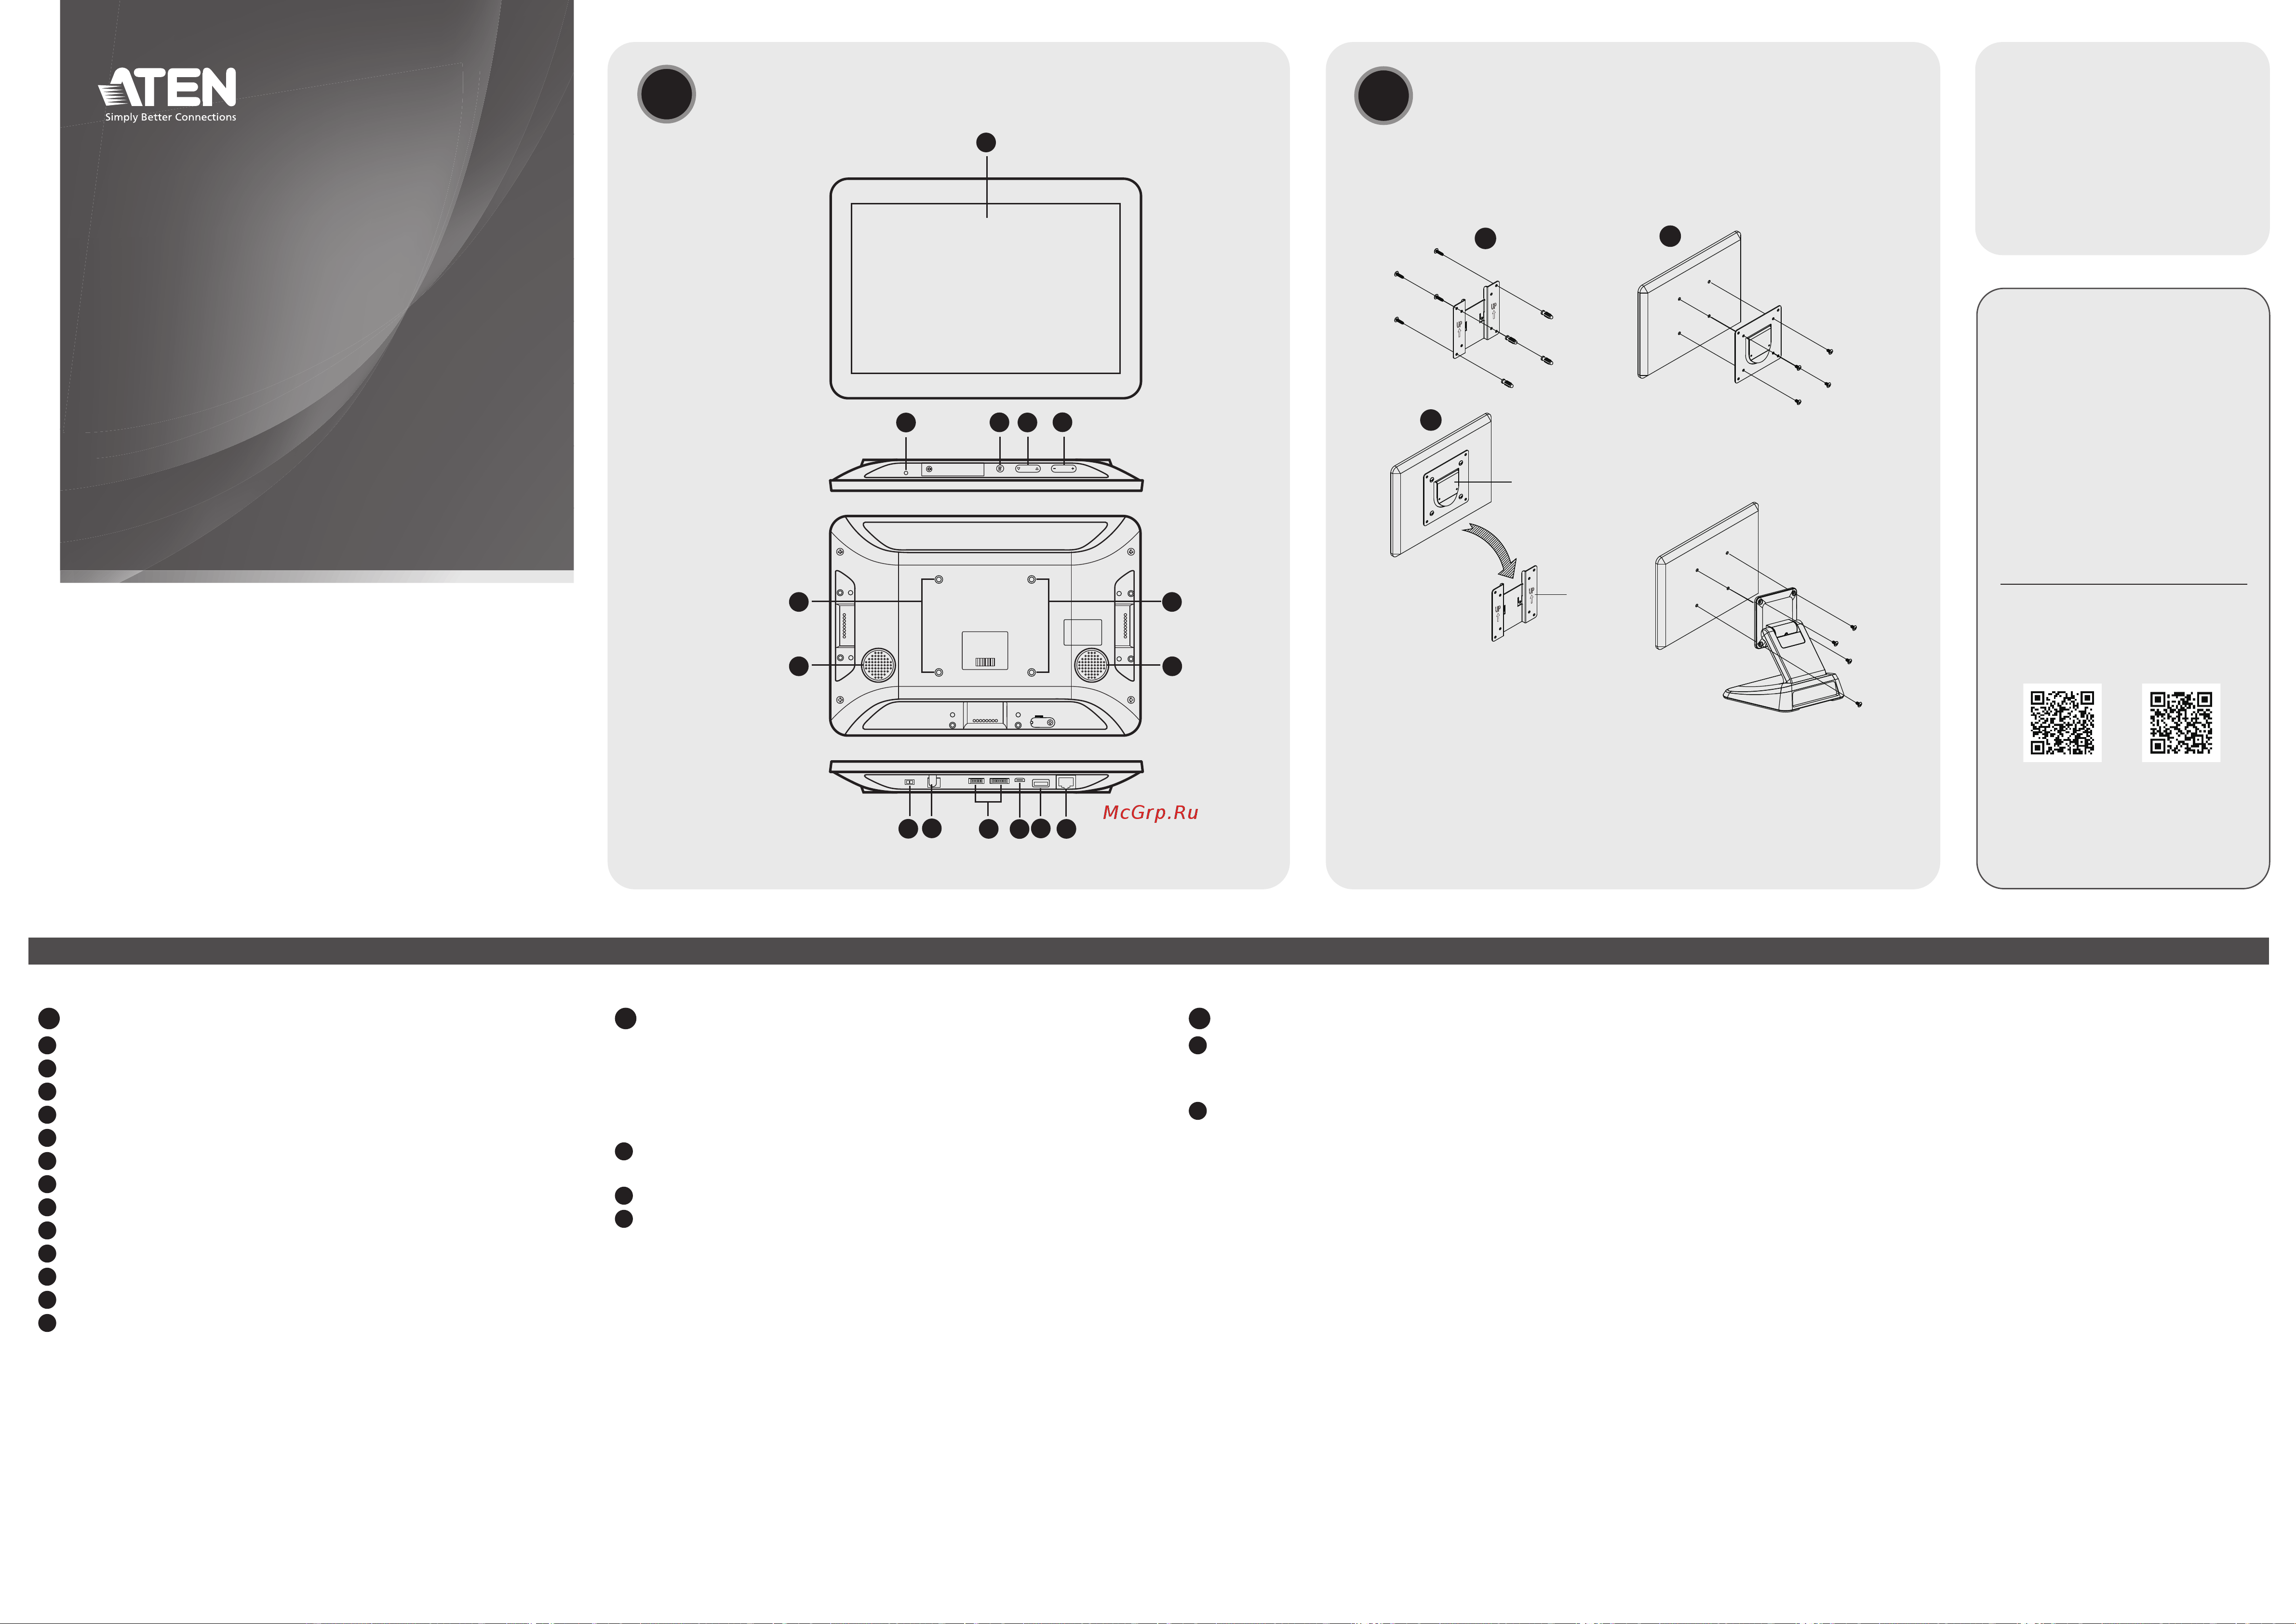
A
Hardware Overview
1
touch panel
2
status LED
3
function button
4
brightness +/-
5
volume +/-
6
screws holes for panel plate
7
speakers
8
power switch
9
power jack
10
for debugging purposes only
11
USB Micro-B port
12
USB Type-A port
13
LAN Port with PoE
B
Mounting the VK330
The VK330 Touch Panel supports desk mount, wall mount, or any
third-party mounting accessory that is VESA compliant (75 mm x 75
mm). For more information about the accessories, visit the product
web page. To mount the VK330 to the wall using ATEN wall mount
accessory, follow the steps below.
1
Secure the wall plate to the wall using the wall anchors and
screws.
2
Secure the panel plate to the VK330 using the M4 screws.
3
Slide the panel plate to the wall plate.
C
Installation
1
Using the 90° RJ-45 cable adapter provided and an Ethernet cable,
connect the unit to a PoE switch / injector to provide power and
access to the network.
2
Put the Power Switch to
ON
. The status LED lights green.
Software Confi guration
Adding Viewers to the ATEN Control System App
1. After switching the power to
ON
, wait for the ATEN Control System
welcome page to appear.
2. Tap
Start
. The Download Viewer page appears.
3. Search for controllers and add Viewers that you have created. For
more information about the ATEN Control System app, refer to the
ATEN Control System User Manual.
Confi guring the Network Settings
To confi gure network settings:
1. Press the
Function
button.
2. Tap
Network & Internet > Ethernet > Ethernet IP Mode
to
confi gure the network settings.
Operation
• To return to the settings page, press the
Function
button once.
• To return to the ATEN Control System app from the settings page,
tap
Return to ATEN Control System App
.
A
Hardware Overview
Front View
Rear View
Top View
Bottom View
4
1
2
3
9
7
6 6
7
12
1310
5
8
11
Содержание
Похожие устройства
- Aten VK330 Руководство пользователя
- Aten VK112EU Краткое руководство по установке Блока клавиш
- Aten VK112EU Краткое руководство по установке контроллера
- Aten VK112EU Руководство пользователя
- Aten VK108US Краткое руководство по установке
- Aten VK108US Руководство пользователя
- Aten VM0202HB Краткое руководство по установке
- Aten VM0202HB Руководство пользователя
- Aten VM0808HB Краткое руководство по установке
- Aten VM0808HB Руководство к Приложению для управления видеоматрицей
- Aten VM0808HB Руководство пользователя
- Aten VM0404HB Краткое руководство по установке
- Aten VM0404HB Руководство к Приложению для управления видеоматрицей
- Aten VM0404HB Руководство пользователя
- Aten VM0202H Краткое руководство по установке
- Aten VM0202H Руководство пользователя
- Aten VM0404HA Руководство пользователя
- Aten VM0404HA Краткое руководство по установке
- Aten VM5808HA Краткое руководство по установке
- Aten VM5808HA Руководство пользователя