
Asus rs100-e7-pi2 Инструкция по эксплуатации онлайн
Содержание
- First edition march 2011 2
- Chapter 1 product introduction 3
- Chapter 2 hardware setup 3
- Contents 3
- Chapter 3 rackmount installation 4
- Chapter 4 motherboard info 4
- Chapter 5 bios setup 4
- Contents 4
- Chapter 7 driver installation 5
- Chapter6 raidconfiguration 5
- Contents 5
- Canadian department of communications statement 7
- Federal communications commission statement 7
- Notices 7
- Class 1 laser product 8
- Electrical safety 8
- Operation safety 8
- Safety information 8
- About this guide 9
- Audience 9
- Contents 9
- Conventions 10
- References 10
- Typography 10
- Chapter 1 11
- Product introduction 11
- Before requesting support from the asus technical support team you must take note of the product s serial number containing 14 characters such as xxs0xxxxxxxxxx shown as the figure below with the correct serial number of the product asus technical support team members can then offer a quicker and satisfying solution to your problems 12
- Check your system package for the following items 12
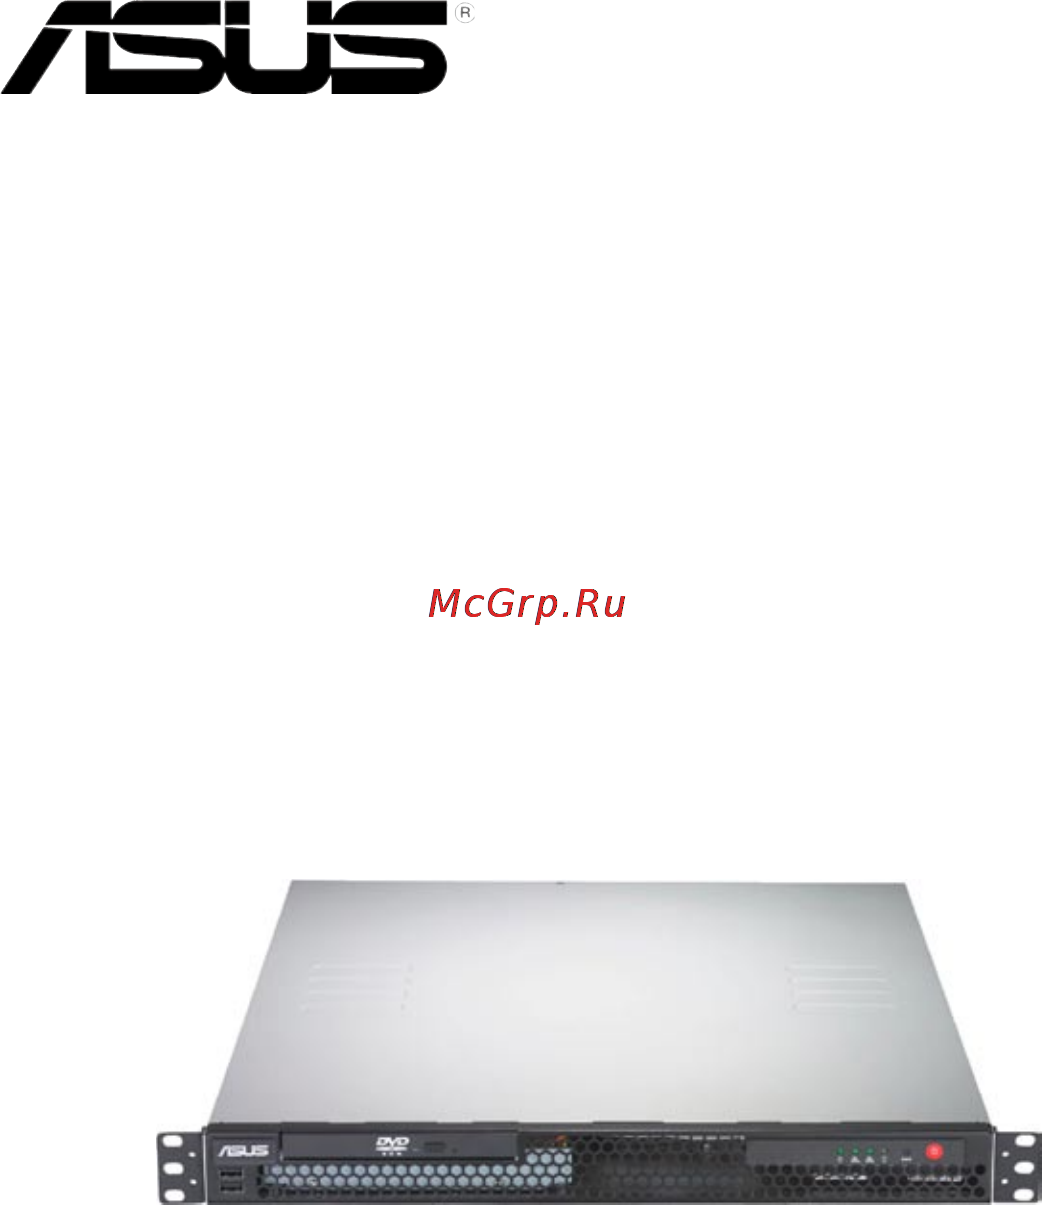
- Rs100 e7 pi2 12
- Serial number label 12
- System package contents 12
- Xxs0xxxxxxxxxx 12
- Lga1155 lynnfield clarkdale 13
- Processors plus other latest technologies through the chipsets onboard 13
- Systemspecifications 13
- The asus rs100 e7 pi2 is a 1u barebone server system featuring the asus p8b m server board the server supports intel 13
- Asus rs100 e7 pi2 1 5 15
- Front panel features 15
- Rear panel features 15
- Refer to section 1 front panel leds for the led descriptions 15
- The barebone server displays a simple yet stylish front panel with easily accessible features the power and reset buttons led indicators optical drive and twp usb ports are located on the front panel 15
- The port is for asus asmb5 ikvm controller card only 15
- The ports for the ps 2 keyboard ps 2 mouse usb vga and gigabit lan do not appear on the rear panel if motherboard is not present 15
- The rear panel includes the expansion slot and system power socket the i o shield with openings for the rear panel connectors on the motherboard are also placed in the rear panel 15
- Turn off the system power and detach the power supply before removing or replacing any system component 15
- Internal features 16
- Front panel leds 17
- Lan rj 45 leds 17
- Led information 17
- Chapter 2 19
- Hardware setup 19
- Chassis cover 20
- Firmly hold the cover and slide it toward the rear panel for about half an inch until it is disengaged from the chassis 20
- Lift the cover from the chassis 20
- Removing the chassis cover 20
- To remove the chassis cover 20
- Use a phillips screwdriver to remove the three screws on the chassis cover 20
- Reinstalling the chassis cover 21
- Secure the cover with three screws 22
- Central processing unit cpu 23
- Installing the cpu 23
- Locate the cpu socket on the motherboard 23
- Press the load lever with your thumb a and then move it to the right b until it is released from the retention tab 23
- The motherboard comes with a surface mount lga1155 socket designed for the intel 23
- To install a cpu 23
- Xeon e3 1200 core i3 2100 processor 23
- Installing the cpu heatsink and airduct 26
- A ddr3 module has the same physical dimensions as a ddr2 dimm but is notched differently to prevent installation on a ddr2 dimm socket ddr3 modules are developed for better performance with less power consumption 28
- Memoryconfigurations 28
- Overview 28
- System memory 28
- The figure illustrates the location of the ddr3 dimm sockets 28
- The motherboard comes with four double data rate 3 ddr3 dual inline memory modules dimm sockets 28
- You may install 1gb 2gb 4gb and 8gb unbuffered with ecc ddr3 dimms into the dimm sockets using the memory configurations in this section 28
- Installing a dimm 29
- Removing a dimm 29
- Hard disk drives 30
- Installing a hard disk drive to the hdd tray 1 30
- Installing a hard disk drive to the hdd tray 2 31
- Expansion card 33
- Installing an expansion card 33
- After installing the expansion card configure the it by adjusting the software settings 35
- Assign an irq to the card refer to the following tables 35
- Configuringanexpansioncard 35
- Install the software drivers for the expansion card 35
- Standard interrupt assignments 35
- Turn on the system and change the necessary bios settings if any see chapter 5 for information on bios setup 35
- Cable connections 36
- Standard cables connected to the motherboard 36
- Chassis fans 37
- Removable optional components 37
- Optical disk drive odd 38
- Installing asmb5 series management board optional 40
- Chapter 3 41
- Rackmount installation 41
- Attaching the rails to the rack 42
- Rackmount rail kit items 42
- Chapter 4 47
- Motherboard info 47
- Motherboard layout 48
- Layout contents 49
- Jumpers 50
- Internal connectors 55
- Atx power connectors 24 pin atxpwr1 8 pin atx12v1 60
- These connectors are for an atx power supply plugs the power supply plugs are designed to fit these connectors in only one orientation find the proper orientation and push down firmly until the connectors completely fit 60
- Bios setup 63
- Chapter 5 63
- Asus crashfree bios 3 utility 64
- Managing and updating your bios 64
- Recoveringthebiosfromausbflashdrive 64
- Asus ez flash utility 65
- Bupdater utility 66
- Updatingthebiosfile 66
- Asus rs100 e7 pi2 5 5 67
- Do not shut down or reset the system while updating the bios to prevent system boot failure 67
- The bios update is finished please restart your system 67
- The utility returns to the dos prompt after the bios update process is completed reboot the system from the hard disk drive 67
- The utility verifies the file then starts updating the bios file 67
- Bios setup program 68
- Advanced for changing the advanced system settings 69
- Asus rs100 e7 pi2 5 7 69
- Bios menu screen 69
- Boot for changing the system boot configuration 69
- Event logs for changing the event log settings 69
- Exit for selecting the exit options 69
- Main for changing the basic system configuration 69
- Menu bar 69
- Monitor for displaying the system temperature power status and changing the fan settings 69
- The menu bar on top of the screen has the following main items 69
- To select an item on the menu bar press the right or left arrow key on the keyboard until the desired item is highlighted 69
- Tool for configuring options for special functions 69
- Configurationfields 70
- General help 70
- Menu items 70
- Navigation keys 70
- Pop up window 70
- Scroll bar 70
- Submenu items 70
- Allows you to set the system date 71
- Allows you to set the system time 71
- Asus rs100 e7 pi2 5 9 71
- If you have forgotten your bios password erase the cmos real time clock rtc ram to clear the bios password see section 2 jumpers for information on how to erase the rtc ram 71
- Main menu 71
- Security 71
- System date day xx xx xxxx 71
- System time xx xx xx 71
- The administrator or user password items on top of the screen show the default not installed after you set a password these items show installed 71
- The security menu items allow you to change the system security settings 71
- When you enter the bios setup program the main menu screen appears the main menu provides you an overview of the basic system information and allows you to set the system date time language and security settings 71
- Administrator password 72
- User password 72
- Asus rs100 e7 pi2 5 11 73
- Change smbios event log settings 73
- Erase event log no allows you to select the options for erasing smbios event log configuration options no yes next reset yes every reset 73
- Event logs menu 73
- Keys to adjust the value the values range from 0 to 99 73
- Keys to adjust the value the values range from 1 to 255 73
- Smbios event log enabled allows you to enable or disable all features of smbios event logging configuration option disabled enabled 73
- The event logs menu items allow you to change the event log settings and view the system event logs 73
- When log is full do nothing allows you to select the options for reaction when the event logs are full configuration options do nothing erase immediately 73
- View smbios event log 74
- View system event log 74
- Acpi settings 75
- Acpi sleep state s3 suspend to ram 75
- Advanced menu 75
- Allows you to enable or disable acpi auto configuration configuration options disabled enabled 75
- Allows you to set the acpi sleep state configuration options suspend disabled s1 cpu stop clock s3 suspend to ram 75
- Enableacpiautoconfigurationdisabled 75
- The advanced menu items allow you to change the settings for the cpu and other system devices 75
- 14 chapter 5 bios setup 76
- Allows you to enable or disable the tpm support configuration options disabled enabled 76
- Allows you to enable or disable the windows hardware error architecture support configuration options disabled enabled 76
- Tpm support disabled 76
- Trusted computing 76
- Whea support enabled 76
- Wheaconfiguration 76
- Active processor cores all 77
- Allows you to choose the number of cpu cores to activate in each processor package configuration options all 1 2 3 77
- Allows you to enable or disable the cpu thermal monitor function configuration options disabled enabled 77
- Asus rs100 e7 pi2 5 15 77
- Cpuconfiguration 77
- Hyper threading enabled 77
- Intel adaptive thermal monitor enabled 77
- Limit cpuid maximum disabled 77
- Setting this item to enabled allows legacy operating systems to boot even without support for cpus with extended cpuid functions configuration options disabled enabled 77
- The items in this menu show the cpu related information that the bios automatically detects some items may not appear if your cpu does not support the related functions 77
- This item appears only when you install a cpu with hyper threading support and allows you to enable or disable the intel hyper threading technology function when disabled only one thread per activated core is enabled configuration options enabled disabled 77
- Cpu c1e enabled 78
- Cpu c3 report enabled 78
- Cpu c6 report enabled 78
- Enhanced intel speedstep technology enabled 78
- Execute disable bit enabled 78
- Intel virtualization tech enabled 78
- Package c state limit no limit 78
- Turbo mode enabled 78
- Allows you to decide which graphics controller to use as the primary boot device configuration options pci peg peg pci 79
- Allows you to enable or disable the dmi gen2 configuration options disabled enabled 79
- Allows you to enable or disable the high precision event timer configuration options enabled disabled 79
- Allows you to enable or disable the vt d configuration options disabled enabled 79
- Allows you to select the options for the low mmio align configuration options 64m 1024m 79
- Asus rs100 e7 pi2 5 17 79
- Dmi gen2 enabled 79
- High precision timer enabled 79
- Initiate graphic adapter peg pci 79
- Low mmio align 64m 79
- North bridge 79
- South bridge 79
- The north bridge is built in the cpu 79
- Vt d disabled 79
- 18 chapter 5 bios setup 80
- Allows you to set the sata configuration configuration options disabled ide mode ahci mode raid mode 80
- If you want the serial ata hard disk drives to use the advanced host controller interface ahci set this item to ahci mode the ahci allows the onboard storage driver to enable advanced serial ata features that increases storage performance on random workloads by allowing the drive to internally optimize the order of commands 80
- If you want to create raid sets with lsi megaraid utility or intel 80
- If you want to use the serial ata hard disk drives as parallel ata physical storage devices keep the default setting ide mode 80
- Sata mode ide mode 80
- Sataconfiguration 80
- Serial ata controller 0 enhanced 80
- Serial ata controller 1 enhanced 80
- Storage technology from the serial ata hard disk drives set this item to raid mode 80
- This item appears only when you set the sata mode item to ide mode set to enhanced to support two sata 3 gb s devices configuration options disabled enhanced 80
- This item appears only when you set the sata mode item to ide mode set to enhanced to support two sata 6 gb s and two sata 3 gb s devices set to compatible when using windows 98 nt 2000 ms dos up to four sata devices are supported under these operating systems configuration options disabled enhanced compatible 80
- While entering setup the bios automatically detects the presence of sata devices the sata port items show not present if no sata device is installed to the corresponding sata port 80
- Allows you to enable or disable support for legacy usb devices setting to auto allows the system to detect the presence of usb devices at startup if detected the usb controller legacy mode is enabled if no usb device is detected the legacy usb support is disabled configuration options disabled enabled auto 81
- Allows you to enable or disable the intel trusted execution technology txt feature configuration options disabled enabled 81
- Asus rs100 e7 pi2 5 19 81
- Intel txt lt support disabled 81
- Inteltxt lt configuration 81
- Legacy usb support enabled 81
- S m a r t self monitoring analysis and reporting technology is a monitor system when read write of your hard disk errors occur this feature allows the hard disk to report warning messages during the post configuration options enabled disabled 81
- S m a r t status check enabled 81
- The intel txt lt support item requires a trusted platform module tpm to be installed on the motherboard to enable 81
- The usb devices item shows the auto detected values if no usb device is detected the item shows none 81
- Usbconfiguration 81
- Device power up delay auto 82
- Device power up delay in seconds xx 82
- Device reset time out 20 sec 82
- Ehci hand off disabled 82
- Intel w82574l oprom1 oprom2 pxe 82
- Onboarddevicesconfiguration 82
- Serialport1 2configuration 82
- Usb transfer time out 20 sec 82
- Eup ready disabled 83
- Power on by pci disabled 83
- Power on by pcie disabled 83
- Power on by ring disabled 83
- Restore ac power loss power off 83
- Com1 console redirection disabled 84
- Console redirection settings 84
- Power on by rtc disabled 84
- Redirection after bios post disabled 84
- Serial port console redirection 84
- Com2 console redirection enabled 85
- Console redirection settings 85
- 24 chapter 5 bios setup 86
- Allows you to configure the asus smart fan feature that smartly adjusts the fan speeds for more efficient system operation configuration options full speed mode high density mode generic mode whisper mode 86
- Cpu fan1 speed frnt fan1 3 speed rear fan1 speed xxxx rpm or ignore n a 86
- Cpu mb tr1 temperature xxx c xxx f xxx c xxx f 86
- Fan speed control generic mode 86
- Monitor menu 86
- The monitor menu displays the system temperature power status and allows you to change the fan settings 86
- The onboard hardware monitor automatically detects and displays the cpu and motherboard component temperatures select ignore if you do not wish to display the detected temperatures 86
- The onboard hardware monitor automatically detects and displays the speed of cpu fans front fans and rear fan in rotations per minute rpm if the fan is not connected to the motherboard the field shows n a 86
- The onboard hardware monitor automatically detects the voltage output through the onboard voltage regulators select ignore if you do not want to detect this item 86
- Vcore1 voltage 3 v voltage 5v voltage 12v voltage vbat voltage 3vsb voltage 1 v ichvoltage 86
- Allows option roms to trap interrupt 19 configuration options disabled enabled 87
- Allows you to enable or disable the full screen logo display feature configuration options disabled enabled 87
- Allows you to select the power on state for the numlock configuration options off on 87
- Allows you to set the display mode for options rom configuration options force bios keep current 87
- Asus rs100 e7 pi2 5 25 87
- Boot menu 87
- Bootup numlock state on 87
- Efi boot disabled 87
- Enables or disables efi boot configuration options disabled enabled 87
- Full screen logo enabled 87
- Interrupt 19 capture enabled 87
- Keys to adjust the number of seconds to wait for setup activation key 87
- Option rom messages force bios 87
- Set this item to enabled to use the asus mylogo2 feature 87
- Setup prompt timeout xx 87
- The boot menu items allow you to change the system boot options 87
- Boot device seeking endless pxe 88
- Boot option priorities 88
- Boot override 88
- Cd dvd rom drives bbs priorities hard drive bbs priorities 88
- Network device bbs priorities 88
- Asus ez flash utility 89
- Discard changes exit 89
- Exit menu 89
- Launchefishellfromfilesystemdevice 89
- Save changes reset 89
- Tool menu 89
- Chapter 6 91
- Raidconfiguration 91
- Raiddefinitions 92
- Setting up raid 92
- Installing hard disk drives 93
- Raidconfigurationutilities 93
- Setting the raid item in bios 93
- 4 chapter 6 raid configuration 94
- Install all the serial ata hard disk drives 94
- Option rom utility 94
- Raid 1 raid 10 raid 1 0 and raid 5 set s from serial ata hard disk drives that are connected to the serial ata connectors supported by the southbridge 94
- Rapid storage technology 94
- Rapid storage technology option rom utility 94
- Rapid storage technology option rom utility allows you to create raid 0 94
- The intel 94
- The navigation keys at the bottom of the screen allow you to move through the navigation keys at the bottom of the screen allow you to move through the menus and select the menu options 94
- The raid bios setup screens shown in this section are for reference only and may not exactly match the items on your screen 94
- To display the utility main menu 94
- To enter the intel 94
- Turn on the system 94
- After completing your selection 95
- Asus rs100 e7 pi2 6 5 95
- Creating a raid set 95
- The following screen appears 95
- To create a raid set 95
- To select the hard disk drives you want to include in the raid set the select disks screen appears 95
- Creating a recovery set 96
- 8 chapter 6 raid configuration 98
- Deleting a raid set 98
- Take caution when deleting a raid set you will lose all data on the hard disk drives when you delete a raid set 98
- The following screen appears 98
- The following warning message appears 98
- To delete a raid set 98
- To return to the delete volume menu 98
- Asus rs100 e7 pi2 6 9 99
- Resetting disks to non raid 99
- Take caution before you reset a raid volume hard disk drive to non raid resetting a raid volume hard disk drive deletes all internal raid structure on the drive 99
- The following screen appears 99
- To reset a raid set hard disk drive 99
- To reset the raid set drive s a confirmation message appears 99
- To return to the utility main menu 99
- To select 99
- 10 chapter 6 raid configuration 100
- After completing your selection and return to the utility main menu 100
- If you have created a recovery set you can configure more recovery set options following the descriptions in the section 100
- Recovery volume options 100
- See section 6 creating a recovery set to create a recovery set before continue 100
- The following screen appears 100
- The select recovery volume screen appears 100
- To configure a recovery set 100
- Asus rs100 e7 pi2 6 11 101
- Exiting the intel 101
- If any of the sata hard disk drives included in the raid 1 array failed the system displays the status of the raid volume as degraded during post you can rebuild the raid array with other installed non raid disks 101
- Rapid storage technology utility 101
- Rebuilding the raid 101
- Rebuilding the raid with other non raid disk 101
- Select a destination disk with the same size as the original hard disk 101
- The following warning message appears 101
- This option is only for the raid 1 set 101
- To enter the intel rapid storage technology option rom utility 101
- To exit 101
- To exit the utility 101
- To rebuild the raid with other non raid disk 101
- To return to the utility main menu 101
- 12 chapter 6 raid configuration 102
- Exit intel rapid storage technology and reboot the system 102
- From the view menu select advanced mode to display the details of the intel rapid storage console 102
- From the volumes view option select raid volume to view the rebuilding status when finished the status is changed to normal 102
- If any of the sata hard disk drives included in the raid array failed the system displays the status of the raid volume as degraded during post you may replace the disk drive and rebuild the raid array 102
- Intel rapid storage console or click the intel rapid storage technology tray icon to load the intel rapid storage manager utility 102
- Reboot the system and then follow the steps in section rebuilding the raid with other non raid disk 102
- Rebuilding the raid with a new hard disk 102
- Remove the failed sata hard disk and install a new sata hard disk of the same specification into the same sata port 102
- Select a destination disk with the same size as the original hard disk 102
- The utility immediately starts rebuilding after the disk is selected the status of the degraded raid volume is changed to rebuild 102
- To rebuild the raid with a new hard disk 102
- Under microsof 102
- Setting the boot array in the bios setup utility 103
- Chapter 7 105
- Driver installation 105
- C20x intel raid driver 106
- Creating a raid driver disk 106
- Raid driver installation 106
- C20x lsi raid driver 107
- Follow screen instructions to create the driver disk 107
- Locate the raid driver and place a blank high density floppy disk to the floppy disk drive 107
- Asus rs100 e7 pi2 7 5 109
- Boot the computer using the windows 109
- During windows 109
- Installing the raid controller driver 109
- Server 2003 xp installation disc 109
- Server 2003 xp os 109
- Server 2003 xp os installation 109
- Setup starts 109
- The windows 109
- To install the raid controller driver when installing windows 109
- To specify an additional device 109
- When the message press f6 if you need to install a third party scsi or raid driver appears at the bottom of the screen 109
- During windows 111
- Server 2008 os installation 111
- Enterprise linux os 5 113
- Red hat 113
- Asus rs100 e7 pi2 7 11 115
- Boot the system from the suse os installation cd 115
- Suse linux 11 os 115
- To install the raid controller driver when installing suse linux enterprise server os 115
- Use the arrow keys to select installation from the boot options menu 115
- 12 chapter 7 driver installation 116
- Sda usb floppy other device 116
- Chipset device software 118
- Installation 118
- Lan driver installation 120
- Vga driver installation 123
- Drivers menu 126
- Management applications and utilities installation 126
- Place the support dvd to the optical drive the dvd automatically displays the drivers menu if autorun is enabled in your computer 126
- Running the support dvd 126
- The drivers menu shows the available device drivers if the system detects installed devices install the necessary drivers to activate the devices 126
- The support dvd that came with the motherboard package contains the drivers management applications and utilities that you can install to avail all motherboard features 126
- Contact information 127
- Make disk menu 127
- Utilities menu 127
- Asus contact information 128
- Asustek computer inc 128
- Asustek computer inc china 128
- Asustek computer inc taiwan 128
- Technical support 128
- Asus computer gmbh germany and austria 129
- Asus computer international america 129
- Technical support 129
Похожие устройства
- Asus z97-k/usb 3.1 Инструкция по эксплуатации
- Asus x99-a/usb 3.1 Инструкция по эксплуатации
- Asus zenfone 2 ze550ml Инструкция по эксплуатации
- Asus rs700-e8-rs4 Инструкция по эксплуатации
- Asus transformer book flip tp300ld, 90nb06t1-m02070 Инструкция по эксплуатации
- Asus transformer book flip tp500la, 90nb05r1-m02160 Инструкция по эксплуатации
- Asus transformer book flip tp500la, 90nb05r1-m02170 Инструкция по эксплуатации
- Asus transformer book flip tp500lb, 90nb08a1-m00080 Инструкция по эксплуатации
- Asus transformer book flip tp500lb, 90nb08a1-m00090 Инструкция по эксплуатации
- Asus transformer book t300chi, 90nb07g1-m00810 Инструкция по эксплуатации
- Asus zenbook ux303la, 90nb04y1-m02830 Инструкция по эксплуатации
- Asus zenbook ux303ln, 90nb04r1-m03370 Инструкция по эксплуатации
- Asus zenbook ux303ln, 90nb04r1-m03380 Инструкция по эксплуатации
- Asus zenbook ux32la, 90nb0511-m02410 Инструкция по эксплуатации
- Asus n550jk, 90nb04l1-m07410 Инструкция по эксплуатации
- Asus n750jk, 90nb04n1-m03250 Инструкция по эксплуатации
- Asus n750jk, 90nb04n1-m03260 Инструкция по эксплуатации
- Asus n751jk, 90nb06k2-m02010 Инструкция по эксплуатации
- Asus n751jk, 90nb06k2-m02240 Инструкция по эксплуатации
- Asus n751jk, 90nb06k2-m01020 Инструкция по эксплуатации