Tp-Link TD-W8101G — настройка переназначения IP-адресов и QoS на маршрутизаторе [59/94]
Превью страниц
Страница 59 /
94
![Tp-Link TD-W8101G Инструкция по эксплуатации онлайн [59/94] 16739](/views2/1017812/page59/bg3b.png)
TD-W8101G
54Mbps Wireless ADSL2+ Modem Router User Guide
информацию о Переназначаемых адресах.
To add a mapping rule: Для того, чтобы добавить правило переназначения:
Step 1: Select the “Virtual Circuit” and Multiple for the “Number of IPs”. Then select the tab IP
Address Mapping (shown in Figure 4 -42).
Шаг 1: Выбрать “Виртуальный канал” и Несколько в строке “Количество IP-адресов”.
Затем выберите окно IP Address Mapping (Переназначение IP-адресов) для Виртуального
сервера (как показано на Рис. 4-23).
Note:
IP Address Mapping is only available for VCs with Multiple IPs.
Step 2: Select the Rule index for the rule as shown in Figure 4 -45.
Step 3: Select the rule type you want from the drop-down list.
Step 4: Enter the local and public IP addresses in the corresponding fields.
Step 5: After that, click SAVE to make the entry take effect.
Примечание:
Переназначение IP-адресов (IP Address Mapping) может производиться только для
Виртуальных каналов с несколькими IP.
Шаг 2: Выбрать Rule index (Индекс правила) для правила как показано на Рис. 4-19.
Шаг 3: Выбрать необходимый вам тип правила из раскрывающегося списка.
Шаг 4: Указать локальный и публичный IP-адреса в соответствующих полях.
Шаг 5: Затем нажмите SAVE (СОХРАНИТЬ) для того, чтобы произведенные изменения
вступили в силу.
Other operations for the entries as shown in Figure 4 -45:
Select the index of assigned entry, and click the DELETE button to delete the entry.
Click the BACK button to return to the previous screen.
Click the CANCEL button to cancel the configuration which is made just now.
Также имеются следующие варианты настройки (см. рис. 4-19):
Введите индекс назначенной записи, нажмите кнопку DELETE (УДАЛИТЬ) для удаления
записи.
Нажмите кнопку Back (Назад) для возврата в предыдущее окно.
Нажмите кнопку CANCEL (ОТМЕНИТЬ) для отмены только что произведенных настроек.
4.4.4 QoS
Choose “Advanced Setup→QoS”, you can configure the QoS in the next screen. QoS helps to
prioritize data as it enters your Router. By attaching special identification marks or headers to
incoming packets, QoS determines which queue the packets enter, based priority. This is useful
when there are certain types of data you want to give higher priority, such as voice data packets
give higher priority than Web data packets. This option will provide better service of selected
network traffic over various technologies. Выбрав “Advanced Setup→QoS”
(“Дополнительные настройки→Качество обслуживания”), вы можете настроить
Качество обслуживания в появившемся окне. С помощью назначения специальных
идентификационных пометок или заголовков входящих пакетов, Качество обслуживания
48
Содержание
84- Td w8101g
- Mbps wireless adsl2 modem router
- Авторское право и торговые марки
- Copyright trademarks
- Сертификация fcc
- Fcc statement
- Требования fcc по уровню радиоизлучения
- Отметка ce
- Fcc rf radiation exposure statement
- Ce mark warning
- Территории различных стран
- Страна ограничения причина замечание
- Данное устройство является продуктом класса b при эксплуатации в домашних условиях данный продукт может вызвать явление интерференции радиосигнала в этом случае от пользователя может потребоваться принятие соответствующих мер
- National restrictions ограничения действующие на
- Country restriction reason remark
- 0 2483 5 мгц
- Tp link technologies co ltd
- South building no keyuan road central zone science technology park nanshan
- Shenzhen p r china
- Declaration of conformity
- Декларация соответствия
- Tp link technologies co ltd
- South building no keyuan road central zone science technology park nanshan
- Shenzhen p r china
- Tp link technologies co ltd
- Contents
- Содержание
- Комплект поставки
- Package content
- Wireless
- Product overview обзор
- Chapter 1 introduction глава 1 введение
- Беспроводная передача данных
- Main features основные характеристики
- Conventions допущения
- Chapter 2 hardware installation глава 2 установка
- Аппаратной части
- The front panel передняя панель
- Chapter 2 hardware installation глава 2 установка аппаратной части
- The back panel задняя панель
- Installation environment среда инсталляции
- Connecting the router подключение маршрутизатора
- Configure pc настройка компьютера
- Руководство по быстрой настройке
- Chapter 3 quick installation guide глава 3 руководство по быстрой настройке
- Chapter 3 quick installation guide глава 3
- Login вход
- Настройка программного обеспечения
- Status состояние
- Chapter 4 software configuration глава 4 настройка программного обеспечения
- Chapter 4 software configuration глава 4
- Interface setup настройка интерфейса
- Quick start быстрый старт
- Internet интернет
- Wireless беспроводная сеть
- Firewall межсетевой экран
- Advanced setup расширенные настройки
- Routing маршрутизация
- Nat nat
- Dmz dmz
- Virtual server
- Ip address mapping переназначение ip адреса
- Vlan vlan
- Adsl adsl
- Acl список контроля доступа acl
- Access management управление доступом
- Ip filter фильтр по ip
- Filter фильтр
- Mac filter фильтр по mac адресу
- Application filter фильтр по приложению
- Url фильтр по url адресу
- Upnp upnp
- Snmp snmp
- Ddns ddns
- Cwmp cwmp
- Maintenance эксплуатация устройства
- Time zone часовой пояс
- Administration администрирование
- Firmware встроенное по
- Sysrestart перезагрузка системы
- Diagnostics диагностика
- Help справка
- Appendix a specification
- Приложение a спецификация
Похожие устройства
-
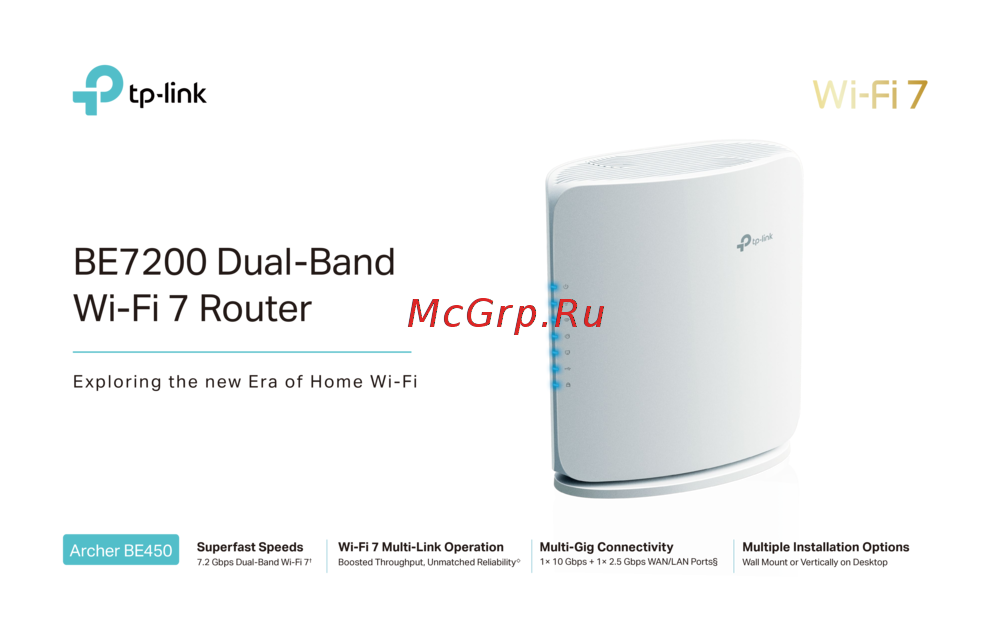 Tp-Link Archer BE450Краткая инструкция
 -
Tp-Link BE7200Краткое руководство пользователя
-
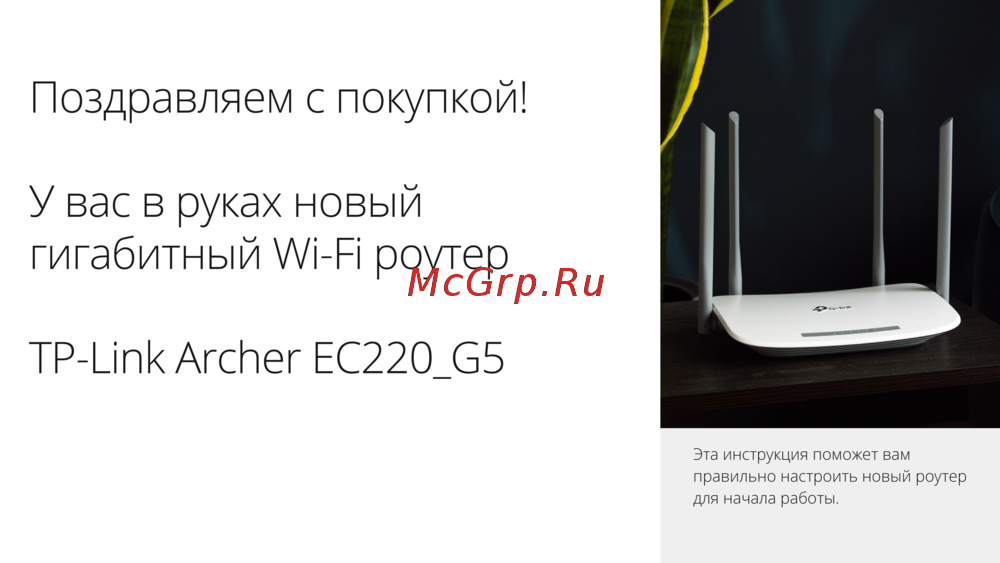 Tp-Link Archer EC220 G5Руководство по настройке
 -
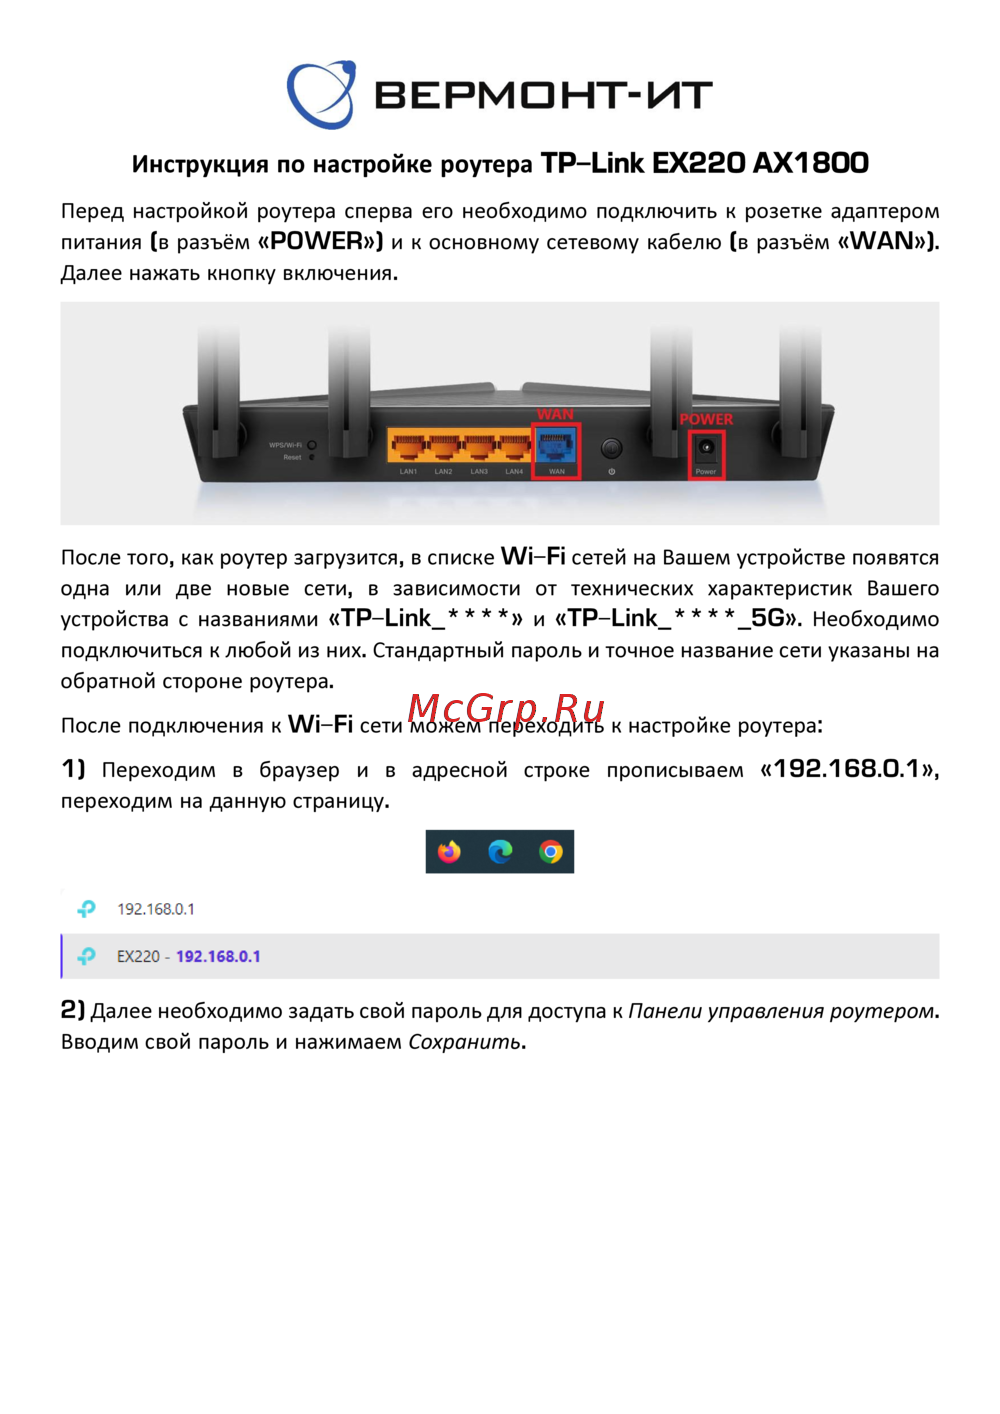 Tp-Link EX220 AX1800Руководство пользователя
 -
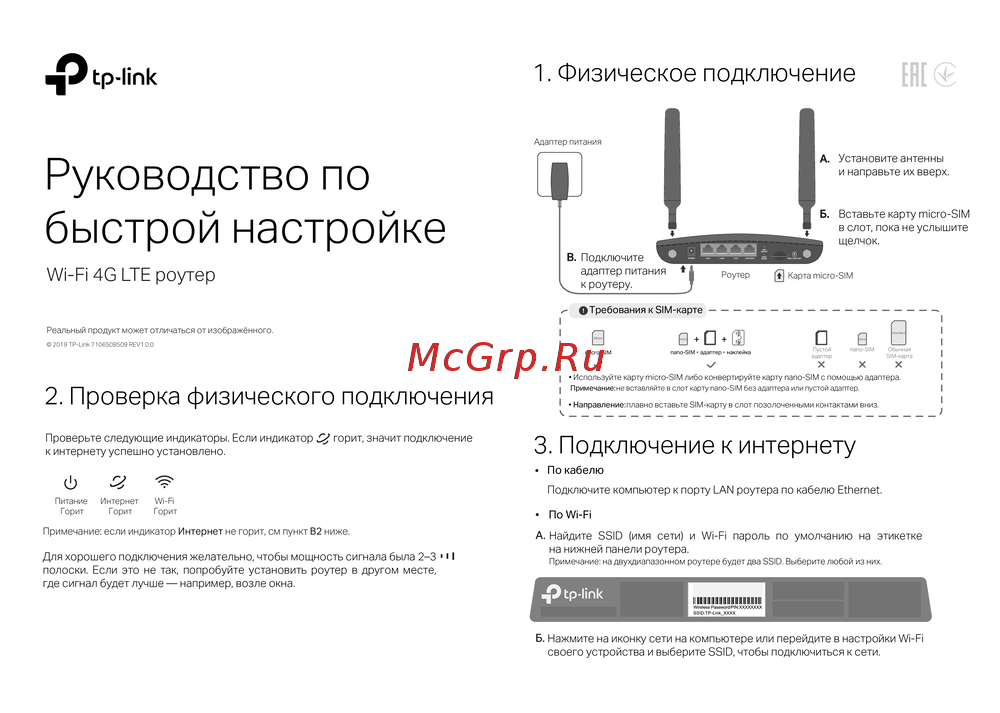 Tp-Link Wi-Fi 4G LTE роутерКраткая инструкция по использованию
 -
 Tp-Link TL-WR3002XИнструкция по применению
 -
 Tp-Link AC750Руководство по работе с устройством
 -
 Tp-Link TL-MR6400 черныйРуководство по эксплуатации
 -
 Tp-Link TL-MR100 N300Руководство по эксплуатации
 -
 Tp-Link TL-MR105 N300Руководство по эксплуатации
 -
 Tp-Link Archer MR500 AC1200Руководство по эксплуатации
 -
 Tp-Link TL-WR840N N300Руководство по эксплуатации
Узнайте, как настроить переназначение IP-адресов и QoS на вашем маршрутизаторе. Пошаговые инструкции помогут оптимизировать работу сети и приоритизировать трафик.