![Cme NeoSynth 24 — обзор аудиовыходов и возможностей подключения синтезатора [10/59]](/img/pdf.png)
Cme NeoSynth 24 — обзор аудиовыходов и возможностей подключения синтезатора [10/59]
![Cme NeoSynth 24 Руководство по эксплуатации онлайн [10/59] 760483](/views2/1992198/page10/bga.png)
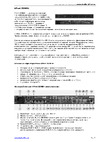
Headphones output (stereo):
A stereo output, mirrored from the main outputs with it’s own dedicated mixer in the patch editor.
Note : By default, this output is connected to the synthesizer part of the NeoSynth.
Master output (L+R):
These outputs can be connected to your DAW, audio card, amplifier etc.
Note : By default, this output is connected to the synthesizer part of the NeoSynth
Auxilliary (Aux) output (L+R):
These outputs can be connected to your DAW, audio card, amplifier etc. and can be used as an extra pair
of outputs, but also as a send/return together with the inputs to be able to use an external effect box with
your Neosynth.
Audio in (L+R):
Here you connect any audio signal for various applications:
1. Make use of the FX section of the Neosynth. Since the synthesizer has a nice Reverb and Delay effect,
you can route any audio through those effects
2. Same as 1, but now mixed with your synthesizer track! With the use of the patch editor you can make
extensive mixes of both the input and synthesizer audio signal.
3. You can even use the inputs for karaoke! Connect a microphone through a microphone amplifier, use
a GM soundset, play a General Midi songfile and sing along with it.
Digital output (stereo):
This is a mirror of the Analog Auxiliary Outputs and can be connected to a digital input on your audiocard,
DAW, etc. it provides a 16 bit/48 kHz signal.
Note : By default, this output is connected to the inputs part, passing through the input FX engine of the
NeoSynth.
Note 2: The equipment connected to the NeoSynth S/PDIF output must be configured to recover the
S/PDIF clock from the NeoSynth S/PDIF output (slave equipment)
Red and orange leds
These two leds will help you to see the in which mode the NeoSynth is acting. You’ll find more info in this
manual about the various possible combinations for on/off or blinking leds.
USB connector
For use with a hardware expander to be able to edit instrument, FX and routing parameters using the pro-
vided patch editor software.
The Neosynth is class compliant with the USB MIDI specification, thus it does not need any driver to work
with Xp-Sp2, Vista, Mac and Linux.
A special driver is available for Win Xp, it is not mandatory to install it, it is just used to replace the generic
device name“USB audio device” by “WaveIdea Neosynth”
10
Содержание
- Neosynth p.1
- User manual p.1
- Special messages section p.2
- Fcc information u s a p.4
- The patch editor software 13 p.5
- The neosynth features 39 p.5
- Table of contents p.5
- Neosynth inputs and outputs 9 p.5
- Midi implementation of the neosynth 40 p.5
- Introduction 6 p.5
- Installing the neosynth expansion board into your cme keyboard 8 p.5
- General 12 p.5
- Terminology p.6
- Introduction p.6
- What s in the box p.6
- Installing the neosynth expansion board into your cmevx or uf keyboard p.8
- Installing the neosynth expansion board into your cme keyboard p.8
- Neosynth inputs and outputs p.9
- Connections p.9
- Usb midi driver p.12
- Sound bank upgrade p.12
- Leds behaviour p.12
- General p.12
- The patch editor software p.13
- Preference screen p.14
- Routing screen p.16
- Inputs fx screen p.19
- Synth fx screen p.23
- Synth channels a screen p.28
- Synth channels b screen p.29
- Synth channels c screen p.31
- Sound bank screen p.33
- The menu items of the patch editor p.35
- The neosynth features p.39
- Midi implementation of the neosynth p.40
- Inputs see paragraph 1 for details p.40
- General p.40
- Outputs settings see paragraph 1 3 for details p.41
- Nrpn 03756h input modules on off p.42
- Nrpn 03755h effects on off p.42
- Midi output on 4 outputs p.42
- Table 4 input equalizer p.44
- Table 3 input volume and pan p.44
- Table 5 input delay p.47
- Delay presets p.48
- Table 6 midi equalizer p.49
- Table 7 midi spatializer p.50
- 4 midi spatializer p.50
- Detailed midi implementation p.51
- Control messages overview p.57
Похожие устройства
-
 AUDIENT EVO 4Руководство по настройке
 -
 AUDIENT iD4 mkIIРуководство по эксплуатации
 -
 Maono E2 Gen2Инструкция пользователя
 -
 Madboy REMIX-31Инструкция по применению
 -
 AUDIENT iD14Руководство по настройке
 -
 JBL CHARGE 5Руководство по работе с устройством
 -
 EUROSOUND Crisp-16XРуководство по использованию
 -
 ALLEN & HEATH XONE:K2Руководство по работе с устройством
 -
 Novation LAUNCHKEY 61Руководство по настройке
 -
 SUPERLUX E431UРуководство по настройке
 -
 APart MICPAT-4Инструкция по работе
 -
 Mooer STEEP IIРуководство пользователя
Узнайте о различных аудиовыходах синтезатора, их подключении и использовании. Подключайте эффекты, микрофоны и многое другое для создания уникального звучания.