![Cme NeoSynth 24 — patch Editor Software for Synthesizers: Enhance Your Sound Experience [13/59]](/img/pdf.png)
Cme NeoSynth 24 — patch Editor Software for Synthesizers: Enhance Your Sound Experience [13/59]
![Cme NeoSynth 24 [13/59] The patch editor software](/views2/1992198/page13/bgd.png)
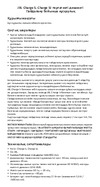
The patch editor software
The fun of the Neosynth doesn’t stop here!When you have attached a USB cable to the Neosynth from your
computer and installed the patch editor software (both Windows and Macintosh versions are available),
you can change the sounds, store them, and make all kinds of settings for multitimbral use of the syn-
thesizer in conjuction with a MIDI sequencer.
In this manual we will take an extensive look at the parameters that can be changed using the patch ed-
itor.
To do so, you need to connect your computer with the Neosynth through a USB-connection. There is no
need for a driver, it is plug and play. Even in Windows XP, although you could use the provided driver to
change the “universal USB device”-name into“Neosynth”as device name.
Installing the editor (Windows):
Unzip the editor file on the CD onto your harddrive. Then run the installer.
Installing the editor (Macintosh):
Unzip the editor file from the CD onto your harddrive. That will create a DMG file on the desktop from
which you can copy the program into the programs folder on your Mac.
If you have made the USB-connection and turned on the VX or UF keyboard you can start up the patch
editor. It will start up with this first screen, the “Preferences”screen.
The upper part of every screen in the patch editor will have the same parameters:
In here you can select various MIDI settings etc. We will go through every parameter of this screen first (see
screen shot next page):
First you can select one of the 16 preset slots. A preset will contain all settings for the 16 channels.You can
see a preset as a container for a multitimbral setup with a maximum of 16 (MIDI)channels. It contains the
audio routing settings for the synth and the external inputs, the effect settings, the MIDIchannel settings,
the so-called synth channel settings, containing parameters like filter cutoff, resonance, attack, decay, re-
lease etc. You can create as many as 16 presets.
Furthermore there are three buttons“Send”,“Receive”and“Reset”. With these three buttons you can send
a preset to the NeoSynth, receive a preset from the NeoSynth and reset the NeoSynth to the factory pre-
set. To the right of these knobs you see the preset number that is selected for sending or receiving, a pro-
gressbar which shows the progress of sending or receiving a preset plus two MIDI indicators, telling you
if there is action going on on the MIDI in and/or MIDI out port. The user can change the name of the pre-
set in the textfield. By default the names are Preset 1, Preset 2 etc.
13
Содержание
- Neosynth p.1
- User manual p.1
- Special messages section p.2
- Fcc information u s a p.4
- The patch editor software 13 p.5
- The neosynth features 39 p.5
- Table of contents p.5
- Neosynth inputs and outputs 9 p.5
- Midi implementation of the neosynth 40 p.5
- Introduction 6 p.5
- Installing the neosynth expansion board into your cme keyboard 8 p.5
- General 12 p.5
- Terminology p.6
- Introduction p.6
- What s in the box p.6
- Installing the neosynth expansion board into your cmevx or uf keyboard p.8
- Installing the neosynth expansion board into your cme keyboard p.8
- Neosynth inputs and outputs p.9
- Connections p.9
- Usb midi driver p.12
- Sound bank upgrade p.12
- Leds behaviour p.12
- General p.12
- The patch editor software p.13
- Preference screen p.14
- Routing screen p.16
- Inputs fx screen p.19
- Synth fx screen p.23
- Synth channels a screen p.28
- Synth channels b screen p.29
- Synth channels c screen p.31
- Sound bank screen p.33
- The menu items of the patch editor p.35
- The neosynth features p.39
- Midi implementation of the neosynth p.40
- Inputs see paragraph 1 for details p.40
- General p.40
- Outputs settings see paragraph 1 3 for details p.41
- Nrpn 03756h input modules on off p.42
- Nrpn 03755h effects on off p.42
- Midi output on 4 outputs p.42
- Table 4 input equalizer p.44
- Table 3 input volume and pan p.44
- Table 5 input delay p.47
- Delay presets p.48
- Table 6 midi equalizer p.49
- Table 7 midi spatializer p.50
- 4 midi spatializer p.50
- Detailed midi implementation p.51
- Control messages overview p.57
Похожие устройства
-
 AUDIENT EVO 4Руководство по настройке
 -
 AUDIENT iD4 mkIIРуководство по эксплуатации
 -
 Maono E2 Gen2Инструкция пользователя
 -
 Madboy REMIX-31Инструкция по применению
 -
 AUDIENT iD14Руководство по настройке
 -
 JBL CHARGE 5Руководство по работе с устройством
 -
 EUROSOUND Crisp-16XРуководство по использованию
 -
 ALLEN & HEATH XONE:K2Руководство по работе с устройством
 -
 Novation LAUNCHKEY 61Руководство по настройке
 -
 SUPERLUX E431UРуководство по настройке
 -
 APart MICPAT-4Инструкция по работе
 -
 Mooer STEEP IIРуководство пользователя
Discover how to use patch editor software to customize sounds, manage presets, and optimize settings for your synthesizer. Connect easily via USB and explore multitimbral capabilities.