![Cme NeoSynth 24 — настройки MIDI и параметры в музыкальном редакторе [15/59]](/img/pdf.png)
Cme NeoSynth 24 — настройки MIDI и параметры в музыкальном редакторе [15/59]
![Cme NeoSynth 24 Руководство по эксплуатации онлайн [15/59] 760483](/views2/1992198/page15/bgf.png)
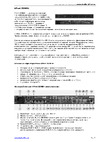
Misc. – Auto send
When selected, the software editor will send every parameter change made in the editor immediately.
When unselected you will have to use the “Send” button in the upper screen to send the whole preset to
Neosynth. Also you can right click on a knob or any other control to send it indiviually. (On OSX control-
click).
Misc. – Link Left & Right parameters
With this one selected all parameters that have a left and right version are linked, meaning if you change
one of them, the other one will change too with the same value. When unselected you can make complete
individual settings for the left and right version of a parameter.
Misc. – MIDI thru
When the box is checked, all incoming MIDI data in the software will be forwarded to the MIDI out, so this
has to be used with care since it can result in a MIDI loop (a confirmation box appears in the software
mentioning this possible MIDI loop).
The MIDI thru can be used with a MIDI file player connected to the soft input. This way you can change
the sounds by turning knobs in the software while the MIDI song is playing.
Misc. – All sounds off
Pressing this button will send a all notes off message to all 16 MIDI channels. This comes in handy when
somehow the MIDI messages are messed up and you hear notes that won’t stop anymore.
15
Содержание
- Neosynth p.1
- User manual p.1
- Special messages section p.2
- Fcc information u s a p.4
- The patch editor software 13 p.5
- The neosynth features 39 p.5
- Table of contents p.5
- Neosynth inputs and outputs 9 p.5
- Midi implementation of the neosynth 40 p.5
- Introduction 6 p.5
- Installing the neosynth expansion board into your cme keyboard 8 p.5
- General 12 p.5
- Terminology p.6
- Introduction p.6
- What s in the box p.6
- Installing the neosynth expansion board into your cmevx or uf keyboard p.8
- Installing the neosynth expansion board into your cme keyboard p.8
- Neosynth inputs and outputs p.9
- Connections p.9
- Usb midi driver p.12
- Sound bank upgrade p.12
- Leds behaviour p.12
- General p.12
- The patch editor software p.13
- Preference screen p.14
- Routing screen p.16
- Inputs fx screen p.19
- Synth fx screen p.23
- Synth channels a screen p.28
- Synth channels b screen p.29
- Synth channels c screen p.31
- Sound bank screen p.33
- The menu items of the patch editor p.35
- The neosynth features p.39
- Midi implementation of the neosynth p.40
- Inputs see paragraph 1 for details p.40
- General p.40
- Outputs settings see paragraph 1 3 for details p.41
- Nrpn 03756h input modules on off p.42
- Nrpn 03755h effects on off p.42
- Midi output on 4 outputs p.42
- Table 4 input equalizer p.44
- Table 3 input volume and pan p.44
- Table 5 input delay p.47
- Delay presets p.48
- Table 6 midi equalizer p.49
- Table 7 midi spatializer p.50
- 4 midi spatializer p.50
- Detailed midi implementation p.51
- Control messages overview p.57
Похожие устройства
-
 AUDIENT EVO 4Руководство по настройке
 -
 AUDIENT iD4 mkIIРуководство по эксплуатации
 -
 Maono E2 Gen2Инструкция пользователя
 -
 Madboy REMIX-31Инструкция по применению
 -
 AUDIENT iD14Руководство по настройке
 -
 JBL CHARGE 5Руководство по работе с устройством
 -
 EUROSOUND Crisp-16XРуководство по использованию
 -
 ALLEN & HEATH XONE:K2Руководство по работе с устройством
 -
 Novation LAUNCHKEY 61Руководство по настройке
 -
 SUPERLUX E431UРуководство по настройке
 -
 APart MICPAT-4Инструкция по работе
 -
 Mooer STEEP IIРуководство пользователя
Изучите функции автоматической отправки параметров, связывания левых и правых настроек, а также управления MIDI в музыкальном редакторе. Удобные советы для оптимизации работы.