![Ariete Minuetto 1334 — как правильно использовать кофейную машину: пошаговое руководство [12/70]](/img/pdf.png)
Ariete Minuetto 1334 — как правильно использовать кофейную машину: пошаговое руководство [12/70]
![Ariete Minuetto 1334 [12/70] Starting the first time](/views2/1123849/page12/bgc.png)
12
EN
Identication data
The following machine identication data are shown on the plate found underneath the machine’s standing base:
• manufacturer and CE mark
• model (Mod.)
• serial number (SN)
• electrical supply voltage (V) and frequency (Hz)
• absorbed electric power (W)
• assistance toll-free number
Always give the model and serial number to the Authorised Service Centres when requesting assistance.
PRELIMINARY PHASES FOR USE
Starting the appliance
Check that the voltage of the domestic network is the same as that indicated on the technical information plate of the appli-
ance. Place the appliance on a at surface.
Wash the tank (B) the rst time it is used and ll it with cool tap water (Fig. 3) up to the level marked “MAX”, then being careful
to put it back into its seat securely (Fig. 4).
Check that the tank is properly inserted; otherwise, the machine may not dispense coffee.
Insert the plug into the socket, which must be earthed.
Starting the rst time
After having lled the tank up with cool tap water, start the machine by pressing the button (F) Fig 5. The indicator lamp (D)
will turn on, indicating that the machine is on, as well as indicator lamp (M), indicating that the internal boiler is starting to heat
up. Placed a container underneath the lter holder connection ange and turn the knob (L) to the coffee position ( ) until you
see water coming out of the lter holder seat (Fig. 6).
HOW TO MAKE COFFEE
Select the desired lter (S) for 1 cup, or (T) for 2 cups, and put it into the lter holder (Fig. 7).
Measure out the coffee in the lter and lightly press with the specially provided presser (Fig. 8). Completely ll two measures
for two cups of coffee, and ll only one for one cup. Insert the lter holder into its seat (Fig. 9).
Tighten well by turning it from left to right while making sure you have hooked it properly onto the ange (Fig. 10).
Warning!
If too much ground coffee is put inside the lter, turning the lter holder may prove difcult and/or you may get leaks
from the lter holder when the coffee is being dispensed.
To get the rst cup of coffee piping hot, too, it is advisable to let the lter holder heat up a few minutes in its seat before
making the coffee. This will not be necessary for the cups of coffee that follow.
Place one or two cups under the lter holder spouts (Fig. 11-12) and start dispensing by turning the knob (L) to the coffee
position ( ). The coffee will start coming out of the spouts of the lter holder. To stop it, put the knob back in the central
standby position. The maximum dose for one cup of espresso is 50 ml.
Warning!
Like in professional coffee machines, do not remove the lter holder during dispensing; danger of burns!
Warning!
Wait about ten seconds after the coffee has been dispensed before removing the lter holder. To remove it, turn it
slowly from right to left so as to prevent splashes or spurts of water or coffee.
To remove the coffee residue from the lter, press the lter lock (P) forward over the edge of the lter, turn the lter holder
over and shake it gently (Fig. 13).
When the machine is in stand-by, the lamp (M) will turn on and off periodically. This shows that the boiler thermostat is trip-
ping, which serves to keep the water temperature optimum. It is a good idea to start dispensing the coffee only when this
indicator lamp is off, and this is true for both the rst cup and those that follow.
Filling the water tank during use
Be sure to ll the tank before the water is completely used up.
Turn off the machine, unplug it from the socket-outlet and ll the tank up to the level marked “MAX” with cool tap water. Put
the tank on the machine, making sure it is inserted securely, and turn it back on.
If the tank is left completely dry, air may enter the circuit, preventing coffee from being dispensed. It is therefore necessary
Содержание
- Avvertenze importanti p.3
- A proposito di questo manuale p.3
- Uso previsto p.3
- Rischi residui p.3
- Pericolo di danni derivanti da altre cause p.4
- Conservare sempre queste istruzioni p.4
- Avvertenza relativa a ustioni p.4
- Attenzione danni materiali p.4
- Prima accensione p.5
- Messa in funzione p.5
- Istruzioni per l uso p.5
- Descrizione dell apparecchio p.5
- Dati di identificazione p.5
- Come fare il caffè p.5
- Riempimento del serbatoio d acqua durante l uso p.6
- Come fare il cappuccino p.6
- Come fare il caffè con cialda p.6
- Pulizia del filtro contenente il macinato p.7
- Consigli utili per preparare un buon espresso all italiana p.7
- Pulizia della sede del portafiltro p.7
- Pulizia dell apparecchio p.7
- Pulizia del tubo vapore p.7
- Pulizia del serbatoio p.7
- Pulizia della griglia e della vasca raccogligocce p.8
- Pulizia del corpo macchina p.8
- Messa fuori servizio p.8
- Decalcificazione p.8
- Guida alla soluzione di alcuni problemi p.9
- With regard to this manual p.10
- Residual risks p.10
- Intended use p.10
- Important safeguards p.10
- Description of the appliance p.11
- Danger of damage originating from other causes p.11
- Warning of burns p.11
- Warning material damage p.11
- Starting the first time p.12
- Starting the appliance p.12
- Preliminary phases for use p.12
- Identification data p.12
- How to make coffee p.12
- Filling the water tank during use p.12
- Useful tips for obtaining a good italian espresso p.13
- How to make coffee with a pod p.13
- How to make cappuccino p.13
- Cleaning the filter containing the grounds p.13
- Cleaning the appliance p.13
- Cleaning the machine body p.14
- Cleaning the grill and drip tray p.14
- Cleaning the filter holder seat p.14
- Putting out of service p.14
- Decalcification p.14
- Cleaning the tank p.14
- Cleaning the steam nozzle p.14
- Troubleshooting p.15
- Utilisation prévue p.16
- Risques résiduels p.16
- Remarques importantes p.16
- Danger électrique p.16
- Danger pour les enfants p.16
- A propos du manuel p.16
- Description de l appareil p.17
- Dangers provenant d autres causes p.17
- Avertissements sur les brûlures p.17
- Attention dégats matériels p.17
- Comment faire le cafe p.18
- Remplissage du réservoir d eau durant l utilisation p.18
- Premier allumage p.18
- Operations avant l emploi p.18
- Mise en marche p.18
- Données d identification p.18
- Nettoyage de l appareil p.19
- Conseils utiles pour obtenir un bon cafe espresso a l italienne p.19
- Comment faire le cappuccino p.19
- Comment faire le café avec les dosette p.19
- Nettoyage du siège du porte filtre p.20
- Nettoyage du réservoir p.20
- Nettoyage du filtre contenant la mouture p.20
- Nettoyage du corps de la machine p.20
- Nettoyage de la grille et du bac recueille gouttes p.20
- Nettoyage de la buse à vapeur p.20
- Décalcification p.20
- Mise hors service p.21
- Comment remedier aux inconvenients suivants p.21
- Zu dieser bedienungsanleitung p.22
- Wichtige hinweise p.22
- Vorgesehener gebrauch p.22
- Restrisiken p.22
- Gerätebeschreibung p.23
- Gebrauchsanleitung gut aufheben p.23
- Kenndaten p.24
- Inbetriebnahme p.24
- Erstes einschalten p.24
- Einen kaffee zubereiten p.24
- Bedienungsanleitung p.24
- Auffüllen des wasserbehälters bei gebrauch p.24
- Einen kaffee mit portionsbeutel zu bereiten p.25
- Einen cappuccino zubereiten p.25
- Wie sie einen guten italienischen espresso zubereiten p.25
- Pflege des gerätes p.25
- Reinigung des wasserbehälters p.26
- Reinigung des kaffeefilters p.26
- Reinigung des grills und des wasserauffangbehälters p.26
- Reinigung des gerätegehäuses p.26
- Reinigung der fassung des kaffeefilters p.26
- Reinigen der dampfdüse p.26
- Entkalkung p.27
- Bei einer außerbetriebnahme des geräts muss es von der stromversorgung getrennt werden den wasserbehälter und den sammelbehälter für verbrauchte kapseln mit abtropfwanne entleeren und reinigen siehe abschnitt pflege des gerätes soll das gerät als abfall entsorgt werden müssen die einzelnen materialien aus denen das gerät besteht sortiert und ent sprechend der im einsatzland geltenden gesetzesvorschriften nach ihrer zusammensetzung getrennt entsorgt werden p.27
- Ausserbetriebnahme p.27
- Was tun wenn es probleme gibt p.28
- Uso previsto p.29
- Riesgos residuos p.29
- Advertencias importantes p.29
- A proposito de este manual p.29
- Peligro de daños derivados de otras causas p.30
- Atención daños materiales p.30
- Advertencias relativas a quemaduras p.30
- Puesta en función p.31
- Primer encendido p.31
- Fases preliminares de uso p.31
- Descripción del aparato p.31
- Datos de identificación p.31
- Como hacer el café p.31
- Llenado del depósito de agua durante el uso p.32
- Como preparar el café con pastilla monodosis p.32
- Como hacer el café con leche cappuccino p.32
- Limpieza del alojamiento del porta filtro p.33
- Limpieza de la p.33
- Consejos útiles para obtener un buen café exprés a la italiana p.33
- Boquilla del vapor p.33
- Limpieza del filtro que contiene el café molido p.33
- Limpieza del aparato p.33
- Puesta fuera de servicio p.34
- Limpieza del depósito p.34
- Limpieza del cuerpo de la máquina p.34
- Limpieza de la rejilla y de la bandeja recolectora de gotas p.34
- Descalcificación p.34
- Como solucionar los siguientes inconvenientes p.35
- Uso previsto p.36
- Riscos resíduos p.36
- Advertências importantes p.36
- A propósito deste manual p.36
- Perigo de danos devidos a outras causas p.37
- Descrição do aparelho p.37
- Aviso relativo a queimaduras p.37
- Atenção danos materiais p.37
- Ligar a máquina pela primeira vez p.38
- Fases preliminares para a sua utilização p.38
- Enchimento do depósito de água durante o uso p.38
- Dados de identificação p.38
- Como preparar o café p.38
- Accionamento p.38
- Limpeza do filtro que contém o café moído p.39
- Limpeza do aparelho p.39
- Conselhos úteis para obter um bom expresso à italiana p.39
- Como fazer o cappuccino p.39
- Como fazer o café com pastilhas p.39
- Limpeza do corpo da máquina p.40
- Limpeza do bico do vapor p.40
- Limpeza do alojamento do porta filtro p.40
- Limpeza da grelha e da bandeja de recolha de gotas p.40
- Descalcificação p.40
- Pôr o aparelho fora de serviço p.40
- Limpeza do reservatório p.40
- Separação dos vários materiais utilizados na construção da máquina e efectuar a eliminação dos mesmos de acordo com a composição e disposições de lei vigentes no país de utilização do aparelho p.41
- Em caso de anomalias de funcionamento desligar imediatamente a máquina e desconectar a ficha da tomada eléctrica p.41
- Como remediar os seguintes inconvenientes p.41
- Overige risico s p.42
- Over deze handleiding p.42
- Gevaar voor kinderen p.42
- Belangrijke aanwijzingen p.42
- Bedoeld gebruik p.42
- Waarschuwing voor verbrandingsgevaar p.43
- Risico op schade door andere oorzaken p.43
- Let op schade aan materialen p.43
- Beschrijving van het apparaat p.43
- Hoe maak je koffie p.44
- Fases voorafgaand aan het gebruik p.44
- Voor het eerst inschakelen p.44
- Reservoir met water vullen tijdens gebruik p.44
- Inwerkingstelling p.44
- Identificatiegegevens p.44
- Reiniging van het filter waar de maling in zit p.45
- Reiniging van het apparaat p.45
- Nuttige informatie voor het maken van een goede expresso p.45
- Koffie maken met een koffiepad p.45
- Cappuccino maken p.45
- Schoonmaak van de plek waar de filterhouder zit p.46
- Schoonmaak reservoir p.46
- Reiniging van het rooster en de druppelopvangbak p.46
- Reiniging van de stoomopening p.46
- Reiniging van de behuizing van de machine p.46
- Ontkalken p.46
- Buitenwerkingstelling p.46
- Overzicht van oplossingen voor een aantal problemen p.47
- Υπολειμματικοι κινδυνοι p.48
- Σχετικα με το παρον εγχειριδιο p.48
- Σημαντικεσ προειδοποιησεισ p.48
- Προβλεπομενη χρηση p.48
- Προσοχή υλικές ζημιές p.49
- Προειδοποίηση για εγκαύματα p.49
- Κίνδυνος ηλεκτροπληξίας p.49
- Κίνδυνος ζημιάς από διάφορες άλλες αιτίες p.49
- Στοιχεία αναγνώρισης p.50
- Πωσ να φτιαξετε καφε p.50
- Προκαταρκτικεσ εργασιεσ για τη χρηση p.50
- Περιγραφη συσκευησ p.50
- Ξεκινώντας την πρώτη φορά p.50
- Θέση σε λειτουργία p.50
- Γεμίζοντας το δοχείο νερού κατά τη διάρκεια της χρήσης p.51
- Πωσ να φτιαξετε καφε με την ταμπλετα p.51
- Πωσ να φτιαξετε καπουτσινο p.51
- Συμβουλεσ για να επιτυχετε εναν καλο ιταλικο καφε p.52
- Καθαρισμός φίλτρου αλεσμένου καφέ p.52
- Καθαρισμοσ συσκευησ p.52
- Καθαρίζοντας το φίλτρο p.52
- Καθαρίζοντας το σώμα της συσκευής p.53
- Καθαρίζοντας το δοχείο νερού p.53
- Καθαρίζοντας το ακροφύσιο του ατμού p.53
- Καθαρίζοντας την γρίλια και το δίσκο συλλογής p.53
- Αχρηστευση συσκευησ p.53
- Αφαιρεση αλατων p.53
- Σε περίπτωση λειτουργικών ανωμαλιών σβήστε αμέσως τη μηχανή και βγάλτε το φις από την πρίζα p.54
- Πωσ να αποκαταστησετε τισ παρακατω ανωμαλιεσ p.54
- Возможный риск p.55
- Важные правила пользования p.55
- Применение по назначению p.55
- По отношению к данной инструкции p.55
- Предупреждения в отношении к ожогам p.56
- Предупреждение материальный ущерб p.56
- Oпасность возникающая по другим причинам p.56
- Oпасность в отношении электричества p.56
- Приготовление кофе p.57
- Подготовка к применению p.57
- Подготовительные фазы перед использованием p.57
- Первое включение p.57
- Описание прибора p.57
- Идентификационные данные p.57
- Приготовление каппуччино p.58
- Наполнение бака водой в процессе применения p.58
- Как готовить кофе используя кофе в чалдах p.58
- Очистка аппарата p.59
- Чистка форсунки пара p.59
- Полезные советы для приготовления хорошего кофе эспрессо по итальянски p.59
- Очистка фильтра содержащего помол p.59
- Очистка гнезда держателя фильтров p.59
- Очистка решётки и капленакопительной ванночки p.60
- Очистка резервуара p.60
- Очистка корпуса машины p.60
- Невозможное применение p.60
- Декальцифицирование p.60
- Руководство по устранению некоторых проблем p.61
- В случае неправильного функционирования выключить сразу машину и вытащить штепсель из электри ческой розетки p.61
- ﺔﻨﻴآﺎﻤﻟا لﺎﻤﻌﺘﺳا ﻞﺒﻗ ﺔﻳﺎﻨﻌﺑ تﺎﻤﻴﻠﻌﺘﻟا أﺮﻗا p.62
- ﺔﻤﺋﺎﻘﻟا رﺎﻄﺧﻷا p.62
- ﺔﻣﺎه تﺎﻬﻴﺒﻨﺗ p.62
- ﺐ ﻴﺘﻜﻟا اﺬه صﻮﺼﺨﺑ p.62
- لﺎﻔﻃﻷا ﻰﻠﻋ ﺮﻄﺧ p.62
- ﺔﻨﻴآﺎﻤﻟا ﻦﻣ ضﺮﻐﻟا p.62
- ىﺮﺧأ بﺎﺒﺳﻷ دﻮﻌﺗ رﺎﻄﺧأ p.63
- قاﺮﺘﺣﻻﺎﺑ ﻖﻠﻌﺘﺗ تﺎﻬﻴﺒﻨﺗ p.63
- تﺎﻬﻴﺒﻨﺗ ﺔﻳدﺎﻣ راﺮﺿأ p.63
- ءﺎﺑﺮﻬﻜﻟا ﺐﺒﺴﺑ ﺮﻄﺧ p.63
- زﺎﻬﺠﻟا تﺎﻔﺻاﻮﻣ p.64
- تﺎﻤﻴﻠﻌﺘﻟا ﻩﺬﻬﺑ ﺎﻤﺋاد ﻆﻔﺘﺣا p.64
- لﺎﻤﻌﺘﺳﻻا تﺎﻤﻴﻠﻌﺗ p.65
- ةﻮﻬﻘﻟا داﺪﻋإ ﺔﻘﻳﺮﻃ p.65
- ﻋإ ﺔﻘﻳﺮﻃ داﺪﻮﻨﻴﺸﺗﻮ ﺒﻜﻟا p.66
- صﺮﻘﻟا ﺔﻄﺳاﻮﺑ ةﻮﻬﻘﻟا داﺪﻋإ ﺔﻴﻔﻴآ p.66
- ﺔﻨﻴآﺎﻤﻟا ﻒﻴﻈﻨﺗ p.67
- ةﻮﻬﻗ داﺪﻋﻹ ةﺪﻴﻔﻣ ﺢﺋﺎﺼﻧ سﺮﺒﺴآﻹا ﺔﻴﻟﺎﻄﻳﻹا ﺔﻘﻳﺮﻄﻟا ﻰﻠﻋ p.67
- ﺔﻴﺴﻠﻜﻟا تﺎﺒﺳﺮﺘﻟا ﺔﻟازإ p.68
- ﻟا فﺎﻘﻳإ ﻞﻤﻌﻟا ﻦﻋ ﺔﻨﻴآﺎﻤ p.69
- ﻞآﺎﺸﻤﻟا ﺾﻌﺑ ﻞﺤﻟ تادﺎﺷرإ p.70
- ﻲﺋﺎﺑﺮﻬﻜﻟا ﺬﺧﺄﻤﻟا ﻦﻣ ﺲﺑﺎﻘﻟا ﺐﺤﺳو ﺎﻬﺋﺎﻔﻃإ رﻮﻔﻟا ﻰﻠﻋ ﺐﺠﻳ ة ذﺎﺷ ﺔﻘﻳﺮﻄﺑ ﺔﻨﻴآﺎﻤﻟا ﻞﻤﻋ ﺔﻟﺎﺣ ﻲﻓ p.70
Похожие устройства
-
 Ariete 1358 Moka AromaРуководство по эксплуатации
 -
 Ariete 1388 Retro RedИнструкция по эксплуатации
 -
 Ariete 1387Инструкция по эксплуатации
 -
 Ariete 1377Инструкция по эксплуатации
 -
 Ariete 1330Инструкция по эксплуатации
 -
 Ariete 1329Инструкция по эксплуатации
 -
 Ariete Moka Aroma 1358Инструкция по эксплуатации
 -
 Ariete Miro 1339Инструкция по эксплуатации
 -
 Ariete 1341Инструкция по эксплуатации
 -
 Ariete Roma Plus 1329/1Инструкция по эксплуатации
 -
 Ariete 1388Инструкция по эксплуатации
 -
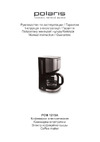 Polaris PCM 1215AРуководство по эксплуатации
Узнайте, как правильно использовать кофейную машину, начиная с подготовки и заканчивая приготовлением кофе. Следуйте простым шагам для идеального результата.