![Sony KL-40WA1K [25/31] Using av preset](/img/pdf.png)
Sony KL-40WA1K [25/31] Using av preset
![Sony KL-40WA1K [25/31] Using av preset](/views2/1091289/page25/bg19.png)
25
GB
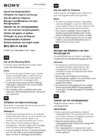
Using AV Preset
Using this function you can preset the desired input source (e.g.
1, RGB signal) to the respective AV input (AV 1 ). In this
way, a connected VCR will automatically switch to the RGB signal.
1 Press MENU.
2 Push the joystick to blue or green to select the symbol
on the
menu screen. Push to yellow to confirm.
3 Push to blue or green to select “Installation”. Push to yellow. Push
to blue or green to select “AV Preset”. Push to yellow to confirm.
The AV PRESET menu appears.
4 Push to blue or green to select the desired AV input. Push to
yellow to confirm.
5 Push to blue or green to select the desired source. Push to yellow
to confirm. For the respective AV inputs you have the following
choice:
AV1: RGB or AV AV3: YC3 or AV
AV2: YC2 or AV AV4: YC4 or AV
6 To label a source: Push to blue or green to select the first
character (letter or number, “-” for a blank). Push to yellow to
confirm. Select the other four characters in the same way.
7 For automatic format and PAL plus selection (Auto 16:9):
Push to blue or green to select “on” for the AV input.
8 Press the joystick to store.
9 Repeat steps 4 to 8 for other AV inputs.
Checking and selecting the input and output sources
using the menu
You can display the menu to see which input sources are selected
for the TV screen, as well as which output source is selected. You
can also select them on the menu display.
1 Press MENU.
2 Push the joystick to blue or green to select the symbol
on the
menu screen. Push to yellow to confirm.
The VIDEO CONNECTION menu appears.
You can see which source is selected for the TV and for the output.
If you want to select the input and output on this menu, go on to the
next step.
3 Push to blue or green to select “TV screen” (input source for TV-
screen), or “Output” (output source for : 2/q 2).
Push to yellow to confirm.
4 Push to blue or green to select the desired source. Press joystick
to store.
For details about each source, see the table on page 24.
5 Repeat steps 3 to 4 to select the source for other inputs or outputs.
6 Press MENU to restore the normal TV picture.
TV screen [ ]
VIDEO CONNECTION
Output
TV -----
[ ]TV -----
TV
TV
AV PRESET
AV-INPUT
AV1
AV2
AV3
AV4
AV
YC
AV
AV
SOURCE
AV1
YC2
AV3
AV4
LABEL
Содержание
- Lcd projection tv p.1
- Kl 40wa1k p.1
- Safety information p.2
- Picture quality p.2
- Maintenance p.2
- Installation p.2
- Important information p.2
- Illumination p.2
- For safe operations p.2
- For general safety p.2
- Warning p.2
- Operating instructions 14 p.3
- Operating instructions p.3
- Getting started 6 p.3
- Getting started p.3
- Contents p.3
- Tv set front p.4
- Symbol p.4
- Refer to page p.4
- Overview p.4
- Symbol p.5
- Remote commander p.5
- Refer to page p.5
- No function on this set p.5
- Menu operation p.5
- For the menu system p.5
- Video operation p.5
- Tv teletext operation p.5
- Step 1 preparation p.6
- Getting started p.6
- Step 2 tuning in to tv stations p.7
- Choosing the menu language and the country p.7
- Presetting channels automatically p.8
- Presetting channels manually p.9
- Additional presetting functions p.9
- Repeat steps 4 and 5 to sort other programme positions p.10
- Push to blue or green to select the programme position of the channel you want to change press joystick to confirm p.10
- Push to blue or green to select the new programme position press joystick to confirm now the selected channel is changed to the new programme position p.10
- Push to blue or green to select programme sorting push to yellow to confirm p.10
- Push the joystick to blue or green to select the symbol on the menu screen push to yellow to confirm p.10
- Programme sorting p.10
- Press menu p.10
- To go back to the normal tv picture press menu p.10
- This function enables you to sort the programme positions to a preferable order p.10
- Sorting programme positions p.10
- Using further programme preset p.11
- Installation p.11
- Skipping programme positions p.12
- Manual programme preset p.12
- Captioning a station name p.12
- Using parental lock p.13
- Tuning in a channel temporarily p.13
- Parental lock p.13
- Switching off completely p.14
- Selecting tv programmes p.14
- Operating the tv using the buttons on the tv p.14
- Operating instructions p.14
- Adjusting the volume p.14
- Watching the tv p.14
- To select a double digit number p.14
- Switching the tv on and off p.14
- Switching on p.14
- Switching off temporarily p.14
- Watching teletext or video input p.15
- Watching teletext p.15
- Watching a video input picture p.15
- Muting the sound p.15
- More convenient functions p.15
- Freezing the picture p.15
- Displaying the time p.15
- Displaying the programme table p.15
- Displaying the on screen indications p.15
- Changing the screen format p.15
- Adjusting and setting the tv using the menu p.16
- Sound control p.16
- Picture control p.16
- Effect of each control p.16
- Effect p.16
- Adjusting the picture and sound p.16
- Using the sleep timer p.17
- Sound control p.17
- Effect p.17
- Operating screen mode p.18
- Changing the screen position for zoom auto wide modes p.18
- Auto 16 9 p.18
- Teletext p.19
- Switching teletext on and off p.19
- Selecting a teletext page p.19
- Direct access functions p.19
- Preventing a teletext page from being updated p.20
- Using fastext p.20
- Revealing hidden information e g for a quiz p.20
- Using the teletext menu p.21
- User pages preset user pages p.21
- Top bottom full p.21
- Time page p.21
- Text clear p.21
- Subtitles p.21
- User page bank system p.22
- Subpage p.22
- Storing pages p.22
- Displaying user pages p.22
- Connecting optional equipment p.23
- Connecting and operating optional equipment p.23
- Available output signal p.23
- Acceptable input signal p.23
- Symbol p.24
- Selecting the output p.24
- Selecting input and output p.24
- Selecting input p.24
- Output modes p.24
- Input signal p.24
- Input modes p.24
- Connector outputs p.24
- Using av preset p.25
- Checking and selecting the input and output sources using the menu p.25
- Remote control of other sony equipment p.26
- Vertical viewing area p.27
- Optimum viewing area p.27
- Horizontal viewing area p.27
- For your information p.27
- Attach the filter p.28
- Turn off the power and disconnect the power cord p.28
- Remove the front panel p.28
- Pull the filter upward and remove it p.28
- Cleaning the air filter p.28
- Clean the dust with a vacuum cleaner p.28
- Attach the front panel p.28
- When the indicator on the front panel flashes p.29
- Turn off the power and disconnect the power cord p.29
- Replacing the lamp p.29
- Remove the front panel p.29
- Loosen the screw with the object such as a coin and remove the lamp cover p.29
- Loosen the screw and pull out the lamp p.29
- Attach the new lamp p.29
- Attach the lamp cover p.29
- Attach the front panel p.29
- Indication on the screen p.30
- Troubleshooting p.30
- Specifications p.30
- Solution p.30
- Receivable channels and channel displays p.30
- Receivable channels p.30
- Problem p.30
- Warning indicators p.31
- Stabilizing the projection tv p.31
- Pass a strong cord or a chain through each bracket mounted in 1 and then secure to a wall or a pillar etc p.31
- Mount the two supplied brackets with the screws to the upper rear side of the projection tv p.31
- Indicator flashing patterns p.31
Похожие устройства
-
 Sony BRAVIA KDS-55A2000Инструкция по эксплуатации
 -
Sony BRAVIA KDS-70R2000Инструкция по эксплуатации
-
 Sony BRAVIA KDF-50E2000Инструкция по эксплуатации
 -
Sony BRAVIA KDF-50E2010Инструкция по эксплуатации
-
 Sony GRAND VEGA KF-50SX200KИнструкция по эксплуатации
 -
 Sony GRAND VEGA KF-50SX300KИнструкция по эксплуатации
 -
Sony GRAND VEGA KF-60SX300KИнструкция по эксплуатации
-
Sony GRAND VEGA KF-42SX300KИнструкция по эксплуатации
-
 Sony GRAND VEGA KF-50SX100KИнструкция по эксплуатации
 -
 Sony KL-50SX100Инструкция по эксплуатации
 -
 Sony KP-41S5KИнструкция по эксплуатации
 -
Sony KP-41S5RИнструкция по эксплуатации