
AMERICAN DJ Inno Color Beam Z19 Руководство по эксплуатации онлайн
User Instructions
Rev. 3/14
©2013 ADJ Products, LLC all rights reserved. Information,
specications, diagrams, images, and instructions herein are
subject to change without notice. ADJ Products, LLC logo and
identifying product names and numbers herein are trademarks
of ADJ Products, LLC. Copyright protection claimed includes all
forms and matters of copyrightable materials and information
now allowed by statutory or judicial law or hereinafter granted.
Product names used in this document may be trademarks or
registered trademarks of their respective companies and are
hereby acknowledged. All non-ADJ Products, LLC brands and
product names are trademarks or registered trademarks of their
respective companies.
ADJ Products, LLC and all aliated companies hereby dis-
claim any and all liabilities for property, equipment, building, and
electrical damages, injuries to any persons, and direct or indi-
rect economic loss associated with the use or reliance of any
information contained within this document, and/or as a result
of the improper, unsafe, unsucient and negligent assembly,
installation, rigging, and operation of this product.
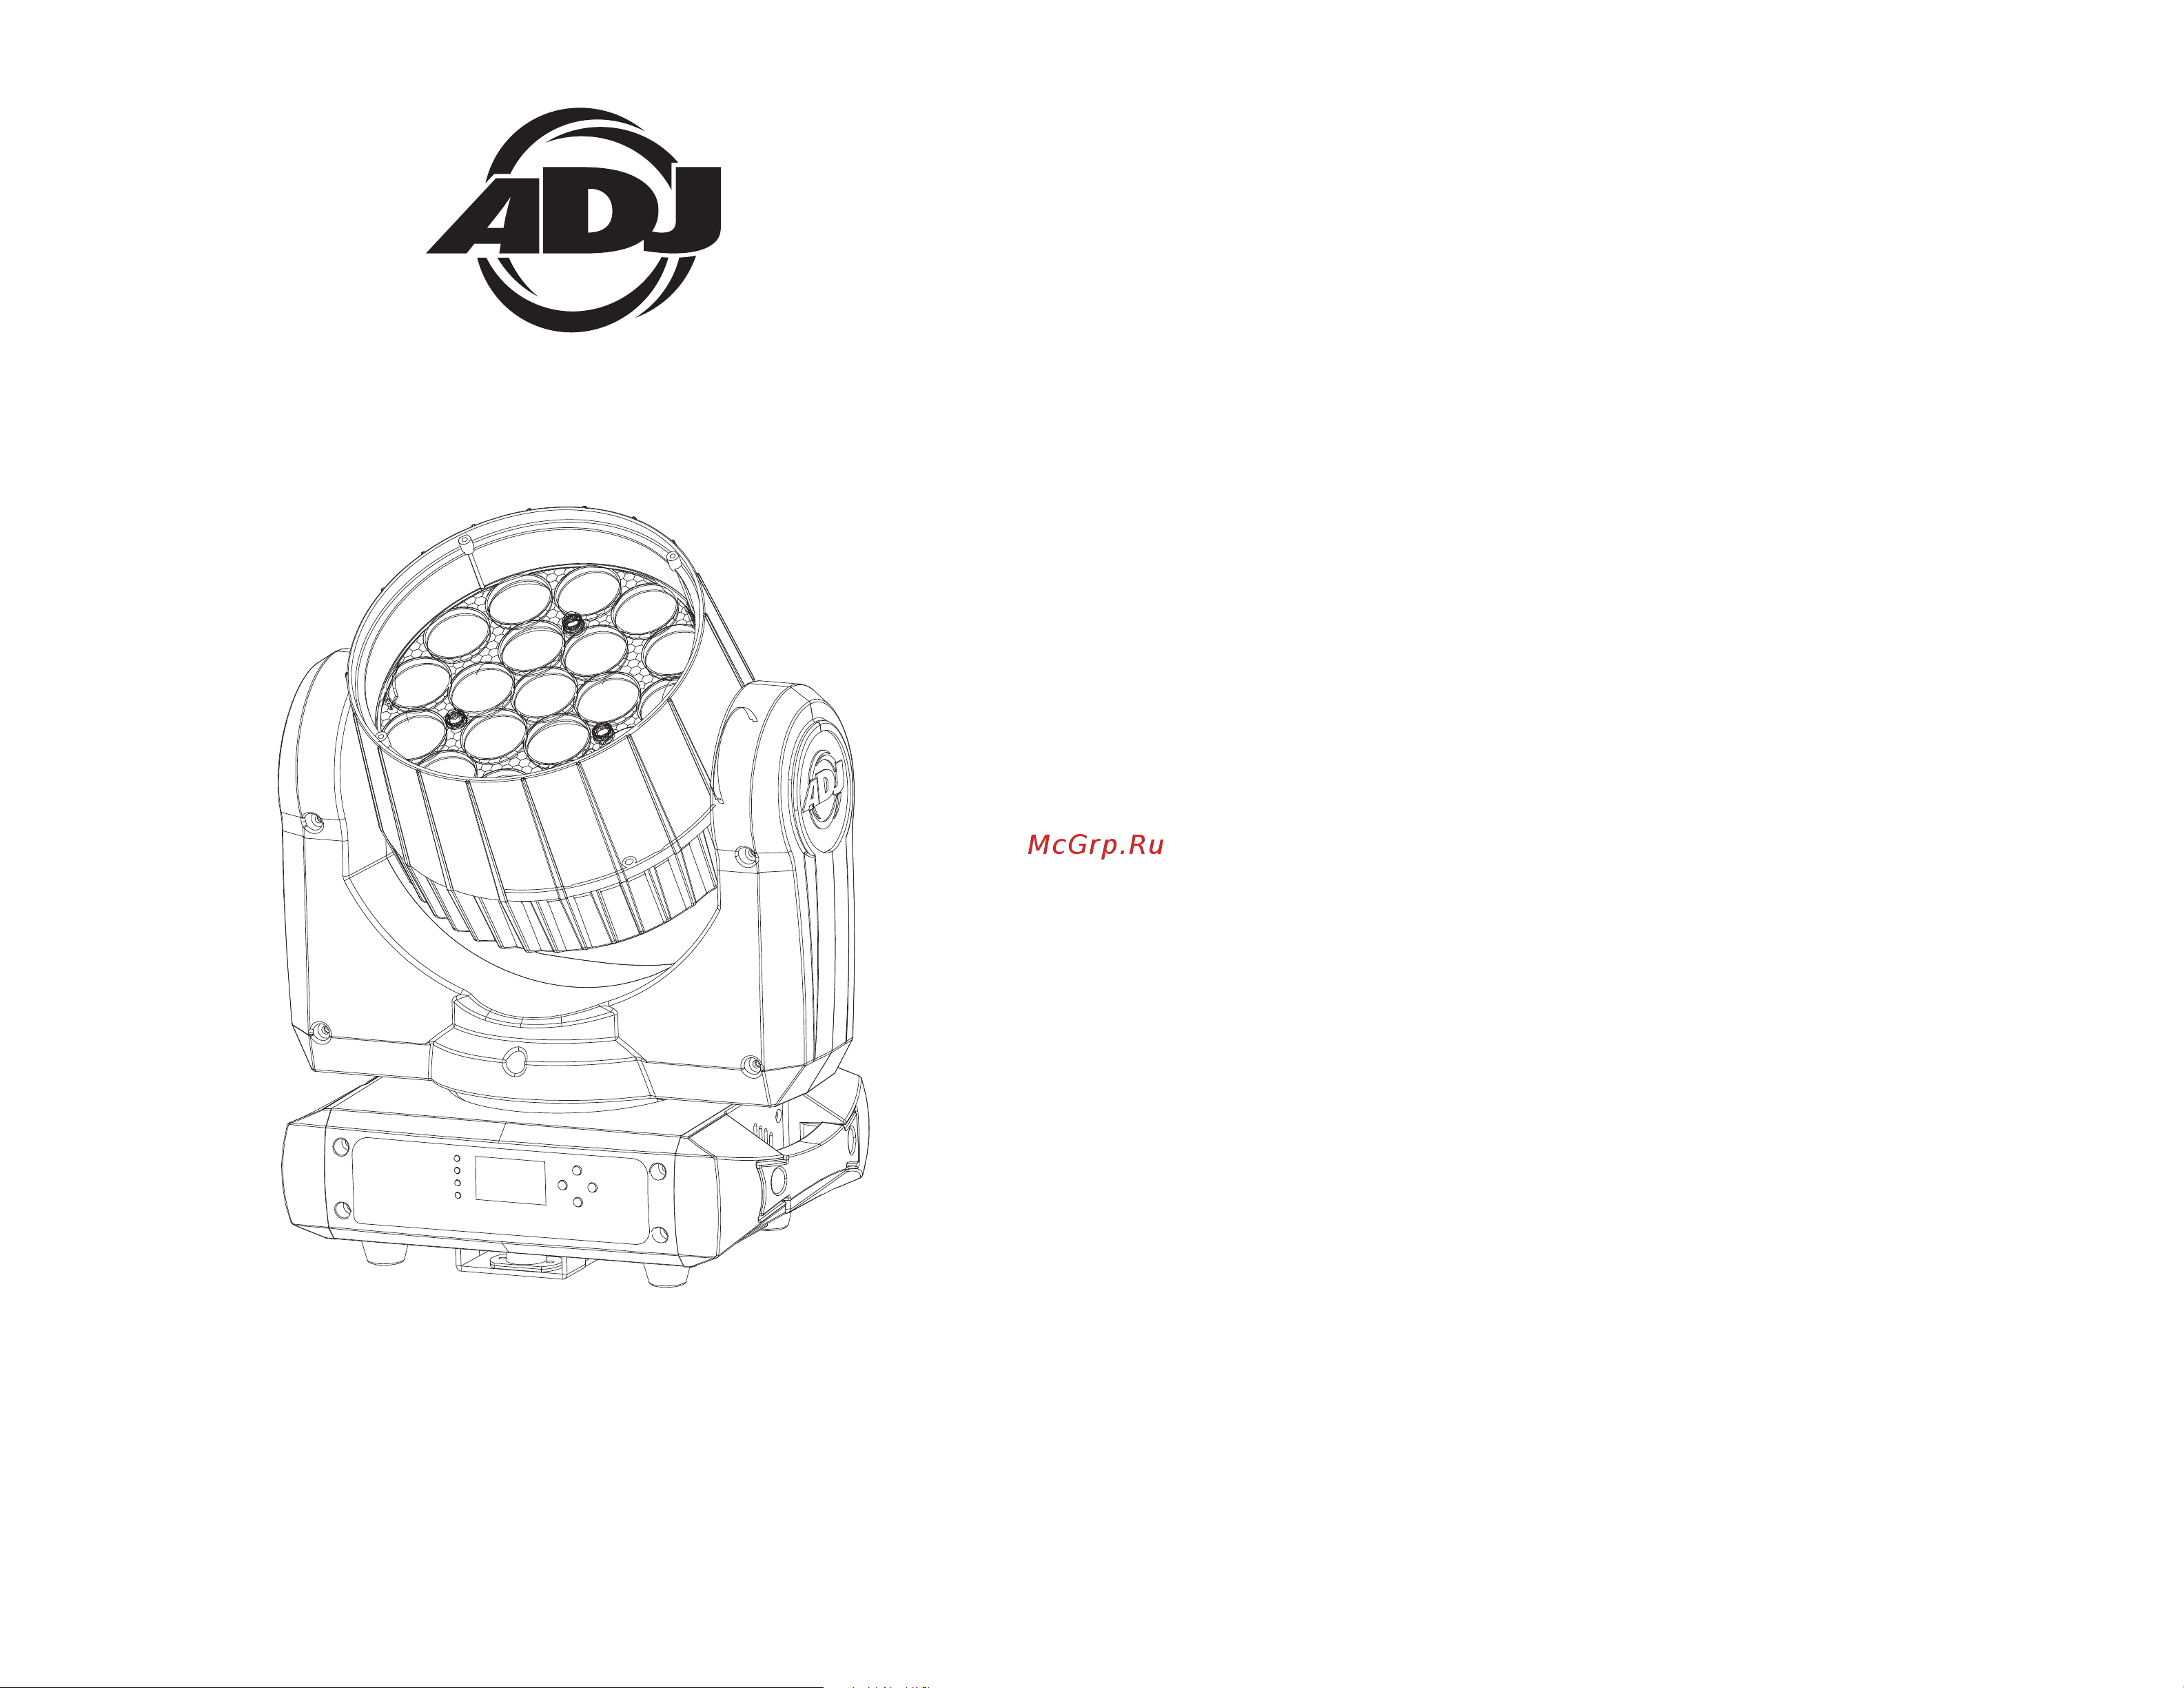
Inno Color Beam Z19
Europe Energy Saving Notice
Energy Saving Matters (EuP 2009/125/EC)
Saving electric energy is a key to help protecting the enviroment.
Please turn o all electrical products when they are not in use. To
avoid power consumption in idle mode, disconnect all electrical
equipment from power when not in use. Thank you!
Содержание
- User instructions p.1
- Inno color beam z19 p.1
- Warning p.2
- Unpacking p.2
- Introduction p.2
- Customer support p.2
- Caution p.2
- Screw one clamp via a m12 screw and nut onto the omega holder insert the quick lock fasteners of the omega holder into the respective holes on the bottom of the inno color beam z19 tighten the quick lock fasteners fully clockwise pull the safety cable through the eyehole hook on the bottom of the base and over the trussing system or a safe fixation spot insert the end in the carabine and tighten the safety screw p.4
- Power supply p.4
- Notice the suitable enviromental temperature for this light ing fixture is between 25 c to 45 c do not place this lighting fixture in an enviroment where the temperatures are under or above the temperatures stated above this will allow the fixture to run at its best and help prolong the fixture life p.4
- Dmx linking p.4
- Dmx 512 p.4
- Data cable dmx cable requirements for dmx operation p.4
- Be sure to follow figures two and three when making your own cables do not use the ground lug on the xlr connector do not con nect the cable s shield conductor to the ground lug or allow the shield conductor to come in contact with the xlr s outer casing grounding the shield could cause a short circuit and erratic behavior p.5
- Adj products llc www adj com inno color beam z19 user manual page 8 adj products llc www adj com inno color beam z19 user manual page 9 p.5
- Xlr pin configuration p.5
- When longer runs of cable are used you may need to use a terminator on the last unit to avoid erratic behavior a terminator is a 90 120 ohm 1 4 watt resistor which is con nected between pins 2 and 3 of a male xlr connector data and data this unit is inserted in the female xlr connector of the last unit in your daisy chain to terminate the line using a cable terminator adj part number z dmx t will decrease the possibilities of erratic behavior p.5
- Special note line termination p.5
- Some manufactures use 5 pin xlr connectors for data transmission in place of 3 pin 5 pin xlr fixtures may be implemented in a 3 pin xlr dmx line when inserting standard 5 pin xlr connectors in to a 3 pin line a cable adaptor must be used these adaptors are readily available at most electric stores the chart below details a proper cable conversion p.5
- Pin xlr dmx connectors p.5
- Notice p.5
- Inno color beam z19 system menu p.5
- Inno color beam z19 set up p.5
- Figure 4 p.5
- Figure 3 p.5
- Figure 2 p.5
- Slave mode p.6
- Show mod p.6
- Dmx addres p.6
- Dimmer curv p.6
- Blackou p.6
- Sound stat p.6
- Sound sens p.6
- White balanc p.7
- Tilt invers p.7
- Pan invers p.7
- Manual tes p.7
- Function dela p.7
- Back light auto of p.7
- Pro defaul p.8
- Fixture use tim p.8
- Firmware versio p.8
- Auto tes p.8
- Universal dmx control p.9
- Pan 0 255 0 540 2 0 255 pan fine 3 tilt 0 255 0 220 4 0 255 tilt fine 5 red 0 255 0 100 6 green 0 255 0 100 7 blue 0 255 0 100 8 white 0 255 0 100 9 color macros 0 off 1 4 macro 1 5 8 macro 2 9 12 macro 3 13 16 macro 4 17 20 macro 5 21 24 macro 6 25 28 macro 7 29 32 macro 8 33 36 macro 9 37 40 macro 10 41 44 macro 11 45 48 macro 12 49 52 macro 13 53 56 macro 14 57 60 macro 15 61 64 macro 16 65 68 macro 17 69 72 macro 18 p.9
- Master slave configuration p.9
- Channel value function p.9
- Shutter strobing 225 229 open 230 244 burst 245 255 open 11 master dimmer 0 255 0 100 12 zoom 0 225 wide narrow 13 pan tilt movement speed 0 225 max min movement sped 14 reset 0 9 no function 10 14 reset all 15 255 no function p.11
- Inno color beam z19 photometric chart p.11
- Inno color beam z19 dimmer curve chart p.11
- Inno color beam z19 14 channel mode p.11
- Channel value function p.11
- Inno color beam z19 troubleshooting p.12
- Inno color beam z19 fuse replacement p.12
- Inno color beam z19 cleaning p.12
- Due to fog residue smoke and dust cleaning the internal and exter nal optical lenses and mirror should be carried out periodically to optimize light output cleaning frequency depends on the environ ment in which the fixture operates i e smoke fog residue dust dew in heavy club use we recommend cleaning on a monthly basis periodic cleaning will ensure longevity and crisp output 1 use normal glass cleaner and a soft cloth to wipe down the out side casing p.12
- Disconnect the unit from its power source locate the fuse holder on the rear panel of the unit using a phillips head screw driver unscrew the fuse holder remove the bad fuse and replace with a new one screw the fuse holder back into the unit containing the new fuse p.12
- Clean the internal optics with glass cleaner and a soft cloth every 30 60 days p.12
- Check that the dmx cables are connected properly and are wired correctly pin 3 is hot on some other dmx devices p.12
- And outputs are connected and outputs are connected p.12
- Always be sure to dry all parts completely before plugging the unit back in p.12
- Use a brush to wipe down the cooling vents and fan grill 3 clean the external optics with glass cleaner and a soft cloth every 20 days p.12
- Adj products llc www adj com inno color beam z19 user manual page 23 p.12
- Unit not responding to dmx p.12
- Adj products llc www adj com inno color beam z19 user manual page 22 p.12
- Unit does not respond to sound p.12
- To the right connectors it does matter which way the inputs to the right connectors it does matter which way the inputs p.12
- Quiet or high pitched sounds will not activate the unit 2 check the sound sensitivity level p.12
- Pin 2 may be hot also check that all cables are connected pin 2 may be hot also check that all cables are connected p.12
- Listed below are a few common problems the user may encounter with solutions p.12
- Inno color beam z19 warranty p.12
- Inno color beam z19 notes p.13
- Auto sensing voltage p.14
Похожие устройства
-
 AMERICAN DJ Vizi BSW300Руководство по эксплуатации
 -
 AMERICAN DJ Focus Spot TWOРуководство по эксплуатации
 -
 AMERICAN DJ Inno Pocket Spot LZRРуководство по эксплуатации
 -
 AMERICAN DJ Vizi Beam RXONEРуководство по эксплуатации
 -
 AMERICAN DJ Vizi Hybrid 16RXРуководство по эксплуатации
 -
 AMERICAN DJ Dotz TPAR SystemРуководство по эксплуатации
 -
 ADJ Hydro Beam X1Руководство по эксплуатации
 -
 Involight LDF100Руководство по эксплуатации
 -
 AMERICAN DJ Focus Spot ONEРуководство по эксплуатации
 -
 Involight LED PAR984WРуководство по эксплуатации
 -
 Antari M-7Руководство по эксплуатации
 -
 STAGG SLI KINGPAR22Руководство по эксплуатации