
Supermicro SYS-6027R-TRF Инструкция по эксплуатации онлайн
Содержание
- Printed in the united states of america 2
- Warning handling of lead solder materials used in this product may expose you to lead a chemical known to the state of california to cause birth defects and other reproductive harm 2
- About this manual 3
- Manual organization 3
- Preface 3
- Chapter 1 introduction 6
- Chapter 2 server installation 6
- Table of contents 6
- Chapter 3 system interface 7
- Chapter 4 standardized warning statements for ac systems 7
- Chapter 5 advanced serverboard setup 7
- Chapter 6 advanced chassis setup 8
- Chapter 7 bios 8
- Appendix a bios error beep codes 9
- Appendix b system specifi cations 9
- 1 overview 11
- Chapter 1 11
- Introduction 11
- 2 serverboard features 12
- Memory 12
- Pci expansion slots 12
- Processors 12
- Serial ata 12
- 3 server chassis features 13
- Front control panel 13
- Graphics controller 13
- Hard drive subsystem 13
- Onboard controllers ports 13
- Other features 13
- System power 13
- 4 advanced power management for f models only 14
- Cooling system 14
- Intel intelligent power node manager nm 14
- Manageability engine me 14
- Chapter 1 introduction 15
- Dmi2 4gb s 15
- E5 2600 series processor e5 2600 series processor 15
- Figure 1 1 intel pch c602 c606 chipset system block diagram note this is a general block diagram please see chapter 5 for details 15
- Pci 32 15
- Pci e x16 g3 15
- Pci e x4 15
- Pci e x4 g3 15
- Pci e x8 g3 15
- 5 contacting supermicro 16
- 1 overview 17
- 2 unpacking the system 17
- 3 preparing for setup 17
- Chapter 2 17
- Choosing a setup location 17
- Server installation 17
- Rack precautions 18
- Server precautions 18
- Warnings and precautions 18
- Ambient operating temperature 19
- Circuit overloading 19
- Mechanical loading 19
- Rack mounting considerations 19
- Reduced airfl ow 19
- 4 installing the system into a rack 20
- Installing the inner rail extension 20
- Reliable ground 20
- Separating the sections of the rack rails 20
- Outer rack rails 22
- 1 overview 25
- 2 control panel buttons 25
- Chapter 3 25
- System interface 25
- 3 control panel leds 26
- Indicates a power supply module has failed the second power supply module will take the load and keep the system running but the failed module will need to be replaced refer to chapter 6 for details on replacing the power supply this led should be off when the system is operating normally 26
- Indicates network activity on the lan1 port when fl ashing 26
- Indicates network activity on the lan2 port when fl ashing 26
- Information led 26
- Power fail 26
- See the following table for the status shown by this led 26
- Superserver 6027r trf user s manual 26
- The control panel located on the front of the chassis has several leds these leds provide you with critical information related to different parts of the system this section explains what each led indicates when illuminated and any corrective action you may need to take 26
- 4 drive carrier leds 27
- Sata drives 27
- 1 about standardized warning statements 29
- Chapter 4 29
- Standardized warning statements for ac systems 29
- Warning defi nition 29
- ןה תואבה תורהצהא ינפמ שמתשמה תא ריהזהל תנמ לע היישעתה ינקת יפ לע תורהז הלבח ןה תואבה תורהצהא ינפמ שמתשמה תא ריהזהל תנמ לע היישעתה ינקת יפ לע תורהז הלבח ה וא תולאש שיו הדימב תירשפא תיזיפי יהשלכ היעבב תולקתרוציל שי הכימת תקלחמ םע רשק רידגהל וא ןיקתהל םיאשר דבלב םיכמסומ םיאנכט ורקימרפוס לש תינכט תאה םיביכר אורקל שי ורקימרפוס יזראמב םיביכרה תרדגה וא תנקתה ינפל ואולמב חפסנה תא 30
- ןונקת תורהצהאהרהז 30
- ﻲﻓ ﻚﻧﺍ ﻥﺃ ﻦﻜﻤﻳ ﺔﻟﺎﺣ ﻲﻓ ﺐﺒﺴﺘﺗ ﺔﺑﺎﺻﺍ ﺔﻳﺪﺴﺟ ﺰﻣﺮﻟﺍ ﺍﺬﻫ ﻲﻨﻌﻳ ﺮﻄﺧ ﺮﻳﺬﺤﺗ ﻥﺃ ﻞﺒﻗ ﻱﺃ ﻰﻠﻋ ﻞﻤﻌﺗ ﺕﺍﺪﻌﻣ ﻛﻢﻠﻋ ﻰﻠﻋ ﻦ ﻦﻋ ﺔﻤﺟﺎﻨﻟﺍ ﺮﻁﺎﺨﻤﻟﺎﺑ ﺮﺋﺍﻭﺪﻟﺍ ﺔﻴﺋﺎﺑﺮﻬﻜﻟﺍ ﻛﻭﺔﻳﺍﺭﺩ ﻰﻠﻋ ﻦ ﺭﺎﻤﻤﻟﺎﺑﺕﺎﺳ ﺔﻴﺋﺎﻗﻮﻟﺍ ﻟ ﻊﻨﻤﻉﻮﻗﻭ ﻱﺃﺙﺩﺍﻮﺣ ﻢﻗﺭ ﻡﺪﺨﺘﺳﺍ ﻥﺎﻴﺒﻟﺍ ﺹﻮﺼﻨﻤﻟﺍ ﺔﻳﺎﻬﻧ ﻲﻓ ﺮﻳﺬﺤﺗ ﻞﻛ ﺭﻮﺜﻌﻠﻟ ﺎﻬﺘﻤﺟﺮﺗ 31
- Installation instructions 32
- אורקל שי רוקמל תכרעמה רוביח ינפל הנקתה תוארוה תאחתמ 32
- ﻟﺍ ﺕﺍﺩﺎﺷﺭﺇ ﺮﻗﺍﺐﻴﻛﺮﺘ ﻞﻴﺻﻮﺗ ﻞﺒﻗ ﻰﻟﺇ ﻡﺎﻈﻨﻟﺍ ﺔﻗﺎﻄﻠﻟ ﺭﺪﺼﻣ 32
- Circuit breaker 33
- לע ךמתסמ הז רצומנגהה תעינמל םינבמב תנקתומה יכ אדוול שי ילמשח רצק רצקה ינפמ ןגמה רישכמה ילמשחהמ רתוי אל אוה 33
- Power disconnection warning 34
- ﺞﺘﻨﻤﻟﺍ ﺍﺬﻫ ﻰﻠﻋ ﺪﻤﺘﻌﻳ ﺕﺍﺪﻌﻣ ﺔﻳﺎﻤﺤﻟﺍ ﺓﺮﻴﺼﻘﻟﺍﺮﺋﺍﻭﺪﻟﺍ ﻦﻣ ﺎﻬﺘﻴﺒﺜﺗ ﻢﺗ ﻲﺘﻟﺍ ﻲﻓ ﻰﻨﺒﻤﻟﺍ 34
- ﻦﻣ ﺪﻛﺄﺗ ﻥﺃ ﻢﻴﻴﻘﺗ ﺯﺎﻬﺠﻟﺍ ﻟﺍﻲﺋﺎﻗﻮ ﺲﻴﻟ ﻦﻣ ﺮﺜﻛﺃ 34
- הרהזא 35
- ילמשח קותינ ינפמ הרהזא 35
- למשחה תורוקמ לכמ תכרעמה תא קתנל שי ריסהל שיו קפסהמ ילמשחה לבכ תא נקתה ךרוצל זראמה לש ימינפה קלחל השיג ינפלת רסה ואת םיביכר 35
- ﻞﺼﻓ ﺐﺠﻳ ﻡﺎﻈﻨﻟﺍ ﻊﻴﻤﺟ ﻦﻣﺭﺩﺎﺼﻣ ﺔﻗﺎﻄﻟﺍ ﺔﻟﺍﺯﺇﻭ ءﺎﺑﺮﻬﻜﻟﺍ ﻚﻠﺳ ﻦﻣ ﺓﺪﺣﻭ ﺩﺍﺪﻣﺍ ﺔﻗﺎﻄﻟﺍ ﻞﺒﻗ ﻰﻟﺇ ﻝﻮﺻﻮﻟﺍ ﺔﻴﻠﺧﺍﺪﻟﺍ ﻖﻁﺎﻨﻤﻟﺍ ﻟﻞﻜﻴﻬﻠ ﺔﻟﺍﺯﺇ ﻭﺃ ﺖﻴﺒﺜﺘﻟ ﺕﺎﻧﻮﻜﻣ ﺯﺎﻬﺠﻟﺍ 35
- Equipment installation 36
- הרהזא שר דבלב ךמסומ תווצתא ףילחהל ןיקתהל יא דויצה רובע תוריש תתל וא דויצה 36
- ﻦﻴﺑﺭﺪﻤﻟﺍﻭ ﻭ ﺐﻴﻛﺮﺘﻟﻝﺍﺪﺒﺘﺳﺍ ﻭﺃ ﺔﻣﺪﺧ ﺯﺎﻬﺠﻟﺍ ﺍﺬﻫ ﺢﻤﺴﻳ ﻥﺃ ﺐﺠﻳ ﻂﻘﻓ ﻦﻴﻠﻫﺆﻤﻟﺍ ﻦﻴﻔﻅﻮﻤﻠﻟ 36
- Restricted area 37
- Battery handling 38
- הרהזא 38
- תלבגומ השיג םע רוזא 38
- תרזעב תנתינ השיגה השיג תלבגה םהב שיש םירוזאב הדיחיה תא ןיקתהל שי דכו לוענמ חתפמ דבלב החטבא ילכ 38
- ﺺﻴﺼﺨﺗ ﺓﺪﺣﻮﻟﺍ ﻩﺬﻫ ﻲﻓ ﺎﻬﺒﻴﻛﺮﺘﻟ ﻖﻁﺎﻨﻣ ﺓﺭﻮﻈﺤﻣ ﻢﺗ ﺻﻮﻟﺍ ﻦﻜﻤﻳﻰﻟﺇ ﻝﻮ ﺔﻘﻄﻨﻣ ﺓﺭﻮﻈﺤﻣ ﻂﻘﻓ ﻡﺍﺪﺨﺘﺳﺍ ﻝﻼﺧ ﻦﻣ ﺔﺻﺎﺧ ﺓﺍﺩﺃ ﻭﺃ ﻱﺃ ﻼﻟ ﻯﺮﺧﺃ ﺔﻠﻴﺳﻭﻥﺎﻣﻷ ﺡﺎﺘﻔﻣﻭ ﻞﻔﻗ 38
- הרהזא 39
- תנכס תמייקץוציפ הניקת אל ךרדב הפלחוהו הדימב הללוסה לש ףילחהל שי גוסב הללוסה תא מ םאותה תרבחלמומ ןרציתצ תוללוסה קוליס תושמושמה עצבל שי ןרציה תוארוה יפל 39
- ﺮﻄﺧ ﻙﺎﻨﻫ ﻦﻣ ﻝﺍﺪﺒﺘﺳﺍ ﺔﻟﺎﺣ ﻲﻓ ﺭﺎﺠﻔﻧﺍ ﺔﻳﺭﺎﻄﺒﻟﺍ ﺔﺤﻴﺤﺻ ﺮﻴﻏ ﺔﻘﻳﺮﻄﺑ ﻚﻴﻠﻌﻓ ﺔﻳﺭﺎﻄﺒﻟﺍ ﻝﺍﺪﺒﺘﺳﺍ ﻂﻘﻓ ﻉﻮﻨﻟﺍ ﺲﻔﻨﺑ ﺎﻬﻟﺩﺎﻌﻳ ﺎﻣ ﻭﺃ ﺎﻤﻛﺖﺻﻭﺃ ﺔﻌﻨﺼﻤﻟﺍ ﺔﻛﺮﺸﻟﺍ ﻪﺑ ﺕﺎﻳﺭﺎﻄﺒﻟﺍ ﻦﻣ ﺺﻠﺨﺗ ﻟ ﺎﻘﻓﻭ ﺔﻠﻤﻌﺘﺴﻤﻟﺍﺔﻌﻧﺎﺼﻟﺍ ﺔﻛﺮﺸﻟﺍ ﺕﺎﻤﻴﻠﻌﺘ 39
- Redundant power supplies 40
- דחא קפסמ רתוי םייק םא 40
- הרהזא 40
- קפס לש דחא רוביחמ רתוי שי הדחיל תא ריסהל שי ןקורל תנמ לע םירוביחה לכ חיה תאי הד 40
- Backplane voltage 41
- ﺪﻗ ﺍﺬﻬﻟ ﻥﻮﻜﻳ ﻟﺍﺯﺎﻬﺠ ﺕﻻﺎﺼﺗﺍ ﺓﺪﻋ ﺕﺍﺪﺣﻮﺑ ﺔﻗﺎﻄﻟﺍ ﺩﺍﺪﻣﺍ ﺔﻟﺍﺯﺇ ﺐﺠﻳ ﺕﻻﺎﺼﺗﻻﺍ ﺔﻓﺎﻛ ﻝﺰﻌﻟ ﻟﺍﺓﺪﺣﻮ ﻦﻋ ءﺎﺑﺮﻬﻜﻟﺍ 41
- Comply with local and national electrical codes 42
- זא הרה זא הרה ךלהמב רהזיהל שי תכרעמה לועפת ןמזב ירוחאה לנפב חתמ תנכס תמייק הדובעה 42
- ירוחאה לנפב חתמ 42
- ﻙﺎﻨﻫ ﺮﻄﺧ ﻦﻣ ﻲﺋﺎﺑﺮﻬﻜﻟﺍ ﺭﺎﻴﺘﻟﺍ ﻰﻠﻋ ﺓﺩﻮﺟﻮﻤﻟﺍ ﺔﻗﺎﻄﻟﺍﻭﺃ ﺔﺣﻮﻠﻟﺍ ﻥﻮﻜﻳ ﺎﻣﺪﻨﻋﻡﺎﻈﻨﻟﺍ ﻞﻤﻌﻳ ﺪﻨﻋ ﺍﺭﺬﺣ ﻦﻛ ﺔﻣﺪﺧ ﺯﺎﻬﺠﻟﺍ ﺍﺬﻫ 42
- Product disposal 43
- הרהזא הרהזא תנקתה םייצראהו םיימוקמה למשחה יקוחל תמאות תויהל תבייח דויצה 43
- יצראה למשחה יקוח םואית 43
- ﺕﺍﺪﻌﻤﻟﺍ ﺐﻴﻛﺮﺗ ﺔﻴﺋﺎﺑﺮﻬﻜﻟﺍ ﻠﻟ ﻞﺜﺘﻤﻳ ﻥﺃ ﺐﺠﻳ ﻦﻴﻧﺍﻮﻘﺔﻴﻨﻁﻮﻟﺍﻭ ﺔﻴﻠﺤﻤﻟﺍ ﺔﻘﻠﻌﺘﻤﻟﺍ ءﺎﺑﺮﻬﻜﻟﺎﺑ 43
- Hot swap fan warning 44
- הרהזא הרהזא ו תויחנהל םאתהב תויהל בייח הז רצומ לש יפוס קוליס הנידמה יקוח 44
- רצומה קוליס 44
- ﻲﺋﺎﻬﻨﻟﺍ ﺺﻠﺨﺘﻟﺍ ﻦﻣ ﺞﺘﻨﻤﻟﺍ ﺍﺬﻫ ﻪﻌﻣ ﻞﻣﺎﻌﺘﻟﺍ ﻲﻐﺒﻨﻳ ﻟ ﺎﻘﻓﻭ ﻊﻴﻤﺠﺔﻴﻨﻁﻮﻟﺍ ﺢﺋﺍﻮﻠﻟﺍﻭ ﻦﻴﻧﺍﻮﻘﻟﺍ ﺪﻨﻋ 44
- הרהזא יקלח תא םיריסמ רשאכ שי םידבוע ןיידע םיררוואמהו ןכתי זראמהמ ררוואמה קיחרהללררוואמה ךותב םיחתפהמ םינוש הדובע ילכו תועבצאה תא חוטב קחרמ 45
- ﻦﻜﻤﻤﻟﺍ ﻦﻣ ﺡﻭﺍﺮﻤﻟﺍ ﻥﺃ ﻝﺍﺰﺗ ﻻ ﺔﻟﺍﺯﺇ ﺪﻨﻋﺭﻭﺪﺗ ﺔﻠﺘﻛ ﺔﺣﻭﺮﻤﻟﺍ ﻞﻜﻴﻬﻟﺍ ﻦﻣ ﺐﺠﻳ ءﺎﻘﺑﺇ ﻊﺑﺎﺻﻷﺍ ﻭﻲﻏﺍﺮﺒﻟﺍ ﺕﺎﻜﻔﻣ ءﺎﻴﺷﻷﺍ ﻦﻣ ﺎﻫﺮﻴﻏﻭ ﺍﺪﻴﻌﺑ ﻦﻋ ﺕﺎﺤﺘﻔﻟﺍ ﻲﻓ ﺔﻠﺘﻛ ﺔﺣﻭﺮﻤﻟﺍ 45
- Power cable and ac adapter 46
- אתמו םיילמשחמ י 47
- ב וא 47
- הרהזא םימאתמו םיקפס םילבכב שמתשהל שי רצומה תא םיניקתמ רשאכ 47
- לש דוק םהילע עיפומ ראשכ 47
- רחא ילמשח רצומ לכ רובע דבלב ורקימקרפוס ידי לע ןיוצ אלש 47
- רשא וא הלקתל םורגל לוכי רחא םאתמ וא לבכ לכב שומיש ךכ םשל וקפוסו ודעונ טב יקוחו למשח ירישכמב שומיש יקוח יפ לע ילמשח רצק רוסיא םייק תוחי ב םיכמסומה םילבכב שמתשהל 47
- ﺐﻴﻛﺮﺗ ﺪﻨﻋ ﻡﺍﺪﺨﺘﺳﺍ ﺐﺠﻳ ﺯﺎﻬﺠﻟﺍ ﻭ ﻞﻴﺻﻮﺘﻟﺍ ﺕﻼﺑﺎﻛ ﺔﻴﺋﺎﺑﺮﻬﻜﻟﺍ ﺕﻼﺑﺎﻜﻟﺍ ﺕﻻﻮﺤﻣﻭ ﺩﺩﺮﺘﻤﻟﺍ ﺭﺎﻴﺘﻟﺍ ﻥﺃ ﻱﺃ ﻡﺍﺪﺨﺘﺳﺍ ﺕﻼﺑﺎﻛ ﺕﻻﻮﺤﻣﻭ ﻯﺮﺧﺃ ﺐﺒﺴﺘﻳ ﻲﻓ ﻞﻄﻋ ﺙﻭﺪﺣ ﻖﻳﺮﺣ ﻭﺃ ﻲﺘﻟﺍ ﻚﻟ ﺎﻫﺮﻴﻓﻮﺗ ﻢﺗ ﺞﺘﻨﻤﻟﺍ ﻊﻣ ul ﻭﺃ csa ﺔﻴﺋﺎﺑﺮﻬﻜﻟﺍ ﺓﺰﻬﺟﻷﺍ ﺩﺍﻮﻣﻭ ﻥﻮﻧﺎﻗ ﺔﻣﻼﺴﻟﺍ ﻡﺍﺪﺨﺘﺳﺍ ﺮﻈﺤﻳ ﺕﻼﺑﺎﻜﻟﺍ ﻞﺒﻗ ﻦﻣ ﺓﺪﻤﺘﻌﻣ 47
- ﺓﺰﻬﺟﺃ ﻯﺮﺧﺃ ﺔﻴﺋﺎﺑﺮﻬﻛ ﺮﻴﻏ ﺕﺎﺠﺘﻨﻤﻟﺍ ﺔﻨﻴﻌﻤﻟﺍ ﻞﺒﻗ ﻦﻣ ﻱﻷ 47
- ﻞﻤﺤﺗ ﻲﺘﻟﺍﺔﻣﻼ 47
- 1 handling the serverboard 49
- Advanced serverboard setup 49
- Chapter 5 49
- Precautions 49
- 2 connecting cables 50
- Connecting data cables 50
- Connecting power cables 50
- Connecting the control panel 50
- 3 i o ports 51
- Chapter 5 advanced serverboard setup 51
- Figure 5 1 front control panel header pins jf1 51
- Figure 5 2 rear panel i o ports 51
- Rear i o ports 51
- The i o ports are color coded in conformance with the pc 99 specifi cation see figure 5 2 below for the colors and locations of the various i o ports 51
- 4 processor and heatsink installation 52
- Chapter 5 advanced serverboard setup 55
- Close the load plate with the cpu inside the socket lock the lever labeled close 1st fi rst then lock the lever labeled open 1st second use your thumb to gently push the load levers down to the lever locks 55
- With the cpu inside the socket inspect the four corners of the cpu to make sure that the cpu is properly installed 55
- Installing a passive cpu heatsink 56
- Removing the heatsink 57
- 5 installing memory 58
- Memory support 58
- Chapter 5 advanced serverboard setup 59
- Cpu 2 dimms 59
- Cpu 4 dimms 59
- Cpu 5 8 dimms 59
- Cpu corresponding dimm modules 59
- Cpus 10 16 dimms 59
- Cpus 16 dimms 59
- Cpus 4 dimms 59
- Cpus 6 dimms 59
- Cpus 8 dimms 59
- Dimm module population confi guration 59
- Dimm slots per channel 59
- Dimms populated per ddr channel 59
- For memory to work properly follow the tables below for memory installation 59
- For memory to work properly populate according to the tables below 59
- Number of cpus dimms cpu and memory population confi guration table for memory to work proper please install dimms in pairs 59
- Population rules 59
- Por speeds in mhz ranks per dimm any combination 59
- Processor and memory module population 59
- Processors and their corresponding memory modules 59
- Rdimm support por on the e5 2600 series processor platform 59
- Rdimm type rdimm reg registered 59
- 6 adding pci add on cards 60
- 7 serverboard details 61
- Chapter 5 advanced serverboard setup 61
- Figure 5 4 x9dri f serverboard layout 61
- Indicates the location of pin 1 61
- Jumpers led indicators not indicated are for testing only 61
- Not drawn to scale 61
- See other sections in this chapter for detailed information on jumpers i o ports and jf1 front panel connections 61
- Use only the correct type of onboard cmos battery as specifi ed by the manufacturer do not install the onboard battery upside down to avoid possible explosion 61
- Connector description 62
- Jumper description default setting 62
- Led description state status 62
- Superserver 6027r trf user s manual 62
- X9dri f quick reference 62
- 8 connector defi nitions 63
- A 24 pin main power supply connector jpwr3 and two 8 pin cpu pwr connectors jpwr1 2 are located on the motherboard these power connectors meet the ssi eps 12v specifi cation these power connectors must also be connected to your power supply see the table on the right for pin defi nitions 63
- Atx power 24 pin connector pin defi nitions jpwr3 63
- Chapter 5 advanced serverboard setup 63
- Power button pin defi nitions jf1 63
- Power connectors 63
- Pw_on connector 63
- The power button connection is located on pins 1 and 2 of jf1 momentarily contacting both pins will power on off the system this button can also be confi gured to function as a suspend button with a setting in the bios see chapter 5 to turn off the power when the system is in suspend mode press the button for 4 seconds or longer refer to the table on the right for pin defi nitions 63
- V 8 pin pwr connector pin defi nitions jpwr1 2 63
- Warning to prevent damage to the power supply or motherboard please use a power supply that contains a 24 pin jpwr3 and two 8 pin power connectors jpwr1 jpwr2 be sure to connect these power supply connectors to the power connectors on the motherboard failure in doing so will void the manufacturer warranty on your power supply and motherboard 63
- A video vga port is located next to lan2 on the i o backplane refer to 65
- Chapter 5 advanced serverboard setup 65
- Hdd led 65
- Hdd led pin defi nitions jf1 65
- Nmi button 65
- Nmi button pin defi nitions jf1 65
- Power led pin defi nitions jf1 65
- Power on led 65
- Serial port pin defi nitions com1 com2 65
- Serial ports 65
- The board layout below for the location 65
- The hdd led connection is located on pins 13 and 14 of jf1 attach the hard drive led cable here to display disk activity for any hard drives on the system including sas serial ata and ide see the table on the right for pin defi nitions 65
- The non maskable interrupt button header is located on pins 19 and 20 of jf1 refer to the table on the right for pin defi nitions 65
- The power on led connector is located on pins 15 and 16 of jf1 this connection is used to provide led indication of power being supplied to the system see the table on the right for pin defi nitions 65
- Two com connections com1 com2 are located on the motherboard com1 is located on the backplane i o panel com2 located close to pci e slot1 provides front access support see the table on the right for pin defi nitions 65
- Video connection 65
- Backplane usb 0 1 2 3 pin defi nitions 66
- Ethernet ports 66
- Four universal serial bus ports usb 0 1 usb 2 3 are located on the i o back panel please note that bp usb 2 3 can also be used for ps2 keyboard mouse connections in addition three usb headers located close to the io hub provides six front accessible usb connections usb 4 5 usb 8 9 usb 10 11 one type a connector usb6 also supports front panel usb connection cables are not included see the tables on the right for pin defi nitions 66
- Fp usb 4 5 8 9 10 11 usb 6 pin defi nitions 66
- Lan ports pin defi nition lan 1 2 66
- Superserver 6027r trf user s manual 66
- Two gigabit ethernet ports lan1 lan2 are located on the i o backplane on the motherboard in addition an ipmi_dedicated lan is located above usb 0 1 ports on the backplane to provide kvm support for ipmi 2 all these ports accept rj45 type cables please refer to the led indicator section for lan led information 66
- Universal serial bus usb 66
- A trusted platform module port 80 header is located at jtpm1 to provide tpm support and port 80 connection use this header to enhance system performance and data security see the table on the right for pin defi nitions 68
- C connector 68
- Oh fan fail led status 68
- Overheat led fan fail 68
- Overheat led pin defi nitions joh1 68
- Power smb 68
- Power system management bus i2c connector ji2c1 monitors power supply fan and system temperatures see the table on the right for pin defi nitions 68
- Pwr smb pin defi nitions ji2c1 68
- Superserver 6027r trf user s manual 68
- The joh1 header is used to connect an led indicator to provide warnings of chassis overheating and fan failure this led will blink when a fan failure occurs refer to the tables on right for pin defi nitions 68
- Tpm header port 80 68
- Tpm port 80 header pin defi nitions jtpm1 68
- A power connector for sata dom disk_on_module devices is located at jwf1 connect an appropriate cable here to provide power support for your dom devices 69
- A system management bus header for ipmi 2 is located at jipmb1 connect the appropriate cable here to use the ipmb 69
- Bios recovery 69
- C connection on your system 69
- Chapter 5 advanced serverboard setup 69
- Dom power connector 69
- Dom power connector pin defi nitions 69
- Ipmb header pin defi nitions jipmb1 69
- Jp3 bios recovery is used to enhance system performance and power effi ciency in the single operation mode online upgrade will be available via recovery mode see the table on the right for pin defi nitions 69
- Me recovery pin defi nitions 69
- Sgpio header pin defi nitions t sgpio1 t sgpio2 69
- T sgpio 1 2 headers 69
- Two sgpio serial link general purpose input output headers are located on the motherboard these headers support serial_link interface for onboard sata connections see the table on the right for pin defi nitions 69
- 9 jumper settings 71
- Explanation of jumpers 71
- 10 onboard indicators 73
- Chapter 5 advanced serverboard setup 73
- Close pins 1 2 of jumper jwp1 to enable write_protect support for system security and data integrity see the table on the right for jumper settings 73
- Glan activity indicator right led settings 73
- Glan leds 73
- In addition to lan ports 1 2 an ipmi dedicated lan is also located on the i o backplane the amber led on the right indicates connection and activity while the green led on the left indicates the speed of the connection see the tables at right for more information 73
- Ipmi dedicated lan leds 73
- Ipmi lan link speed led left activity led right 73
- Lan connection speed indicator left led settings 73
- There are two lan ports lan1 2 on the motherboard each ethernet lan port has two leds the yellow led on the right indicates connection and activity the link led on the left side may be green amber or off to indicate the speed of the connection see the tables at right for more information 73
- Write_protect enable 73
- Write_protect enable disable jumper settings jwp1 73
- 11 sata drive connections 74
- A bmc heartbeat led is located at dm1 on the motherboard when dm1 is blinking bmc functions normally see the table at right for more information 74
- An onboard power led is located at le1 on the motherboard when this led is on the system is on be sure to turn off the system and unplug the power cord before removing or installing components see the tables at right for more information 74
- Bmc heartbeat led 74
- Bmc heartbeat led status 74
- Onboard power led 74
- Onboard pwr led indicator led settings le1 74
- Sata ports pin defi nitions sata0 sata3 74
- Serial ata ports 74
- Superserver 6027r trf user s manual 74
- There are six serial ata ports i sata0 i sata 5 located on the motherboard i sata 0 1 support sata 3 and i sata 2 5 are sata 2 ports these ports provide serial link signal connections which are faster than the connections of parallel ata see the table on the right for pin defi nitions 74
- 12 installing software 75
- Superdoctor iii 76
- 13 serverboard battery 78
- 1 static sensitive devices 79
- Advanced chassis setup 79
- Chapter 6 79
- Precautions 79
- Unpacking 79
- 2 control panel 80
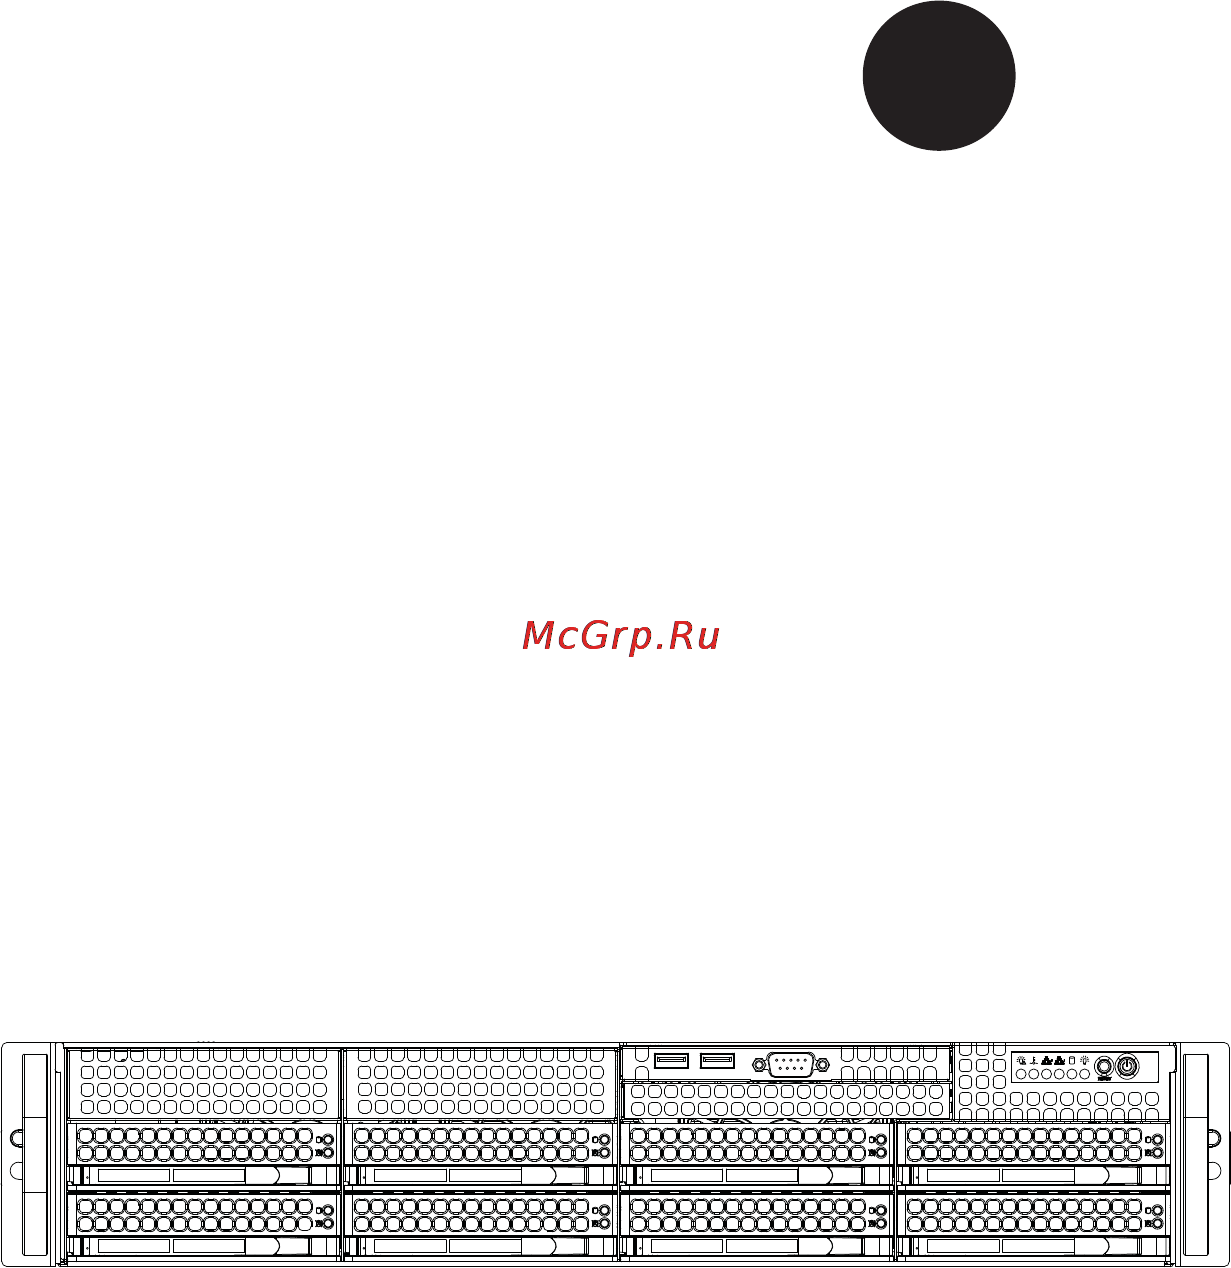
- Figure 6 1 front and rear chassis views 80
- See chapter 3 for details on the leds and the control panel buttons details on jf1 can be found in chapter 5 80
- Superserver 6027r trf user s manual 80
- The control panel located on the front of the chassis must be connected to the jf1 connector on the serverboard to provide you with system status indications a ribbon cable has bundled these wires together to simplify the connection connect the cable from jf1 on the serverboard to the control panel pcb printed circuit board make sure the red wire plugs into pin 1 on both connectors pull all excess cabling out of the airfl ow path the leds inform you of system status 80
- 3 chassis cover 81
- 3 system fans 82
- System fan failure 82
- 4 drive bay installation removal 83
- Accessing the drive bays 83
- Replacing system fans 83
- Sata drive installation 84
- Hard drive backplane 85
- Dvd rom installation optional 86
- 5 power supply 87
- Power supply failure 87
- Removing replacing the power supply 87
- 1 introduction 89
- 2 main menu 89
- Chapter 7 89
- Starting the setup utility 89
- 3 advanced settings menu 90
- Boot feature 90
- System time system date 90
- Cpu confi guration 91
- Socket 0 cpu information 92
- Socket 1 cpu information 92
- Chipset confi guration 96
- Ioh io hub confi guration 96
- North bridge 96
- Qpi confi guration 98
- South bridge 102
- Sata confi guration 103
- Pcie pci pnp confi guration 104
- Sas confi guration 104
- Thermal confi guration 104
- Serial port 0 confi guration serial port 1 confi guration 106
- Super io confi guration wpcm450 106
- Console redirection settings 107
- Serial port console redirection 107
- Acpi settings 109
- Trusted computing available if a tpm device is installed 109
- 4 event logs 110
- Change smbios event log settings 110
- Me management engine subsystem 110
- View smbios event log 111
- View system event log 111
- 5 ipmi 112
- System event log 112
- Bmc network confi guration 113
- 6 boot 114
- 7 security 114
- 8 save exit 115
- A 1 amibios error beep codes 117
- Appendix a 117
- Appendix a bios error beep codes 117
- Bios error beep codes 117
- During the post power on self test routines which are performed each time the system is powered on errors may occur 117
- Fatal errors are those which will not allow the system to continue the boot up procedure if a fatal error occurs you should consult with your system manufacturer for possible repairs 117
- Non fatal errors are those which in most cases allow the system to continue the boot up process the error messages normally appear on the screen 117
- These fatal errors are usually communicated through a series of audible beeps the numbers on the fatal error list on the following page correspond to the number of beeps for the corresponding error all errors listed with the exception of beep code 8 are fatal errors 117
- X9 ipmi error codes 117
- Appendix b 119
- Chipset 119
- Drive bays 119
- Expansion slots 119
- Memory capacity 119
- Peripheral drive bays optional 119
- Processors 119
- Sata controller 119
- System specifi cations 119
- Chassis 120
- Operating environment 120
- Power supply 120
- Serverboard 120
- System cooling 120
- System input requirements 120
- Weight 120
- Regulatory compliance 121
- Superserver 6027r trf user s manual 122
Похожие устройства
- Supermicro CSE-745TQ-R920B Инструкция по эксплуатации
- Supermicro X9DRH-IF-O Инструкция по эксплуатации
- Supermicro SYS-6028R-WTR Инструкция по эксплуатации
- Supermicro SSG-6028R-E1CR12T Инструкция по эксплуатации
- Supermicro X9SCL-F-O Инструкция по эксплуатации
- Supermicro SYS-6026T-URF Инструкция по эксплуатации
- Supermicro X9SCA-F-O Инструкция по эксплуатации
- Supermicro SYS-2027R-WRF Инструкция по эксплуатации
- Supermicro SYS-6028R-WTR Инструкция по эксплуатации
- Sturm gc99451b Инструкция по эксплуатации
- Sturm CD3112H Инструкция по эксплуатации
- Sturm cs5060ms Инструкция по эксплуатации
- Steelseries siberia elite Инструкция по эксплуатации
- Stinger C707 Инструкция по эксплуатации
- Steelseries siberia v2 full-size headset Инструкция по эксплуатации
- Steelline KP-04, черный Инструкция по эксплуатации
- Supermicro CSE-825TQ-R720LPB Инструкция по эксплуатации
- Supermicro CSE-826E1-R800LPB Инструкция по эксплуатации
- Supermicro CSE-743TQ-865 Инструкция по эксплуатации
- Supermicro SYS-5015A-PHF Инструкция по эксплуатации